Pi 4 Emulator In A Durable, Dumpstered Cabinet

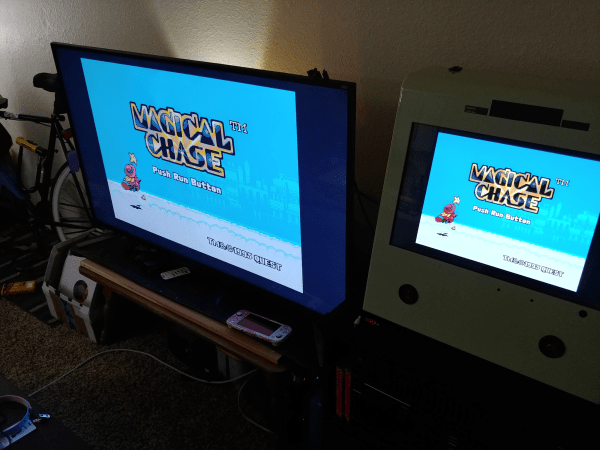
We must be looking in the wrong Dumpsters, because we never find anything as cool as [Queen_Combat] did. It’s one of those Kidzspace kid-proof waiting room game systems, complete with the original TV and an XBOX 360 that hasn’t been updated since 2009. When life hands you a sturdy game console box, it’s almost your duty to turn it into an all-in-one Raspberry Pi 4 emulation station.

[Queen_Combat] relocated the speakers from the top to the inside, just behind the vent holes on the sides, and printed a couple of mountable custom enclosures to hold them there. These are driven with a little 5W amplifier board, and everything is run from the XBOX’s power supply.

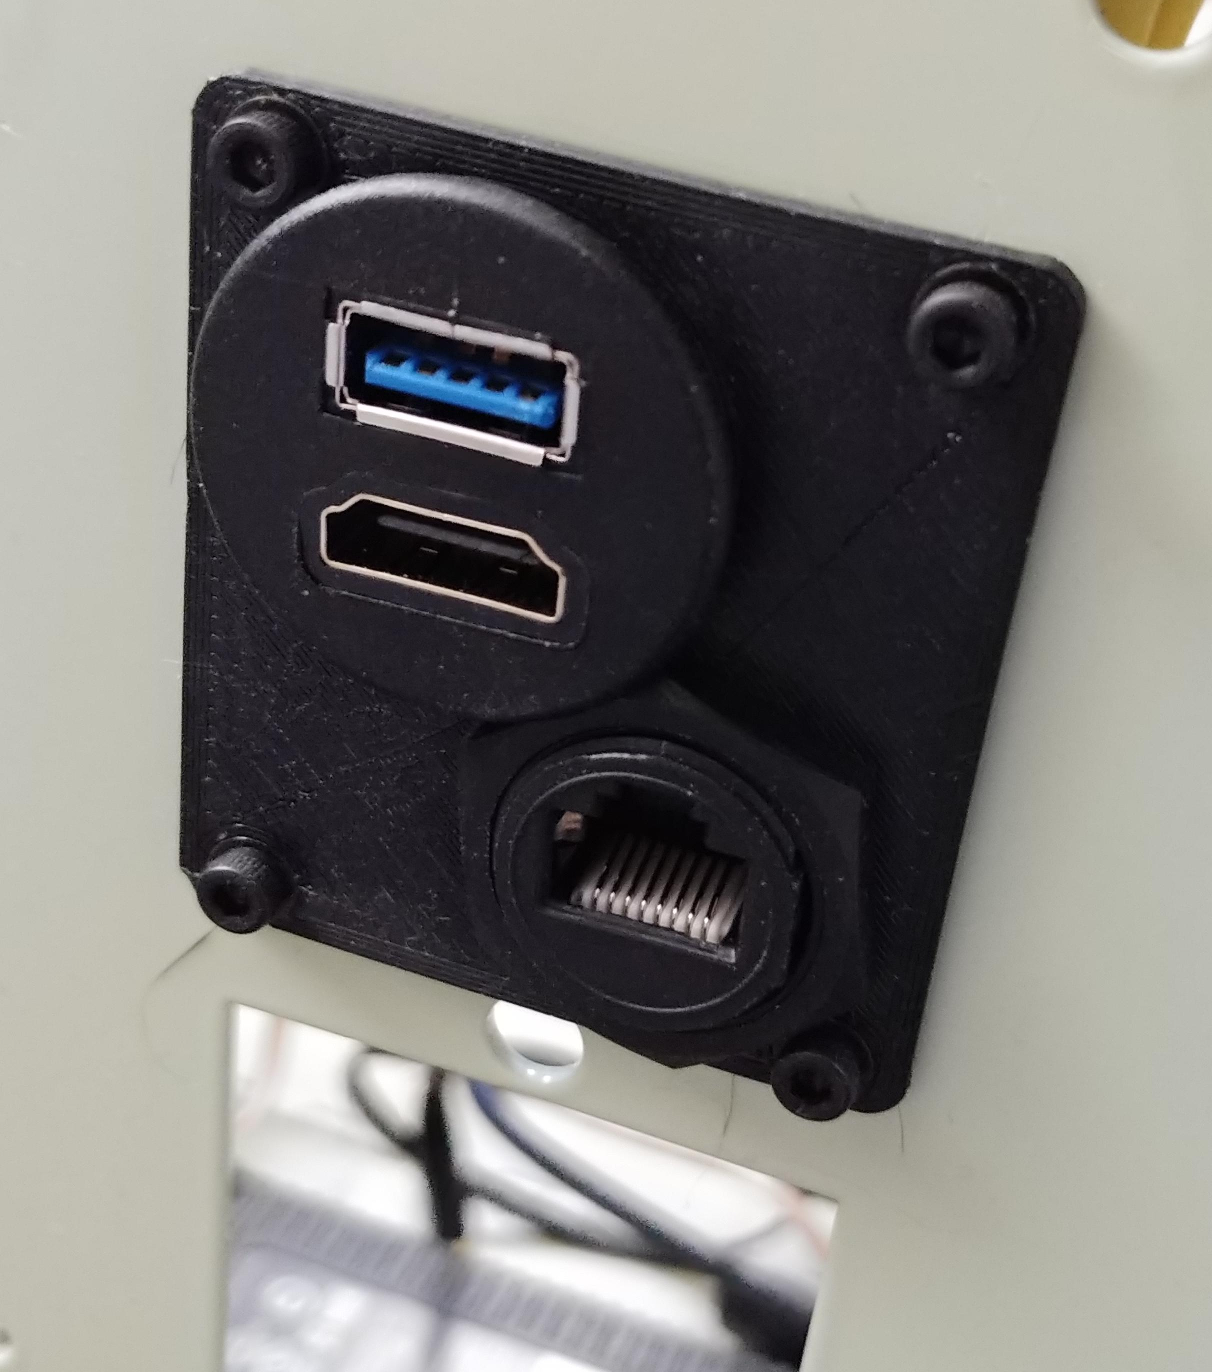
We particularly like the use of extenders in cigarette-lighter form factor, because we hadn’t seen those before. [Queen_Combat] printed a couple of adapters to make them fit nicely into the large holes on the front where the XBOX controllers were once attached — one has a volume knob, and the other has a USB3 port and a 3.5mm audio jack. [Queen_Combat] wanted to have HDMI audio out as well, so there’s an HDMI audio extractor in the mix, too, and another extender around back. Only thing missing is a paint job and some sweet vinyl graphics.

Yes, vinyl graphics would be sweet, but how? Not on the laser cutter, if that’s what you’re thinking. Don’t dismiss vinyl cutters out of hand, because they can do a whole lot more than that.

Via r/raspberry_pi

A Simple Science Fair AM Transmitter

A crystal radio is a common enough science fair project, but the problem is, there isn’t much on anymore. The answer is, of course, obvious: build your own AM transmitter, too. AM modulation isn’t that hard to do and [Science Buddies] has plans for how to build one with a canned oscillator and an audio transformer.

We don’t imagine the quality of this would be so good, but for a kid’s science project it might be worth a shot. Maybe something like “What kind of materials block radio waves?” would be a good project statement.

Continue reading “A Simple Science Fair AM Transmitter”

A Pair Of CRTs Drive This Virtual Reality Headset

With the benefit of decades of advances in miniaturization, looking back at the devices of yore can be entertaining. Take camcorders; did we really walk around with these massive devices resting on our shoulders just to record the family trip to Disneyworld? We did, but even if those days are long gone, the hardware remains for the picking in closets and at thrift stores.

Those camcorders can be turned into cool things such as this CRT-based virtual reality headset. [Andy West] removed the viewfinders from a pair of defunct Panasonic camcorders from slightly after the “Reggievision” era, leaving their housings and optics as intact as possible. He reverse-engineered the connections and hooked up the composite video inputs to HDMI-to-composite converters, which connect to the dual HDMI ports on a Raspberry Pi 4. An LM303DLHC accelerometer provides head tracking, and everything is mounted to a bodged headset designed to use a phone for VR. The final build is surprisingly neat for the number of thick cables and large components used, and it bears a passing resemblance to one of those targeting helmets attack helicopter pilots use.

The software is an amalgam of whatever works – Three.js for browser-based 3D animation, some off-the-shelf drivers for the accelerometers, and Python and shell scripts to glue it all together. The video below shows the build and a demo; we don’t get the benefit of seeing what [Andy] is seeing in glorious monochrome SD, but he seems suitably impressed. As are we.

We’ve seen an uptick in projects using CRT viewfinders lately, including this tiny vector display. Time to scour those thrift stores before all the old camcorders are snapped up.

Continue reading “A Pair Of CRTs Drive This Virtual Reality Headset”

BinDayCator Lets You Know When To Take Out The Trash

Municipal waste pickup is a wonderful luxury. Typically once a week, large trucks come by and pick up bins of garbage from your residence. All you have to do is remember to put them out! In a uniquely human way, this is very hard to do. Enter the BinDayCator.

The project consists of a 3D-printed model of a typical council wheelie-bin. Printed in white filament, the bin is translucent enough to glow when lit by powerful WS2812B LEDs. Having four LEDs both helps fill the entire model with an even light, as well as allows the bin to display multiple colors in different segments. This means that if it’s green bin day, the bin glows green. If it’s the day for the red and blue bins, the indicator will light up segments in red and blue.

Unfortunately there’s no global standard that councils use to serve up bin day data over the Internet, so configuration isn’t as simple as pointing the BinDayCator at your local waste authority’s website. Instead, some Node-RED code is used to scrape the council website once a day and tell the ESP8266 controlling the BinDayCator which bins are due to be placed on the roadside. A later revision has a custom calendar UI that can allow for manual configuration of the relevant days.

The BinDayCator is a cute device, and one that would likely be commercially successful if there were a simple and easy way to configure the necessary data feed. We’d love one by our front door so we didn’t miss another collection day. Visual indicators are always useful, even if its just for checking the mail. Video after the break.

Continue reading “BinDayCator Lets You Know When To Take Out The Trash”

Spring Clamp Is Completely 3D Printed

Dual-filament printers may seem like a gimmick to the uninitiated, but they open up some powerful options for advanced designs. [Darren Tarbard] shows this off with a nifty spring clamp that is 3D printed in a single operation.

The clamp is similar to one you’d find at any hardware store. Standard PLA or ABS filaments can be used for the main body of the clamp, which has an integrated hinge. However, instead of having a typical metal spring, the element is instead 3D printed. The spring is created out of TPU filament, and printed in place. Different in-fill percentages on the spring component can vary the characteristics of the spring, making for a softer or firmer grip.

It’s a tidy example of the applications of dual-filament printing – and far more useful than using it to print bi-color Pikachus. 3D printers have much to offer in the world of tooling; they can even turn a bench vice into an effective press brake. Video after the break.

Continue reading “Spring Clamp Is Completely 3D Printed”

The Truth Is In There: The Art Of Electronics, The X-Chapters

If you’ve been into electronics for any length of time, you’ve almost certainly run across the practical bible in the field, The Art of Electronics, commonly abbreviated AoE. Any fan of the book will certainly want to consider obtaining the latest release, The Art of Electronics: The x-Chapters, which follows the previous third edition of AoE from 2015. This new book features expanded coverage of topics from the previous editions, plus discussions of some interesting but rarely traveled areas of electrical engineering.

For those unfamiliar with it, AoE, first published in 1980, is an unusually useful hybrid of textbook and engineer’s reference, blending just enough theory with liberal doses of practical experience. With its lively tone and informal style, the book has enabled people from many backgrounds to design and implement electronic circuits.

After the initial book, the second edition (AoE2) was published in 1989, and the third (AoE3) in 2015, each one renewing and expanding coverage to keep up with the rapid pace of the field. I started with the second edition and it was very well worn when I purchased a copy of the third, an upgrade I would recommend to anyone still on the fence. While the second and third books looked a lot like the first, this new one is a bit different. It’s at the same time an expanded discussion of many of the topics covered in AoE3 and a self-contained reference manual on a variety of topics in electrical engineering.

I pre-ordered this book the same day I learned it was to be published, and it finally arrived this week. So, having had the book in hand — almost continuously — for a few days, I think I’ve got a decent idea of what it’s all about. Stick around for my take on the latest in this very interesting series of books.

Continue reading “The Truth Is In There: The Art Of Electronics, The X-Chapters”

A Ploopy Pick And Place

A fair number of hackers reach that awkward age in their careers – too old for manual pick and place, but too young for a full-fledged PnP machine. The obvious solution is to build your own PnP, which can be as simple as putting a suction cup on the Z-axis of an old 3D-printer. Feeding parts into the pick and place, though, can be a thorny problem.

Or not, if you think your way through it like [Phil Lam] did and build these semi-automated SMD tape feeders. Built for 8-mm plastic or paper tapes, the feeders are 3D-printed assemblies that fit into a rack that’s just inside the work envelope of a pick and place machine. Each feeder has a slot in the top for the tape, which is advanced by using the Z-axis of the PnP to depress a lever on the front of the case. A long tongue in the tape slot gradually peels back the tape’s cover to expose a part, which is then picked up by the PnP suction cup. Any machine should work; [Phil] uses his with a LitePlacer. We like the idea that parts stay protected until they’re needed; the satisfyingly clicky lever action is pretty cool too. See it briefly in action in the video below.

It looks like [Phil] built this in support of his popular Ploopy trackball, which is available both as a kit and fully assembled. We think the feeder design is great whether you’re using PnP or not, although here’s a simpler cassette design for purely manual SMD work.

Continue reading “A Ploopy Pick And Place”