We have all watched videos of concerts and events dating back to the 1950s, but probably never really wondered how this was done. After all, recording moving images on film had been done since the late 19th century. Surely this is how it continued to be done until the invention of CCD image sensors in the 1980s? Nope.
Although film was still commonly used into the 1980s, with movies and even entire television series such as Star Trek: The Next Generation being recorded on film, the main weakness of film is the need to move the physical film around. Imagine the live video feed from the Moon in 1969 if only film-based video recorders had been a thing.
Commercial-free video on demand was every couch potato’s dream for decades, and now we’ve got it. But nostalgia has a funny way of making some folks miss the old days, even if we know it’s technically be a step backwards. Wanting to recreate the TV watching experience circa 1998, [probnot] has come up with a way to run his very own television channel.
With the Raspberry Pi and a digital modulator, he’s got the only house on the block that’s wired to show The Simpsons all day. He has absolutely no control over which episode plays next, he can’t pause it, and its in presented in standard definition (a nightmare for anyone who grew up in the Netflix era) but a familiar viewing experience for the rest of us.
Where we’re going, we don’t need HDMI.
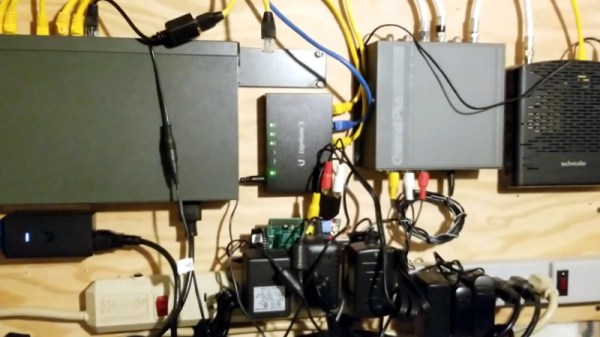
The key to this project is the Channel Plus Model 3025 modulator. It takes the feed from the antenna and mixes in two composite video sources on user-defined channels. All [probnot] had to do was find a channel that wouldn’t interfere with any of the over-the-air stations. The modulator has been spliced into the house’s coax wiring, so any TV connected to the wall can get in on the action. There’s no special setup required: when he wants to watch The Simpsons he just tunes the nearest TV to the appropriate channel.
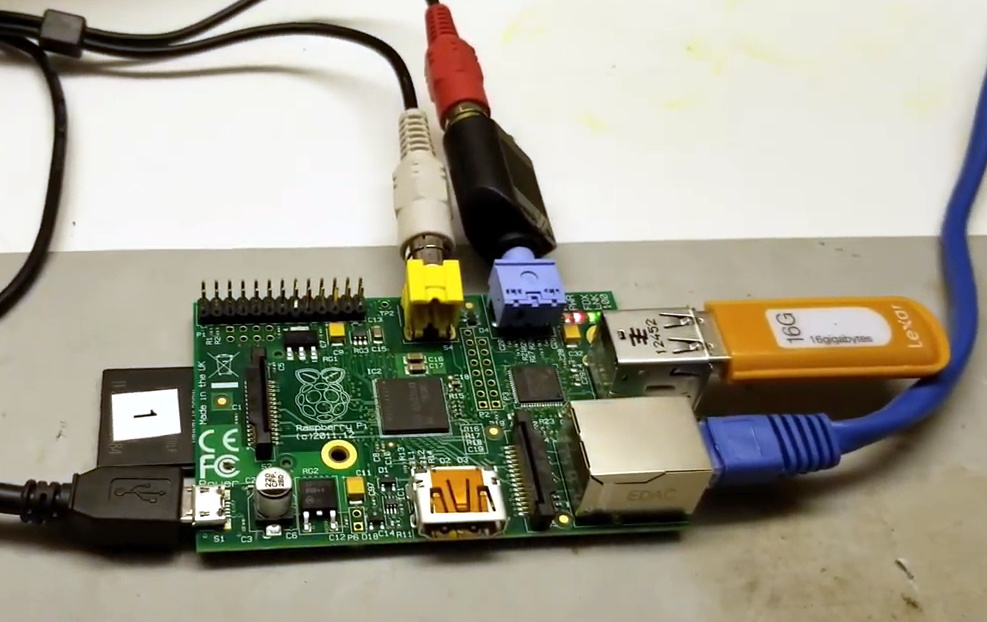
Providing the video for the modulator is a Raspberry Pi, specifically, the original model that featured composite video output. While the first generation Pi is a bit long in the tooth these days, playing standard definition video is certainly within its capabilities. With a USB flash drive filled with a few hundred episodes and a bit of scripting it’s able to deliver a never-ending stream direct from Springfield. There’s still that second channel available on the modulator as well, which we’re thinking could be perfect for Seinfeld or maybe The X-Files.
Interestingly, this isn’t the first time we’ve seen a Raspberry Pi used to provide a never-ending stream of The Simpsons. But compared to previous attempts which had to be directly connected to the TV, we like the idea of using the modulator and creating a more authentic experience.
Last year a team of researchers published a paper detailing a method of boosting visual contrast and image quality in stereoscopic displays. The method is called Dichoptic Contrast Enhancement (DiCE) and works by showing each eye a slightly different version of an image, tricking the brain into fusing the two views together in a way that boosts perceived image quality. This only works on stereoscopic displays like VR headsets, but it’s computationally simple and easily implemented. This trick could be used to offset some of the limitations of displays used in headsets, for example making them appear capable of deeper contrast levels than they can physically deliver. This is good, because higher contrasts are generally perceived as being more realistic and three-dimensional; important factors in VR headsets and other stereoscopic displays.
Stereoscopic vision works by having the brain fuse together what both eyes see, and this process is called binocular fusion. The small differences between what each eye sees mostly conveys a sense of depth to us, but DiCE uses some of the quirks of binocular fusion to trick the brain into perceiving enhanced contrast in the visuals. This perceived higher contrast in turn leads to a stronger sense of depth and overall image quality.
Example of DiCE-processed images, showing each eye a different dynamic contrast range. The result is greater perceived contrast and image quality when the brain fuses the two together.
To pull off this trick, DiCE displays a different contrast level to both eyes in a way designed to encourage the brain to fuse them together in a positive way. In short, using a separate and different dynamic contrast range for each eye yields an overall greater perceived contrast range in the fused image. That’s simple in theory, but in practice there were a number of problems to solve. Chief among them was the fact that if the difference between what each eyes sees is too great, the result is discomfort due to binocular rivalry. The hard scientific work behind DiCE came from experimentally determining sweet spots, and pre-computing filters independent of viewer and content so that it could be applied in real-time for a consistent result.
Things like this are reminders that we experience the world only through the filter of our senses, and our perception of reality has quirks that can be demonstrated by things like this project and other “sensory fusion” edge cases like the Thermal Grill Illusion, which we saw used as the basis for a replica of the Pain Box from Dune.
With the benefit of decades of advances in miniaturization, looking back at the devices of yore can be entertaining. Take camcorders; did we really walk around with these massive devices resting on our shoulders just to record the family trip to Disneyworld? We did, but even if those days are long gone, the hardware remains for the picking in closets and at thrift stores.
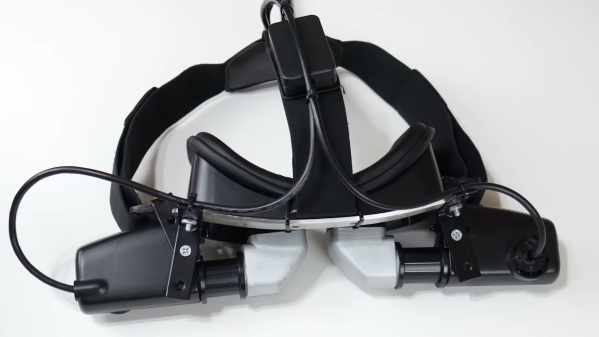
Those camcorders can be turned into cool things such as this CRT-based virtual reality headset. [Andy West] removed the viewfinders from a pair of defunct Panasonic camcorders from slightly after the “Reggievision” era, leaving their housings and optics as intact as possible. He reverse-engineered the connections and hooked up the composite video inputs to HDMI-to-composite converters, which connect to the dual HDMI ports on a Raspberry Pi 4. An LM303DLHC accelerometer provides head tracking, and everything is mounted to a bodged headset designed to use a phone for VR. The final build is surprisingly neat for the number of thick cables and large components used, and it bears a passing resemblance to one of those targeting helmets attack helicopter pilots use.
The software is an amalgam of whatever works – Three.js for browser-based 3D animation, some off-the-shelf drivers for the accelerometers, and Python and shell scripts to glue it all together. The video below shows the build and a demo; we don’t get the benefit of seeing what [Andy] is seeing in glorious monochrome SD, but he seems suitably impressed. As are we.
We’ve seen an uptick in projects using CRT viewfinders lately, including this tiny vector display. Time to scour those thrift stores before all the old camcorders are snapped up.
We generally cast a skeptical eye at projects that claim some kind of superlative. If you go on about the “World’s Smallest” widget, the chances are pretty good that someone will point to a yet smaller version of the same thing. But in the case of what’s touted as “The world’s smallest vector monitor”, we’re willing to take that chance.
If you’ve seen any of [Arcade Jason]’s projects before, you’ll no doubt have noticed his abiding affection for vector displays. We’re OK with that; after all, many of the best machines from the Golden Age of arcade games such as Asteroids and Tempest were based on vector graphics. None so small as the current work, though, based as it is on the CRT from an old camcorder’s viewfinder. The tube appears to be about 3/4″ (19 mm) in diameter, and while it still had some of its original circuitry, the deflection coils had to be removed. In their place, [Jason] used a ferrite toroid with two windings, one for vertical and one for horizontal. Those were driven directly by a two-channel push-pull audio amplifier to make patterns on the screen. Skip to 15:30 in the video below to see the display playing [Jerobeam Fenderson]’s “Oscilloscope Music”.
As much as we’d love to see a tiny game of Battlezone played on the diminutive display, there’s only so much it can do. Maybe an analog version of this adorable digital oscilloscope would be possible?
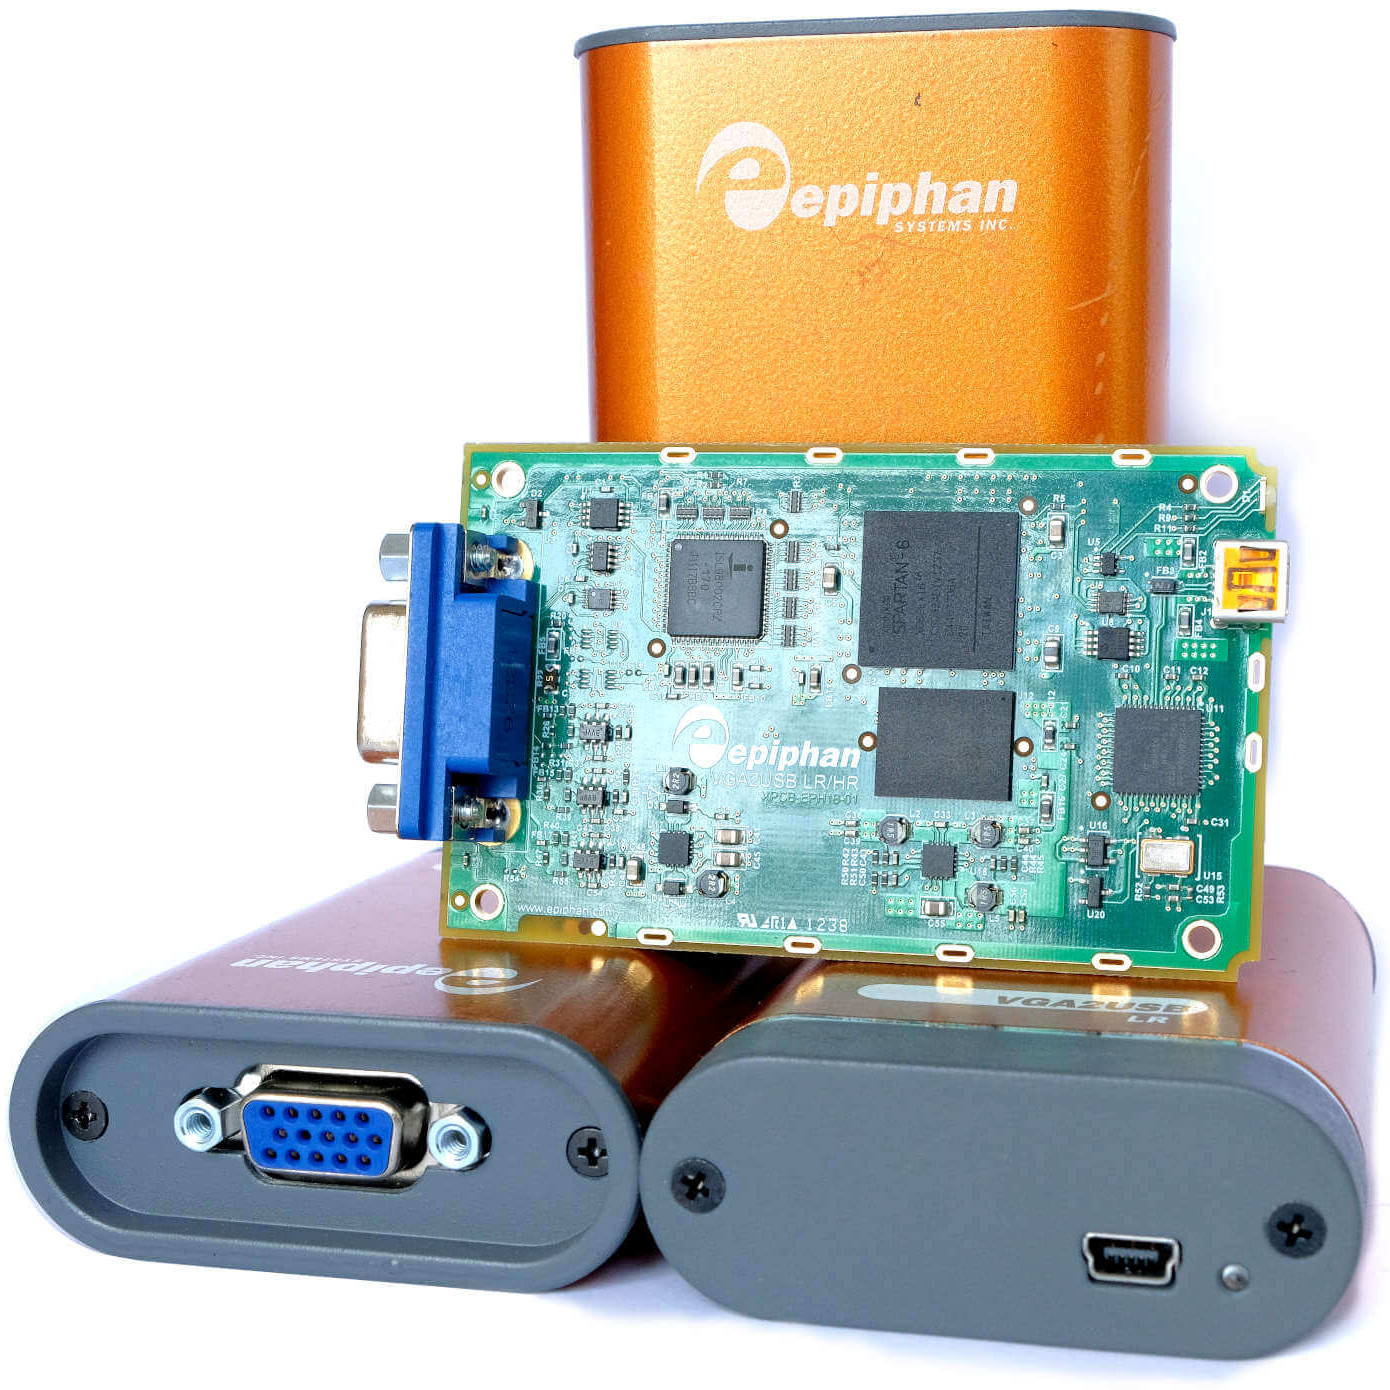
[Ben Cox] found some interesting USB devices on eBay. The Epiphan VGA2USB LR accepts VGA video on one end and presents it as a USB webcam-like video signal on the other. Never have to haul a VGA monitor out again? Sounds good to us! The devices are old and abandoned hardware, but they do claim Linux support, so one BUY button mash later and [Ben] was waiting patiently for them in the mail.
But when they did arrive, the devices didn’t enumerate as a USB UVC video device as expected. The vendor has a custom driver, support for which ended in Linux 4.9 — meaning none of [Ben]’s machines would run it. By now [Ben] was curious about how all this worked and began digging, aiming to create a userspace driver for the device. He was successful, and with his usual detail [Ben] explains not only the process he followed to troubleshoot the problem but also how these devices (and his driver) work. Skip to the end of the project page for the summary, but the whole thing is worth a read.
The resulting driver is not optimized, but will do about 7 fps. [Ben] even rigged up a small web server inside the driver to present a simple interface for the video in a pinch. It can even record its output to a video file, which is awfully handy. The code is available on his GitHub repository, so give it a look and maybe head to eBay for a bit of bargain-hunting of your own.
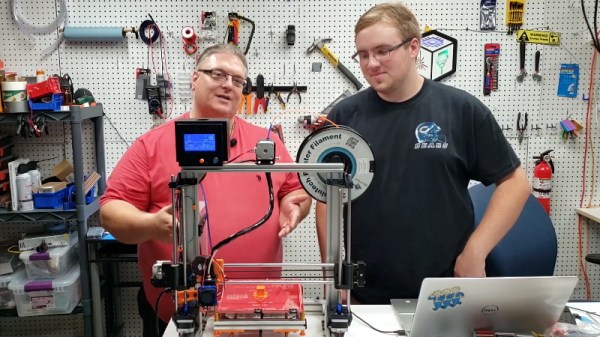
Today it’s almost always cheaper to buy an imported 3D printer kit than it is to source your own parts and build one yourself. But that doesn’t stop people from doing it anyway. Whether they’re looking for something a bit more solid, or just want to do things their own way, there are still valid reasons to design and build your own machine. Luckily for us in the audience, [Rob Mech] decided to document the build of his custom “LayerFused C201” printer on his YouTube Channel.
If you’ve ever dreamed of taking the plunge and building a 3D printer exactly the way you want, but were never able to manage the time, this seven video series might be the next best thing. Each video takes you through a different step of the construction, from building the frame out of aluminum extrusion all the way to wiring up the endstop switches and the 32-bit SKR v1.3 controller. There’s even a video that introduces the viewer to the concept of a “Frankenstein” printer that uses cobbled together parts just long enough to produce its own final components.
All told, [Rob] says the Bill of Materials for the LayerFused C201 comes to at least $200, but that’s going to take shopping around for the lowest possible prices and potentially even salvaging some components from other machines and projects. Like we said, building a cheap printer is absolutely not the goal here; it’s all about building a printer you want to use. Continue reading “A 3D Printer Scratch Built For Your Viewing Pleasure”→