Hackaday.io user [mincepi] wanted a VGA output on his Raspberry Pi Zero. His quest led him to design a PCB that mates with a VGA monitor and the Pi board and–according to his estimates–costs about $3.62 each (although to get that price, you have to build three).
Video Hacks638 Articles
Resurrecting A 1960’s VTR With Foam
Nearly fifty years back, Sony launched the DVC-2400, their first consumer grade video camera. This unit weighed in at 10 pounds, and recorded only 20 minutes of footage per reel. It left something to be desired for $1250, or nearly $9000 in today’s dollars.
[NeXT] got his hands on one of these camera kits, and began bringing it back to life. While all the pieces were included, the Video Tape Recorder (VTR), which is used to play back the footage, didn’t power up. A little poking found a dead transistor. After determining a modern replacement part, the voltages checked out. However, the drum still wasn’t spinning.
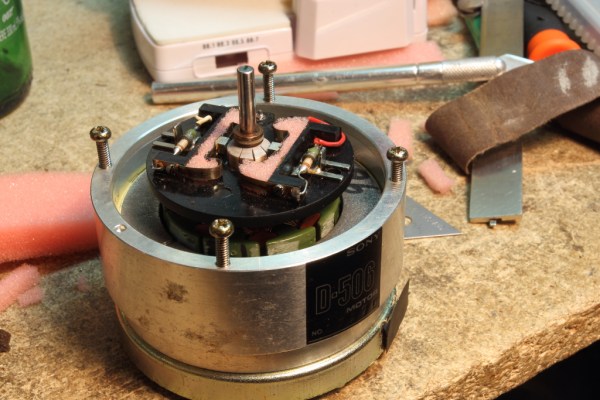
Further disassembly found that the drum’s DC motor was made on the cheap, using a foam instead of springs to apply pressure on the brushes. This foam had worn out and lost its springy qualities, so no electrical contact was made. New foam was cut out as a replacement. Once reassembled, the drum spun successfully. After some adjustment, the VTR was running at the correct speed once again.
With this working, the VTR should be ready to go. However, camera still isn’t working, so we’re awaiting a part 2.
ESP8266 Transmits Television On Channel 3
We’ve seen a lot of ESP8266 projects in the past, but this one most definitely qualifies as a hack. [Cnlohr] noticed that the ESP8266, when overclocked, could operate the I2S port at around 80MHz and still not lose DMA data. He worked out how to create bit patterns that generate RF around 60MHz. Why is that interesting? Analog TVs can receive signals around that frequency on channel 3.
As you can see in the video below, the output is monochrome only and is a little snowy. It also will lose frames on some WiFi events, but this is all forgivable when you consider this very inexpensive module isn’t meant to do video output at all.
Continue reading “ESP8266 Transmits Television On Channel 3”
VGA In Memoriam
The reports of the death of the VGA connector are greatly exaggerated. Rumors of the demise of the VGA connector has been going around for a decade now, but VGA has been remarkably resiliant in the face of its impending doom; this post was written on a nine-month old laptop connected to an external monitor through the very familiar thick cable with two blue ends. VGA is a port that can still be found on the back of millions of TVs and monitors that will be shipped this year.
This year is, however, the year that VGA finally dies. After 30 years, after being depreciated by several technologies, and after it became easy to put a VGA output on everything from an eight-pin microcontroller to a Raspberry Pi, VGA has died. It’s not supported by the latest Intel chips, and it’s hard to find a motherboard with the very familiar VGA connector.
Scrolling A Message On A Building In A Time Lapse Video
[Saulius Lukse] has a really interesting way of turning a couple of buildings into his own addressable display. The effect is not seen in real life, but is a clever video rendering with stock he pulled from time-lapse cameras. Now if you want to play Tetris using the windows of a building you add wireless lightbulbs to every window. But that’s a lot of work. You can fake playing Tetris (or scrolling messages in this case) if you just show a video of the buildings and swap in your own image manipulation.

[Saulius] starts with a time lapse sequence of a city scape. It needs to be one with a large building or two to provide a good scrolling surface. The building is extracted from the scene with the background transparent. The really time consuming part is creating a distinct image with one window lit for each window that is going to be used. This set of windows are the ‘pixels’ used to create the scrolling images. This is accomplished by masking out one image of the building with every office light turned off, then masking out each window individually with the office illuminated. This masking means everything going on around the building (traffic, weather, people) will be preserved, while the windows can be individually manipulated.
Next the program jinx is used to create the building animation. This program is designed to create scrolling messages on LED panels. [Saulius] provides a Python script that takes the images, the output of jinx, and combines them to create the final set of moving images.
The result is a city wishing you a “Happy New Year!”
Continue reading “Scrolling A Message On A Building In A Time Lapse Video”
PiNoculars – A Farseeing Pi Camera
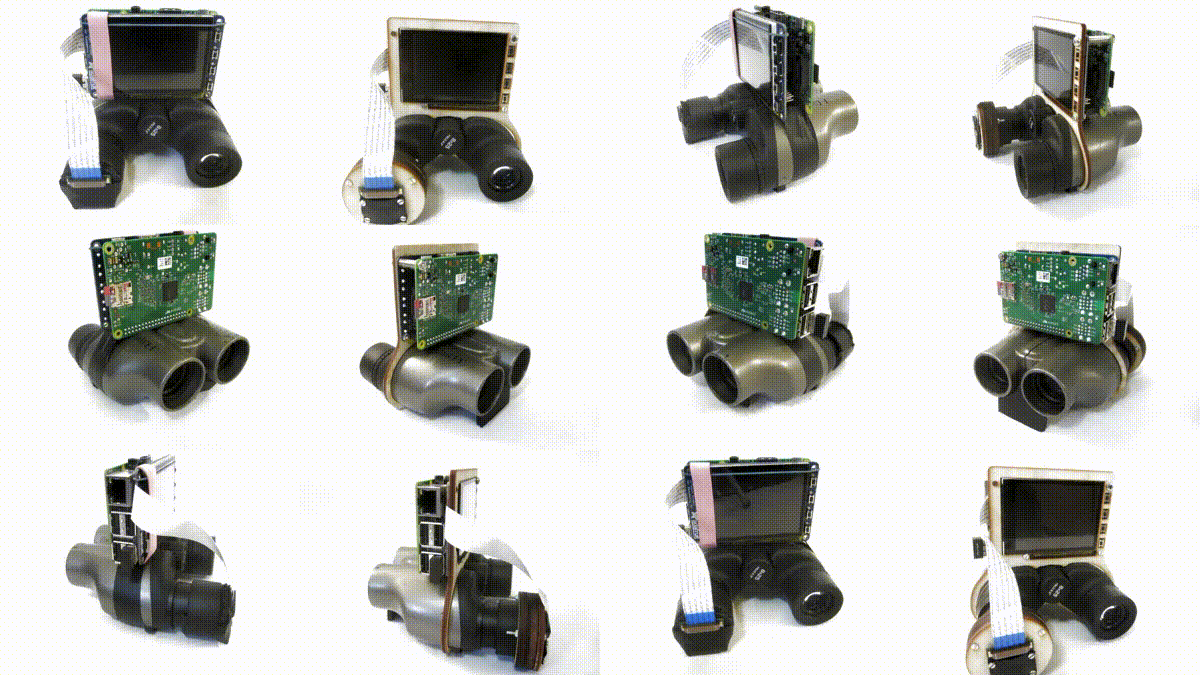
The Raspberry Pi camera provides a 5 megapixel resolution with still images of up to 2592 x 1944 and multiple video modes including 2592 x 1944 at 15 frames per second. With it being mounted on a small board it is ideal for using in hacks. [Josh Williams] mounted the camera on the lens of binoculars to capture some startling images, including this squirrel.
The camera is installed on a custom, laser cut mount that fastens to one eyepiece of the binoculars. The Pi itself is mounted above the binoculars. An LCD touch screen from Adafruit allows [Josh] to select the image and adjust the focus. Snapping pictures is done using either the touch screen or switches that come with the screen.
The Instructable [Josh] wrote is extremely detailed and includes two different ways of mounting the Pi on the binoculars. The quick and dirty method just straps on with tape. The highly engineered method delves into Inkscape to design a plywood mount that is laser cut. For portable operation, [Josh] uses one of the ubiquitous battery packs meant for USB charging.
Basic setup of the Pi and camera are in a video after the break.
Android Set Top Box Lets You Stream And Record Via HDMI Input
While on the hunt for some hardware that would let him stream video throughout his LAN [danman] got a tip to try the €69 Tronsmart Pavo M9 (which he points out is a re-branded Zidoo X9). With some handy Linux terminal work and a few key pieces of software [danman] was able to get this going.
The Android box was able to record video from the HDMI input with pre-installed software found in the main menu as [danman] explains on his blog. File format options are available in the record menu, however none of them were suitable for streaming the video (which was the goal, remember?).
[danman] was able to poke around the system easily since these boxes come factory rooted (or at least the Tronsmart variant that [danman] uses in his demo did). Can anyone with a Zidoo X9 verify access to the root directory?
Long story short, [danman] was able to get the stream working over the network. Although he did have to make some changes to the stream command he was issuing over ssh. He finds the fix in the ffmpeg documentation which saves you the trouble of reading through it but you’ll have to check out his blog post for that (pro tip: he links to a sweet little .apk reverse engineering tool as well).
We’ve seen set top box hacks before, however, streaming and recording HDMI at this price is a rare find. If you’ve been hacking up the same tree let us know in the comments, and don’t forget to send in those tips!


