Making Smart Bulbs Smarter With The Power Of MQTT

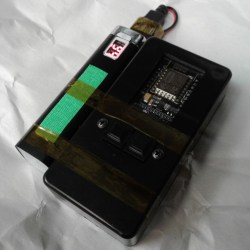
What’s the point of smart home automation? To make every day tasks easier, of course! According to [Tomasz Cybulski], that wasn’t the case when he installed IKEA smart lights in his closet. It’s handy to have them in a common switch, in this case a remote control, but having to look for it every time he needed the lights could use some improvement. Enter his project to make smart bulbs smarter, through the use of a simple ESP8266.

While hooking a door switch to the lights’ power supply could provide a quick solution, [Tomasz]’s wife wanted to keep the functionality of the remote control, so he had to look elsewhere. These light bulbs use the simple Zigbee protocol, so arranging for other devices was rather trivial. A USB dongle to interface with the protocol was configured for his existing Raspberry Pi automation controller, while an ESP8266 served as the real-world sensor by connecting it to reed switches installed in the closet doors.

With all the hardware sorted out, it’s a simple matter of making it all talk to each other. The ESP8266, using the Tasmota firmware, sends a signal to an MQTT server running on the Raspberry Pi, which in turn translates it to a remote trigger on the Zigbee frequency with the dongle. The lights turn on when the door opens, and off again once it closes. And since there were no further modifications to the lights themselves, the original IKEA controller still works as expected, which we’re sure [Tomasz]’s wife appreciates!

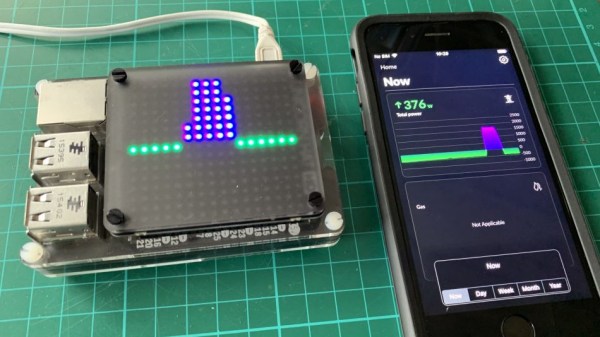
MQTT can be an interesting piece of software that goes beyond just home automation though, and if you already have a server in your home you can use it to transfer your clipboard’s contents to another device. If you are using it for home automation though, here’s an inspiration for a rather unusual dashboard to keep things interesting. Check out this hack in action after the break.

Continue reading “Making Smart Bulbs Smarter With The Power Of MQTT”

Basics Of Remote Cellular Access – Choosing A Modem

These days, we’re blessed with cellular data networks that span great swathes of the Earth. By and large, they’re used to watch TV shows and argue with strangers online. However, they’re also a great tool to use to interact with hardware in remote locations, particularly mobile ones where a wired connection is impractical.

In this series, we’re taking a look at tips and tricks for doing remote cellular admin the right way. First things first, you’ll need a data connection – so let’s look at choosing a modem.

Options Abound

When shopping around for cellular data modems, it can be difficult to wade through the variety of options out there and find something fit for purpose. Modems in this space are often marketed for very specific use cases; at the consumer level, many are designed to be a no-fuss home broadband solution, while in the commercial space, they’re aimed primarily to provide free WiFi for restaurants and cafes. For use in remote admin, the presence of certain features can be critical, so it pays to do your research before spending your hard earned money. We’ve laid out some of the common options below.

Consumer Models

The Sierra Aircard 320U is ancient now, with limited frequency bands available. Its flimsy flexible connector is also a drawback. However, its ease of configuration with Linux systems makes it a dream to use in remote access situations. Unlike many others, it acts as a Direct IP connection, not appearing as a separate router.

Many telecommunications providers around the world sell cheap USB dongles for connecting to the Internet, with these first becoming popular with the rise of 3G. They’re somewhat less common now in the 5G era, with the market shifting more towards WiFi-enabled devices that share internet among several users. These devices can often be had for under $50, and used on prepaid and contract data plans.

These devices are often the first stop for the budding enthusiast building a project that needs remote admin over the cellular network. However, they come with certain caveats that can make them less attractive for this use. Aimed at home users, they are often heavily locked down with firmware that provides minimal configuration options. They’re generally unable to be set up for port forwarding, even if you can convince your telco to give you a real IP instead of carrier-grade NAT. Worse, many appear to the host computer as a router themselves, adding another layer of NAT that can further complicate things. Perhaps most frustratingly, with these telco-delivered modems, the model number printed on the box is often not a great guide as to what you’re getting.

A perfect example is the Huawei E8327. This comes in a huge number of sub-models, with various versions of the modem operating in different routing modes, on different bands, and some even omitting major features like external antenna connectors.  Often, it’s impossible to know exactly what features the device has until you open the box and strip the cover off, at which point you’re unable to return the device for your money back.

All is not lost, however. The use of VPNs can help get around NAT issues, and for the more adventurous, some models even have custom firmware available on the deeper, darker forums on the web. For the truly cash strapped, they’re a viable option for those willing to deal with the inevitable headaches. There are generally some modems that stand out over others in this space for configurability and ease of use. This writer has had great success with a now-aging Sierra Aircard 320U, while others have found luck with the Huawei E3372-607. As per earlier warnings though, you don’t want to accidentally end up with an E3372-608 – thar be dragons.

Continue reading “Basics Of Remote Cellular Access – Choosing A Modem”

IRC Over LoRa, For When Things Really Go South

As a society, we’ve become accustomed to always-on high-speed data connections, whether we’re at home on the computer or out and about with a mobile device. But what happens if a natural disaster knocks out the local infrastructure? Sure some people will be able to fire up their radio if they need to reach out and touch someone, but even among hackers, hams are a minority. What we really need is a backup Internet.

The team behind the CellSol project hopes to show that building a volunteer-operated distributed communications network is not only within the capabilities of the hacker community but probably much easier and cheaper to do than you might think. Each node in the network, known as a Pylon in CellSol parlance, can shuttle data between the LoRa backbone and WiFi-enabled devices like smartphones and computers. Once the network is up and running, users don’t need any special hardware or software to use it.

Now to be clear, nobody is talking about surfing the web here. When a user connects to one of the ESP32 Pylons, they’ll be able to access a simplistic chat system through their browser. If the Pylon has an active Internet connection the chat can be bridged to an IRC channel. Without Internet connectivity, the pylon will simply give users on the CellSol network a means to communicate among each other. To keep things simple there’s no user names, private messages, or encryption. This is bare-bones, end-of-the-world style communication.

Want to join the CellSol revolution? All you really need is an ESP32, a LoRa radio, and the open-source firmware. If you get something like the Heltec LoRa 32 development board, you don’t even need to solder anything together. Just flash the board and go. Once you have a few Pylons going, you can also put together a cheap repeater node using a LoRa equipped Arduino. Both devices are small and energy efficient enough that they could easily be battery or solar powered. As you can see in the video after the break, the team even envisions a future where they could be dropped off in public areas via drone.

This isn’t the first time we’ve seen the ESP32 used to establish an off-grid LoRa communications network, and like those previous attempts, it’s usefulness will largely depend on how many people you can convince to set up their own nodes and repeaters. But if you’ve got some open minded friends who live relatively close by, this could be a great way to have a little chat.

Continue reading “IRC Over LoRa, For When Things Really Go South”

The Macro Keyboard Is On Deck

The idea of a reconfigurable macro keyboard is a concept that has been iterated on by many all the way from custom DIY keypads to the polarizing TouchBar on MacBooks. The continual rise of cheap powerful microcontrollers with Wi-Fi and 3D printers makes rolling your own macro keyboard easier every year. [Dustin Watts] has joined the proverbial club and built a beautiful macro pad called FreeTouchDeck.

We’ve seen macro keyboards that use rotary encoders to cycle through different mappings for the keys. FreeTouchDeck has taken the display approach and incorporates a touch screen to offer different buttons. [Dustin] was inspired by a similar project called FreeDeck, which offers six buttons each with a small screen. FreeTouchDeck is powered by an ESP32 and drives an ILI9488 touch screen with an XPT2046 touch controller. This means that FreeTouchDeck can offer six buttons with submenus and all sorts of bells and whistles. A connection to the computer is done by emulating a Bluetooth keyboard. By adding a configuration mode that starts a web server, FreeTouchDeck allows easy customization on the fly.

[Dustin] whipped up a quick PCB that makes it easy to solder the ESP32 and the TFT together, but a breadboard works just fine. Gerbers for that are available on GitHub. To wrap it all up, a nice 3D printed shell encloses the whole system in a clean, tidy way. The code, documentation, and case designs are all on his GitHub.

Continue reading “The Macro Keyboard Is On Deck”

Roll Your Own Tracking

The smartphone is perhaps the signature device of our modern lives. For most of the population it is never more than an arm’s length away, it’s on your person more than any other device in your life. Smartphones are packed with all sorts of radios and ways to communicate wireless. [Amine Mansouri] built an ESP8266 based tracking device that takes advantage of this.

Most WiFi-enabled devices will send out “probe requests” frames trying to search for the SSIDs they were connected to. These packets contain the device MAC address as well as the SSIDs you’ve connected to. Using about 12 components, [Amine] laid out a small board in Eagle. By putting the ESP8266 in monitor mode, the probe frames can be logged and uploaded. The code can be updated OTA making it easy to service while in the field.

With permission from his local library, eight repeater boards were scattered throughout the building to forward the probe packets to where the tracker could pick them up. A simple web interface was built that allows the library to figure out how many people are in the library and how often they frequent the premises.

While an awesome project with open-source code on Github, it is important to stress how important is it to get permission to do this kind of tracking. While some phones implement MAC randomization, there are still many out in the wild that don’t. While this is similar to another project that listens to radio signals to determine the coming and going of ships and planes, tracking people with this sort of granularity is in a different category altogether.

Thanks [Amine] for sending this one in!

Nerfnet Tunnels TCP/IP Over NRF24L01 Radios

There’s an excellent chance you’ve already worked with the nRF24L01. These little modules are an easy and cheap way to shuffle data across a 2.4 GHz radio link at a respectable rate, making them great for remote control projects. But after seeing that others had experimenting with using these radios to transmit digital audio, [Andrew Rossignol] got to wondering if some software trickery could push the envelope even further.

The result is nerfnet, a Linux program that allows you to tunnel TCP/IP over a pair of nRF24L01 modules. The link appears as a virtual interface, meaning everything happens transparently as far as other programs are concerned. Anything that uses TCP/IP to communicate on Linux can take advantage of this low-cost link, albeit at speeds that most of us haven’t had to deal with in decades.

Though it’s not quite as bad as you might think. Latency is around 50 ms, and after some tweaks, [Andrew] has been able to squeeze almost 300 Kbps out of the link. That’s more than enough for terminal work, and some light audio and video streaming isn’t out of the question.

In terms of range, he was able to maintain a fairly reliable connection at a distance of up to 60 meters (200 feet) outdoors. It might not sound like much, but again, you’ve got to take the cost of these radios into account. If you’re looking to SSH into a Raspberry Pi weather station you’ve got in the backyard, a pair of these could get the job done for just a couple of bucks.

The blog post [Andrew] has put together explains the software in fantastic detail if you’re interested in the nuts and bolts of it all. But if you just want to play around with the idea, you just need to connect some nRF24L01 modules to a pair of Raspberry Pis with short SPI wires to cut down any interference, and follow the instructions. Ideally the radios would have external antennas, but it’s not strictly required.

We’ve seen these modules pushed into service as impromptu Bluetooth Low Energy transmitters in the past, but nothing quite like this. While the latency and bandwidth offered by this technique might seem antiquated to modern eyes, it could be the perfect dedicated communication channel for your sensors, smart devices, or home automation projects.

Continue reading “Nerfnet Tunnels TCP/IP Over NRF24L01 Radios”

E-Ink Calendar Paves A Path For All

[Martin Fasani] has set out to build a beautiful low power E-Ink Calendar he can hang on his wall. But perhaps more importantly, the work he has done makes it easier for everyone in the future to have a e-ink display. Many battery-powered e-ink projects connect to some server, download a bitmap image, display the new image, and then go into a deep sleep power mode. [Martin’s] project is no different, but it uses a handy microservice that does the conversion and rendering for you.

The firmware for this ESP32/ESP32S2 based calendar is open sourced on GitHub, with a version based on the Arduino framework as well as the native ESP-IDF framework. One particularly fantastic part of the firmware is a C++ component called CalEPD that drives e-paper displays. CalEPD extends the Adafruit_GFX class and is broken out in a separate repo, making it easy to consume on other projects. Since this supports dozens of different e-paper displays, this simplifies the process of building a calendar with different screens. The firmware includes a Bluetooth setup flow from a smartphone or tablet. This means you can quickly configure how often it wakes up, what it queries, and other important features.

The hardware shown in the demo video has a 7.5″ Waveshare screen with 800 x 400 resolution nestled inside a 3D-printed shell. There is also a 5,000 mAh battery with an ESP32 TinyPICO powering the whole system. The TinyPICO was picked for its incredible deep sleep power consumption. All this fits into a frame just 11 mm thick, for which STL files are available. [Martin] continues to work on this calendar display and has recently added support for FocalTech touch panel controllers. We’re excited to see where he takes it next!

This isn’t the first e-ink display project we’ve seen but this is a great reference to build your own. If you need another good starting point, this weather display might give you that little bit of inspiration you need.

Continue reading “E-Ink Calendar Paves A Path For All”