We’ve seen a few near-future sci-fi films recently where computers respond not just to touchscreen gestures but also to broad commands, like swiping a phone to throw its display onto a large flat panel display. It’s a nice metaphor, and if we’re going to see something like it soon, perhaps this wrist-mounted pointing device will be one way to get there.
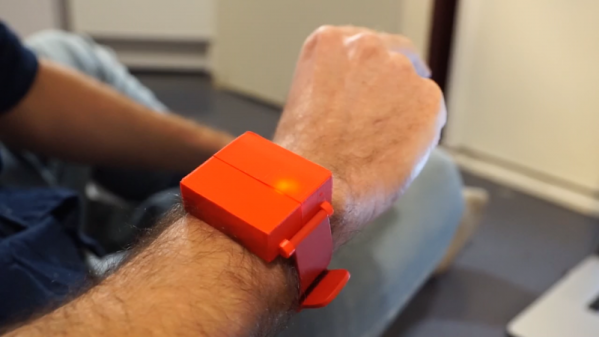
The video below shows the finished product in action, with the cursor controlled by arm movements. Finger gestures that are very much like handling a real mouse’s buttons are interpreted as clicks. The wearable has a Nano, an MPU6050 IMU, and a nRF24L01 transceiver, all powered by some coin cells and tucked nicely into a 3D-printed case. To be honest, as cool as [Ronan Gaillard]’s wrist mouse is, the real story here is the reverse engineering he and his classmate did to pull this one off.
The road to the finished product was very interesting and more detail is shared in their final presentation (in French and heavy with memes). Our French is sufficient only to decipher “Le dongle Logitech,” but there are enough packet diagrams supporting into get the gist. They sniffed the packets going between a wireless keyboard and its dongle and figured out how to imitate mouse movements using an NRF24 module. Translating wrist and finger movements to cursor position via the 6-axis IMU involved some fairly fancy math, but it all seems to have worked in the end, and it makes for a very impressive project.
Is sniffing wireless packets in your future? Perhaps this guide to Wireshark and the nRF24L01 will prove useful.
Continue reading “Wireless Protocol Reverse Engineered To Create Wrist Wearable Mouse”