Litar: LiDAR air guitar

Litar: An Air Guitar Using LiDAR

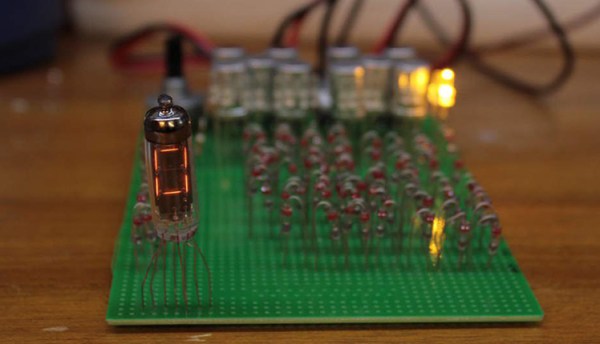
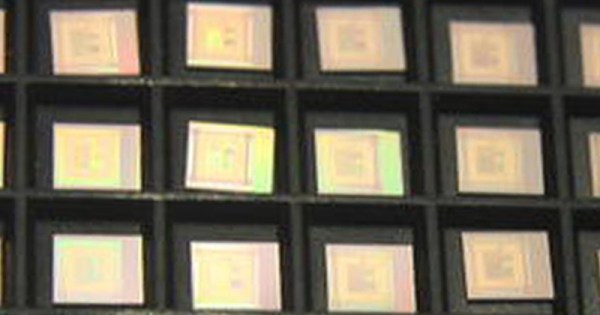
This year, [Blecky’s] Hackaday Prize Entry is an air guitar which uses multiple LiDAR sensors to create the virtual strings. What’s also neat is that he’s using his own LiDAR sensor, the MappyDot Plus, an enhanced version of his 2017 Prize Entry, the MappyDot.

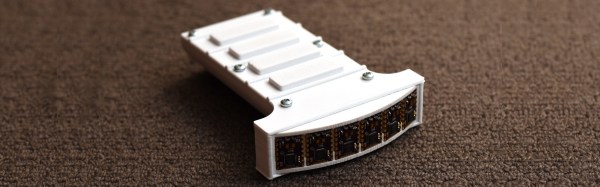
He uses a very clever arrangement of six sensors to get four virtual strings. Each sensor scans a 25-degree field of view. Three adjacent sensors are used to define a string, with the string being in the overlap of the outer two of those sensors. The middle sensor is used for the distance data.

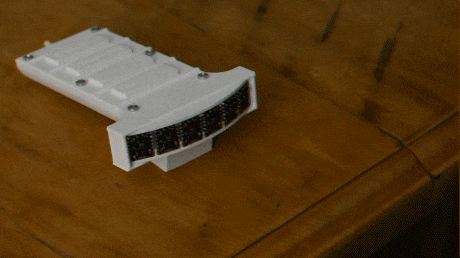
For the chords, he started out using some commercially made joysticks but ran into some ergonomic issues. Also, the manufacturer was discontinuing the product, a no-no for an open source project. So he abandoned that approach and designed his own buttons. He came up with a PCB with a linear hall effect sensor and some springs on it. The button has a magnet attached to its underside and sits on the springs. That way he gets the press and can do vibrato as well.

He plans to use Bluetooth MIDI so that you can play the sound on a phone or laptop but for now he lights up an LED beside each sensor as you press the strings.

Friday Hack Chat: Control Schemes For Robotics

The Hackaday Prize is in full swing if you haven’t heard. It’s the Academy Awards of Open hardware, and the chance for you — yes, you — to create the next great piece of hardware and a better future for everyone. Right now, we’re in the Robotics Module Challenge portion of the prize. This is your chance to build a module that could be used in robotics projects across the world! Show off your mechatronic skills and build a robotics module that’s transferable to other builds!

Not coincidentally, for this week’s Hack Chat, we’re talking all about Robotics Modules. We’re taking a deep dive into actuation and control schemes for robotics, and you’re invited to take part. Everyone wants affordable robotics, and stepper and servo motors are no longer the domain of high-budget industrial robots. Everyone can build a robot, but how do you do that? That’s what we’re going to find out this Friday in the Hack Chat!

Our guest for this week’s Hack Chat is [Ryan Walker]. He holds a diploma in Mechatronics and Robotics from BCIT. He’s worked on everything from prosthetics to industrial automation, and his current hobbies include designing and building control algorithms that drive electronics and enable cheap hardware to excel! If you want to learn about robotics, this is the Hack Chat for you.

In this chat, we’ll be talking about:

  • Control schemes
  • How to actuate your projects
  • Wheels, tweels, and ways to make your project move
  • Automating robotics

You are, of course, encouraged to add your own questions to the discussion. You can do that by leaving a comment on the Hack Chat Event Page and we’ll put that in the queue for the Hack Chat discussion.join-hack-chat

Our Hack Chats are live community events on the Hackaday.io Hack Chat group messaging. This week is just like any other, and we’ll be gathering ’round our video terminals at noon, Pacific, on Friday, April 27th.  Here’s a clock counting down the time until the Hack Chat starts.

Click that speech bubble to the right, and you’ll be taken directly to the Hack Chat group on Hackaday.io.

You don’t have to wait until Friday; join whenever you want and you can see what the community is talking about.

Custom Chips As A Service

Ages ago, making a custom circuit board was hard. Either you had to go buy some traces at Radio Shack, or you spent a boatload of money talking to a board house. Now, PCBs are so cheap, I’m considering tiling my bathroom with them. Today, making a custom chip is horrifically expensive. You can theoretically make a transistor at home, but anything more demands quartz tube heaters and hydrofluoric acid. Custom ASICs are just out of reach for the home hacker, unless you’re siphoning money off of some crypto Ponzi scheme.

Now things may be changing. Costs are coming down, the software toolchain is getting there, and Onchip, the makers of an Open Source 32-bit microcontroller are now working on what can only be called a, ‘OSH Park for silicon’. They’re calling it Itsy-Chipsy, and it’s promising to bring you your own chip for as low as $100.

The inspiration for this business plan comes from services like MOSIS that allows university classes to design their own chips on multi-project wafers. This aggregates multiple chips onto one wafer, bringing the cost of a prototype down from tens of thousands of dollars to about five thousand dollars, or somewhere around a thousand dollars a chip.

Itsy-Chipsy is taking this batch processing one step further. This is a platform that combines multiple projects on one die. That thousand dollar chip is now sixteen different projects, tied together with regulators, current sources, clocks, and process monitors. Using a 2 mm by 2 mm chip size, Itsy-Chipsy gives chip designers 350 μm of silicon using a 180 nm CMOS process. That’s enough for a basic 32-bit RISC-V microprocessor in a QFN or DIP 40 for just one hundred dollars.

This project is a contender for The Hackaday Prize — the Prize ends in November and we’d be amazed to see results by then. The Onchip team is talking to foundries, though, and it looks like there’s interest for this model in the industry. We’d guess that the best case scenario is a crowdfunding campaign for an OSH Park-like chip fab sometime in 2019. Whenever it comes, this is something we’re eagerly awaiting.

Tiny Vacuum Chamber Arm To Help With Homemade Semiconductors

[Nixie] wants to make semiconductors at home, and that requires some unusual tools. Chief among them is a vacuum chamber to perform thin-film deposition, and true to the hacker credo his is homemade, and will soon be equipped with a tiny manipulator arm with magnetically coupled mechanical controls.

If [Nixie]’s setup looks familiar, it might be because we featured his plasma experiments a few days ago. He was a little cagey then about his goal, but he’s come clean with his desire to make his own FETs (a project that is his 2018 Hackaday Prize entry). Doing so will require not only creating stable plasmas, but also the ability to move substrates around inside the vacuum chamber. Taking inspiration from the slender and maneuverable instruments surgeons use for laparoscopic procedures, [Nixie] is working on a miniature arm that will work inside his vacuum chamber. The video below is a 3D-printed proof-of-concept model in action, and shows how the arm’s segments will be controlled by cables. What’s really interesting is that the control cables will not penetrate the vacuum chamber — they’ll be moved right through the glass wall using magnets.

We’re keen to see chips from [Nixie]’s home fab lab, but it looks like there will be a lot of cool hacks between here and there. We’ll be watching closely. Continue reading “Tiny Vacuum Chamber Arm To Help With Homemade Semiconductors”

Robotics Module Challenge: Build Robot, Win Prizes

Brand new today, we’re going to go all in with the Robotics Module Challenge! This is the newest part of the 2018 Hackaday Prize which is only six weeks old, and already we’ve seen almost six hundred incredible entries. But a new challenge means a fresh start and a perfect time for you to begin your entry.

This is your call to build a module that can be used in robotics projects across the world. Twenty module designs will be awarded $1,000 and and chance at the five top prizes including the $50,000 grand prize!

Robotics is the kitchen sink of the world of electronics. You have to deal with motors, sensors, spinny lidar doohickies, computer vision, mechatronics, and unexpected prototyping issues accounting for the coefficient of friction of 3D printed parts. Robotics is where you show your skills, and this is your chance to show the world what you’ve got.

Wouldn’t it be great if there were some more ways to skip around the hard parts? That is the Robotics Module Challenge in a nutshell. We want to see great modular Open Hardware designs that can be used by roboticists all over the world. This might be a motor controller, a chassis or limb design system, a sensor network scheme, a communications system, data collection and delivery — basically anything related to robotics. Build a prototype that shows how your module is used and document all the info needed to incorporate and riff on your design in other robot builds.

Start your entry now and show us your take on a great bit of Open Hardware.

Continue reading “Robotics Module Challenge: Build Robot, Win Prizes”

Counting Without Transistors

The Hackaday Prize is all about Building Hope. We want to see hardware creators change the world with microcontrollers and breadboards. That’s a noble goal, but it also doesn’t mean you can’t have fun. That’s exactly what [Yann] is doing with a pile of surplus Soviet components, a bunch of bodge wire, and exactly zero transistors. He’s building a hexadecimal display module using only relays and diodes. It’s absurd, but still very very cool.

The inspiration for this build comes from homebrew computing. With this, there’s a recurring problem of displaying the status of a bus. Sure, a bank of LEDs will work, but then you have to count to F. The better solution to this is a hexadecimal display. The best solution to this problem is using Numitrons — seven segment Nixies, basically — and doing it all with relays and diode steering.

This module accepts four bits as an input and uses a clever arrangement of diodes to turn those four signals into the digits 0-F. Yes, it’s hexadecimal, but that’s just what you do when you’re building your own computer.

Right now, [Yann] has one module on a slim-profile protoboard that should stack easily enough for an 8 or even a 16-bit wide bus. That’s four tubes and hundreds of diodes for the 16-bit version, but the good news is all of these modules are identical, vastly simplifying the construction of the display panel of a homebrew computer.

Roomba-Riding Beer Butlers Will Serve Us All

[Josh] isn’t one to refuse a challenge, especially when robots are involved. The latest dare from friends and family? Build a beer robot that can bring beverages at everyone’s beck and call.

The build consists of two main parts: the refrigerated cooler and the butler part, which comes courtesy of a Roomba Discovery from a fellow roboticist. [Josh] is basing the design on double-walled and insulated restaurant coolers. He built the refrigerated beverage hold from two stainless steel trash cans, sized an inch or so apart in diameter, and filled the gap with expanding foam insulation. He then cut away several inches from the bottom of the liner can to make room for the cooling unit, reinstalled the drip tray, and made a [airflow-allowing platform] by drilling a bunch of holes in an antimicrobial plastic cutting board.

At first, he tried a Peltier unit from an electric Igloo cooler, but that doesn’t work as well as [Josh] hoped, so he’s redesigning the can to use a mini fridge compressor. This meant making custom evaporator and condenser coils from copper tubing to match the compressor’s load spec. Go through [Josh]’s build logs over on IO and you’ll get a free mini-course on expanding foam and refrigeration.

[Josh] is currently working on some different butler modes for this robot. These run the gamut from simply sitting nearby with cold beverages and opening with the wave of a hand to doing voice-triggered beverage butler-ing at everyone’s beck and call. We applaud his efforts thus far and will be following this one with great thirst interest to see how he handles navigation and voice control.