What’s Your Fidget Spinner Say?

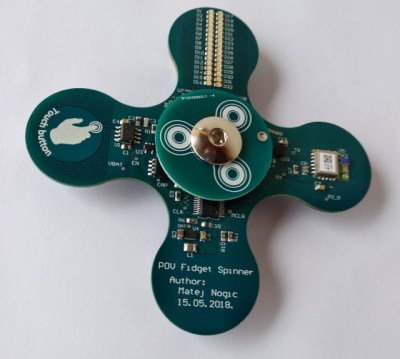
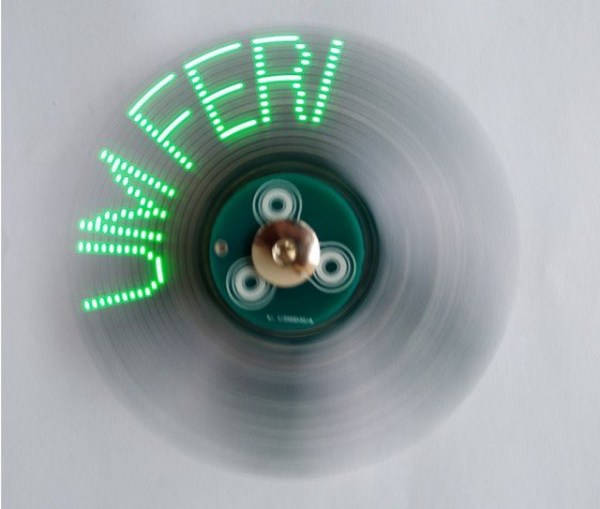
The persistence of vision (POV) optical illusion is pretty common in cheap toys nowadays, but how cool would it be to have your own programmable POV message board? German electronics grad student [Matej] has luckily created an open source fidget spinner with a fully customizable POV display that lets you share whatever thoughts you’d like fellow fidget spinning friends to know.

The displayed graphics don’t rely on rotation velocity, thanks to a solution that tracks the rotation angle. Unlike over POV devices, the POV fidget spinner displays the same graphics at higher and lower rotational speeds, which is useful considering the fidget spinner doesn’t automatically spin at the same rotational speed for every user. It also doesn’t require a constant speed for the image to be displayed correctly, unlike POV fans or clocks.

Continue reading “What’s Your Fidget Spinner Say?”

Getting The Heat On With A Thermal Camera

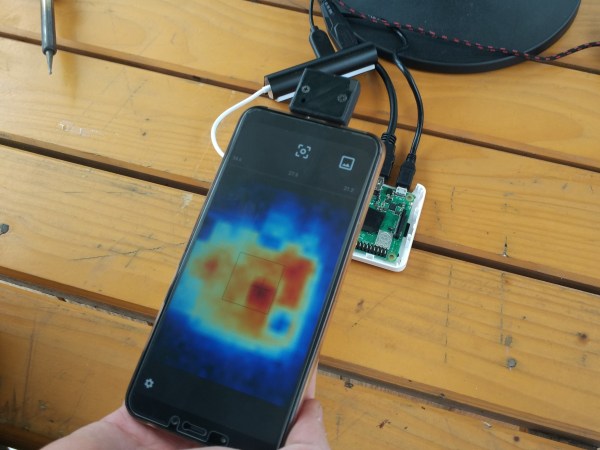
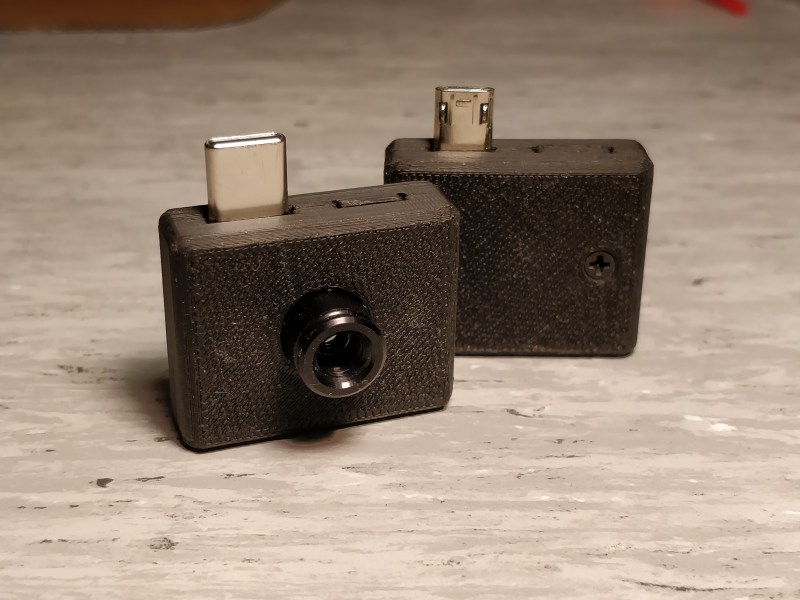
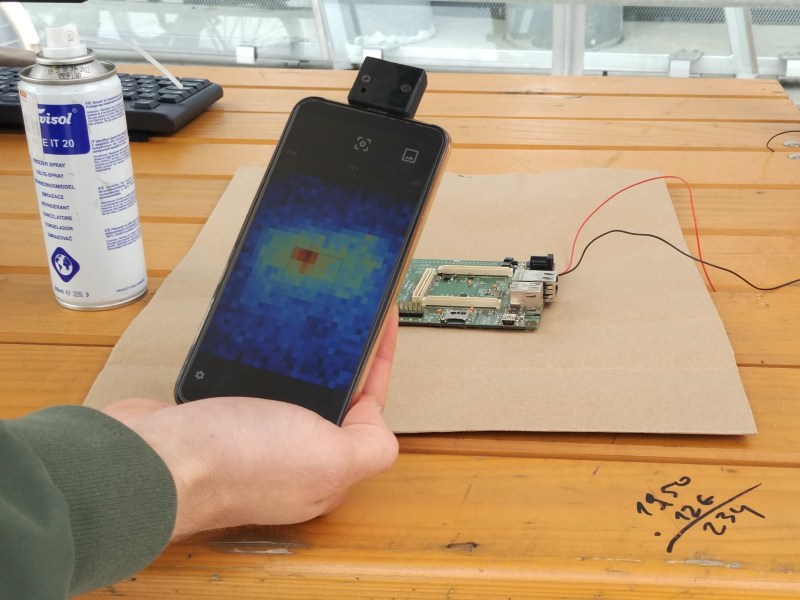
Need a quick way to tell your temperature before work tomorrow? Student maker [The Marpe] recently fashioned a sleek home-use thermal camera that even looks like a point and shoot. It works as an Android hardware add-on by integrating the readings from a MLX90640 far-infrared (FIR) thermal sensor with a STM32F042F6Px microcontroller. All this connects to an Android application via USB (MicroUSB or Type C).

On the app, users are able to view, take photos, and display the resulting thermal images from the open thermal camera. The code for the open Android application is also available on his GitHub.

The FIR sensors contain a small array of IR pixels, integrated to measure the ambient temperature of the internal chip, and supply sensor to measure the VDD. Each pixel on the sensor array responds to the IR energy focused on it to produce an electronic signal, which is processed by the camera processor to create a map of the apparent temperature of the object. The outputs of the sensors and VDD are stored in an internal RAM and are accessible through 3.3V I2C. They’re not only low-cost and fairly high resolution, but also available by order on Digi-Key.

The microcontroller is based on the STM32 platform, with 32-bit performance, low-power operation (at 2V to 3.6V and 48 MHz) and is fairly low-cost. The custom-designed PCBs are fitted inside a 3D-printed casing with M2.5 inserts to ease assembly. [The Marpe] used an Esra soldering iron to create a heat insert tool for easier assembly and more consistent results with the heat inserts, which made for a nicer overall finish.

The project has since been presented at the Ljublana Mini Maker Faire in Slovenia and the Trieste Mini Maker Faire in Italy. Here, the open thermal camera is being tested out on a faulty PCB with a shorted component, showing the location of the short on the Android application’s thermal camera display.

Other uses for the camera could be home insulation inspection, water leakage detection, wildlife observation, or even figuring out if your soldering iron is hot enough to use. We’ll say it’s a pretty useful DIY project!

Can You Read Me The Time?

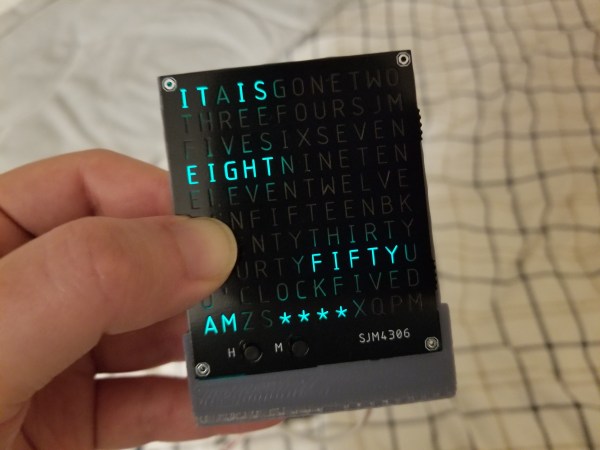
If you’re like the average clock user, you’ve probably gotten annoyed at reading analog clocks before. Typically, the solution is just to use a digital timepiece, but [sjm4306] has opted to make a small word clock that you can carry with you wherever you go to remind you of the time in the English language.

Unlike a similar project made by [Gordan Williams], which uses an 8 x 8 LED matrix with an inkjet printed overlay, this small word clock uses a 3D-printed light box to achieve its letter matrix. In fact, they were inspired by all of the existing DIY word clock designs using anything from off-the-shelf LED arrays, transparency masks and WS2812s.

The design uses a home-brewed PCB design that runs off 5 V via USB. The design places the letters on the top stop and restricts layers to keep the solder mask and copper from obstructing the light. The bottom side uses the same design principle with a square shape that overlaps the letter. In order to block light between adjacent letters, the 3D-printed light box comes into play.
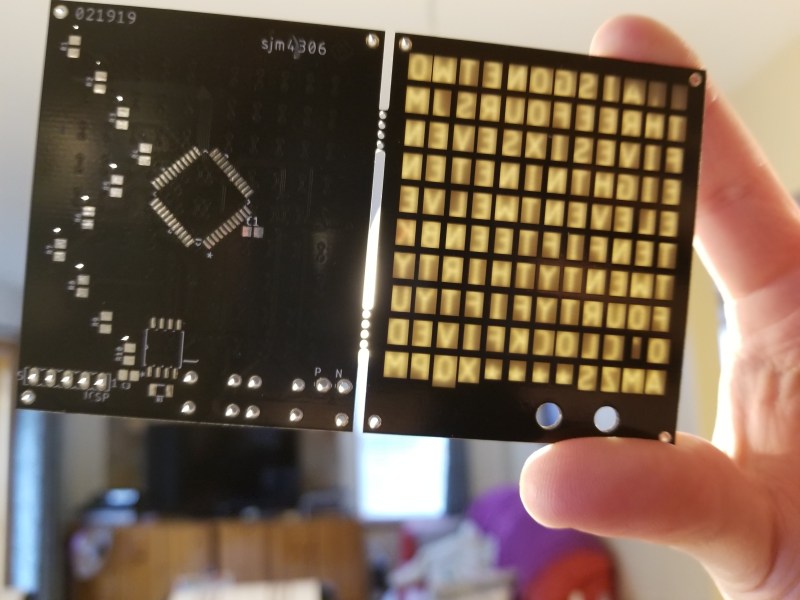
One design challenge for the letter matrix was fitting all possible minutes into the array. Rather than making a larger array of letters, [sjm4306] had the clock describe the time down to five-minute intervals then add asterisks for the full time. It’s a pretty understandable solution for keeping the design simple, and the letters all fit onto the design so well!
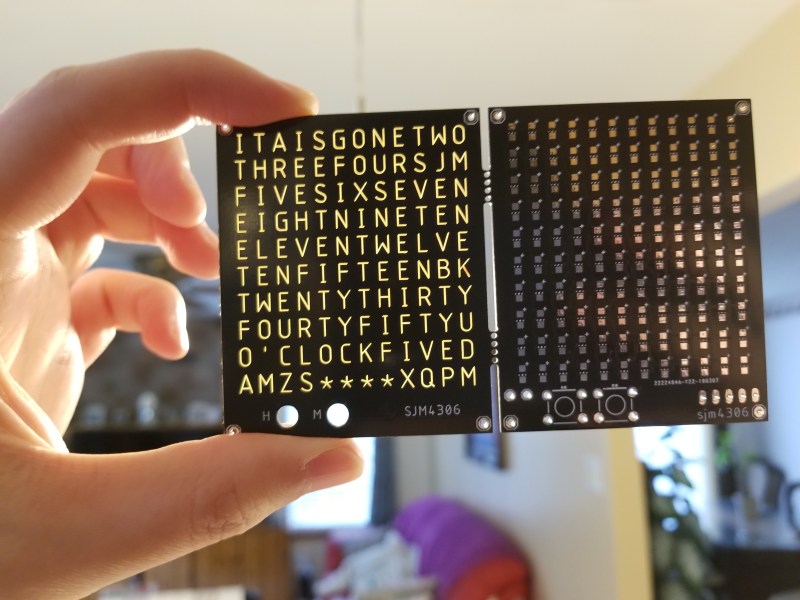
Using a pin map assigned to the I/O for the rows and columns of the array, the software toggles the states of the pins as a switch statement. For scanning the matrix, the software uses an interrupt that draws the current column of LEDs and updates the display image before incrementing to the next column. By skipping or not skipping cycles, this allows the display to look brighter or dimmer.

The time tracking is fairly simple, using a DS1302 serial real time clock chip – it even charges a super capacitor to keep time after power is removed!

To tackle the light scattered internally in the PCB’s FR4 material, a separator is used to contain the light. As a low-cost solution, while there is still some amount of light diffused, it’s definitely better than without the separator.

Almost all of the files used for building the small word clock are available on [sjm4306]’s project page, including the software and design files. It hopefully won’t be too long before we start seeing more of these low-cost word clock designs!

Continue reading “Can You Read Me The Time?”

A Stylish Home For Your Next ESP Project

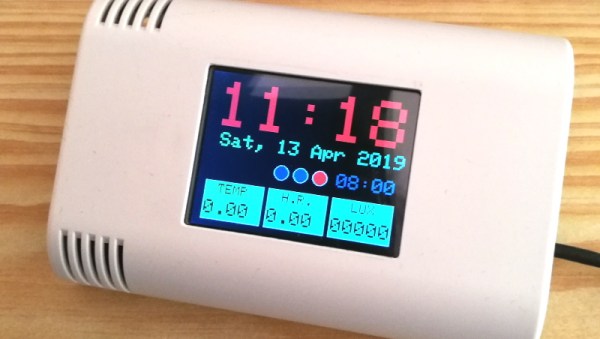
The ESP8266 and ESP32 are fast becoming the microcontroller of choice for, well, everything. But one particular area we’ve seen a lot of activity in recently is home automation; these boards make it so incredibly easy and cheap to get your projects online that putting together your own automation system is far more appealing now than it’s ever been. Capitalizing on that trend, [hwhardsoft] has been working on a ESP enclosure that’s perfect for mounting on the living room wall.

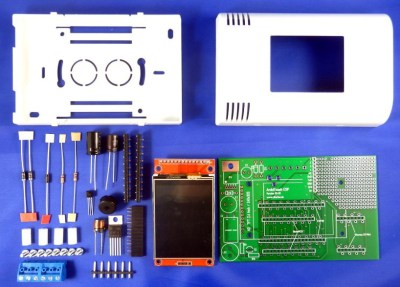
Of course, there’s more to this project than an admittedly very nice plastic box. The system also includes a ILI9341 2.4 inch touch screen LCD, an integrated voltage regulator, and even a section of “perfboard” that gives you a spot to easily wire up ad-hoc circuits and sensors. You don’t even need to switch over to the bare modules either, as the PCB is designed to accommodate common development boards such as the Wemos D1 Mini and NodeMCU.

Despite its outward appearance, this project is very much beginner friendly. Utilizing through hole components, screw down terminals, and a impeccably well-labeled silkscreen, you won’t need to be a hardware expert to produce a very slick gadget the whole family can appreciate.

Much like the HestiaPi project we covered a few months back, this project takes a cheap and readily available development board and turns it into something that has all the trappings of a commercial offering. These projects are reminders that the line between built and bought is only getting blurrier as time goes on.

Continue reading “A Stylish Home For Your Next ESP Project”

Pew Pew In The Palm Of Your Hand

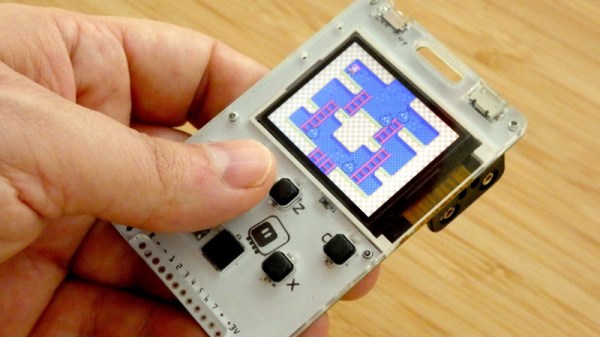
It’s often said that “getting there is half the fun”, and we think that can be just as true when building hardware as it is during the roadtrip to your favorite hacker con. Many of us enjoy the process of planning, designing, and building a new gadget as much as playing with it when it’s done. We get the impression [Radomir Dopieralski] feels the same way, as he’s currently working on yet another iteration of his PewPew project.

For the uninitiated, [Radomir] has already created a number of devices in the PewPew line, which are designed to make programming games on “bare metal” easier and more approachable for newcomers by using CircuitPython.

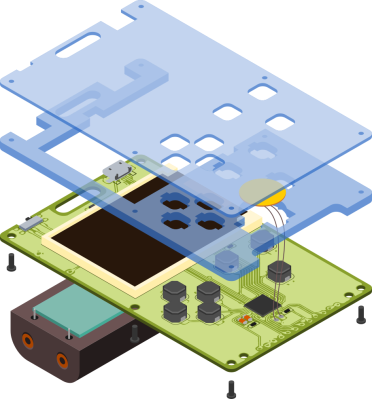
The original version was a shield for the Adafruit Feather, which eventually evolved into a standalone device. The latest version, called the M4, includes many niceties such as a large TFT screen and an acrylic enclosure. It’s also switched over to the iconic Game Boy layout, to really drive home that classic gaming feel.

As [Radomir] explains, previous versions of the PewPew were designed to be as cheap and easy to manufacture as possible, since they were to be used in game programming workshops. But outside of that environment, they left a little something to be desired. With the M4, he’s created something that’s much closer to a traditional game system. In that respect it’s a bit like the Arduboy: you can still use it to learn game development, but it’s also appealing enough that you might just play other people’s games on it instead.

Smart Thermometer Probes First, Asks Questions Later

As flu season encroaches upon the northern hemisphere, doctor’s offices and walk-in clinics will be filled to capacity with phlegm-y people asking themselves that age-old question: is it the flu, or just a little cold? If only they all had smart thermometers at home that can tell the difference.

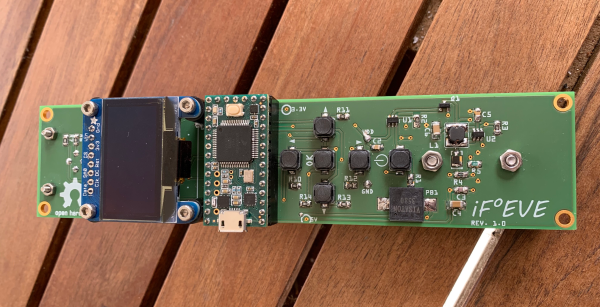
Typically, a fever under 101°F (38.5°C) in adults and 100.4°F (38°C) in children is considered low-grade, and thus is probably not the flu. But who can remember these things in times of suffering? [M. Bindhammer]’s iF°EVE is meant to be a lifesaving medical device that eliminates the guesswork. It takes readings via 3D printed ear probe mounted on the back, and then asks a series of yes/no questions like do you have chills, fatigue, cough, sore throat, etc. Then the Teensy 3.2 uses naive Bayes classification to give the probability of influenza vs. cold. The infrared thermometer [M.] chose has an accuracy of 0.02°C, so it should be a fairly reliable indicator.

Final determinations should of course be left up to a throat swab at the doctor’s office. But widespread use of this smart thermometer could be the first step toward fewer influenza deaths, and would probably boost the ratio of doctors to patients.

A Curiously Strong Z80 In Your Pocket

Like many hackers, [Tom Szolyga] has soft spot for the venerable Z80. The number of instructions and registers made it relatively easy to program in ASM, and he still has fond memories of the refreshingly straightforward CP/M operating system he used to run on them back in the day. In fact, he loves Z80 computers so much he decided to build one that he could carry around in his pocket.

The result is the Minty Z80, so-called because it lives inside a tin formerly inhabited by every hacker’s favorite curiously strong mint. But the goal of this build wasn’t just to make it small, but also make it convenient to work with. [Tom] is using a ATmega32A to help interface the Z84C0008 microprocessor with the modern world, which allows for niceties such as support for a micro SD card. There’s no onboard USB-to-serial capability, but with an external adapter connected to the Minty’s header, it’s easy to use log into this microcosm of classic computing with a terminal emulator running on a computer or mobile device.

[Tom] has provided the schematics and Bill of Materials for the Minty Z80 on the project’s Hackaday.io page, but as of the latest update, he’s holding off on releasing the board files until he’s sure that all the bugs have been worked out. There’s no word yet if he found any show stoppers in the first iteration of the board design, but he’s posted a picture of the fully assembled miniature retrocomputer in all its glory which seems like a good sign.

The design of the Minty Z80 is similar to that of the Z80-MBC2 by [Just4Fun], but on an even smaller scale. It’s encouraging to see several projects leveraging modern design and components to prevent classic computing from becoming little more than a distant memory.