WiringPi Library To Be Deprecated

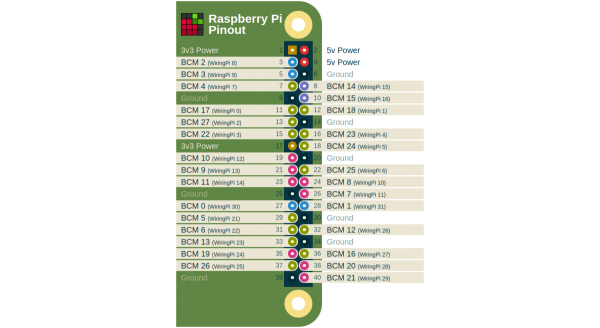
Since the release of the original Raspberry Pi single board computer, the WiringPi library by [Gordon] has been the easy way to interface with the GPIO and peripherals – such as I2C and SPI – on the Broadcom SoCs which power these platforms. Unfortunately, [Gordon] is now deprecating the library, choosing to move on rather than deal with a community which he no longer recognizes.

Among the points which he lists are the (commercial) abuse of his code, and the increasing amount of emails and messages on social media from folk who either failed to read the friendly manual, or are simply rude and inconsiderate. As [Gordon] puts it, WiringPi was never meant to be statically linked into code, nor to be used with anything other than C and RTB BASIC programmers. He never supported the use of the library with other languages, or having it statically integrated into some Java/JavaScript/NodeJS project.

As this secondary use is what’s draining the fun out of the project, he has decided to put out one final release, before making it a closed-source project, for use by himself and presumably paying clients. What the impact of this will be has to be seen. Perhaps a new fork will become the new ‘WiringPi’?

Suffice it to say, none of this is a good thing. The illegal use of open source code and the support nightmare that gets poured on the authors of said code by less than informed users is enough to drive anyone away from putting their projects out there. Fighting abuse and junking the ‘spam’ is one way to deal with it, but who has the time and energy (and money) for this?

What are your thoughts on this news, and this issue in general? How should an open source developer deal with it?

Thanks to [Dirk-Jan Faber] for sending this one in.

Hackable Ham Radio Multitool Contributes To Long Term Survival Of The Hobby

Ham radio, especially the HF bands, can be intimidating for aspiring operators, many being put off by the cost of equipment. The transceiver itself is only part of the equation and proper test and measurement equipment can easily add hundreds of dollars to the bill. However, such equipment goes a long way to ease the frustrations of setting up a usable station. Fortunately [Ashhar Farhan, VU2ESE] has been at it again, and recently released the Antuino, an affordable, hackable test instrument for ham radio and general lab for use.

As you can probably guess from the name, it is primarily intended for testing antennas, and uses an Arduino Nano as a controller. It has quite a list of measurement functions including SWR, field strength, cable loss, RF cable velocity, modulation, and frequency response plotting. It also provides a signal source for testing. Its frequency range includes the HF and VHF bands, and it can even work in the UHF bands (435Mhz) if you are willing to sacrifice some sensitivity. The software is open source and available with the schematics on Github.

Most of the active ham radio operators today are of the grey haired, retired variety. If the hobby is to stand any chance of outliving them, it needs to find a way to be attractive to the younger generations who grew up with the internet. The availability of affordable and hackable equipment can go long way to making this happen, and [Ashhar Farhan] has been one of the biggest contributors in this regard. His $129 μBITX HF SSB/CW transceiver kit is by far the best value for money general coverage HF radio available.

See a short demonstration of the Antuino video after the break

Continue reading “Hackable Ham Radio Multitool Contributes To Long Term Survival Of The Hobby”

Tiny Woodshop Is Packed With Space-Saving Hacks

Fair warning: once you’ve watched [Stephen]’s tiny workshop tour, you will officially be out of excuses for why you need to expand your workshop. And, once you see his storage and organization hacks, you’ll be shamed into replicating some in whatever space you call home.

[Stephen]’s woodshop is a cozy 6′ x 8′ (1.8 m x 2.4 m) garden shed. The front wall is almost entirely occupied by the door and a window, reducing the amount of wall space available but providing ample natural light and keeping the small space from inducing claustrophobia. Absolutely every square inch of the remaining space is optimized and organized. [Stephen] wisely eschews bulky cabinets in favor of hanging tool racks, all mounted flexibly to the wall on French cleats. Everything has a place, and since every hand tool is literally within arm’s reach, it stays stored until it’s needed and goes right back when it’s done. The shop boasts way more than hand tools, though; a lathe, drill press, thickness planer, sander, air compressor, scroll saw, band saw, and even a table saw all fit in there. There’s even dust collection courtesy of “The Beast”, [Stephen]’s DIY dust extractor.

No matter whether you work in wood, metal, or silicon, we could all learn some lessons from [Stephen]’s shop. It’s a model of efficiency and organization, and while he’s not likely to build a full-size [Queen Anne] dresser in there, it’s clear from his blog that he gets a lot done with it. Too bad we missed this one the last time we did a roundup of tiny shops.

Continue reading “Tiny Woodshop Is Packed With Space-Saving Hacks”

Stunning 4-Cylinder Solenoid Motor Should Be A Hit With Subaru Fans

As far as electric propulsion is concerned, the vast majority of applications make use of some kind of rotational motor. Be it induction, universal, brushed or brushless, these are the most efficient ways we have to do mechanical work with electricity. There are other, arcane methods, though – ones which [Maker B] explores with this 4-cylinder solenoid engine.

The principle of the solenoid engine is simple. Cylinders are wound with coils to act as solenoids, with the piston acting as the armature. When the solenoid is energised, it pulls the piston into the cylinder. The solenoid is then de-energised, and the piston can return to its initial position. The piston is coupled to a crankshaft via a connecting rod, and a flywheel is used to help the motor run continually. These are also known as reciprocating electric motors.

[Maker B]’s build is a 4-cylinder design in a boxer configuration. Produced with basic hand-operated machine tools, the build process is one to watch. Aluminium and brass are carefully crafted into the various components of the motor, and parts are delicately assembled with small fasteners and plenty of retaining compound. Solenoid timing is via a series of microswitches, installed neatly in the base of the motor and actuated by the crankshaft.

While solenoid motors are inefficient, they’re quite something to watch in action. This one is no exception, with the motor spinning up to 1100 rpm when running at 7.2 volts. We’d love to see some data on the power output and efficiency too. It’s possible to build solenoid motors in different configurations, too – this radial build is particularly fun. Video after the break.

Continue reading “Stunning 4-Cylinder Solenoid Motor Should Be A Hit With Subaru Fans”

Smart Thermometer Probes First, Asks Questions Later

As flu season encroaches upon the northern hemisphere, doctor’s offices and walk-in clinics will be filled to capacity with phlegm-y people asking themselves that age-old question: is it the flu, or just a little cold? If only they all had smart thermometers at home that can tell the difference.

Typically, a fever under 101°F (38.5°C) in adults and 100.4°F (38°C) in children is considered low-grade, and thus is probably not the flu. But who can remember these things in times of suffering? [M. Bindhammer]’s iF°EVE is meant to be a lifesaving medical device that eliminates the guesswork. It takes readings via 3D printed ear probe mounted on the back, and then asks a series of yes/no questions like do you have chills, fatigue, cough, sore throat, etc. Then the Teensy 3.2 uses naive Bayes classification to give the probability of influenza vs. cold. The infrared thermometer [M.] chose has an accuracy of 0.02°C, so it should be a fairly reliable indicator.

Final determinations should of course be left up to a throat swab at the doctor’s office. But widespread use of this smart thermometer could be the first step toward fewer influenza deaths, and would probably boost the ratio of doctors to patients.

Tool Rolls, The Fabric Design Challenge That Can Tidy Up Any Workshop

You’ve designed PCBs. You’ve cut, drilled, Dremeled, and blow-torched various objects into project enclosurehood. You’ve dreamed up some object in three dimensions and marveled as the machine stacked up strings of hot plastic, making that object come to life one line of g-code at a time. But have you ever felt the near-limitless freedom of designing in fabric?

I don’t have to tell you how satisfying it is to make something with your hands, especially something that will get a lot of use. When it comes to that sweet cross between satisfaction and utility, fabric is as rewarding as any other medium. You might think that designing in fabric is difficult, but let’s just say that it is not intuitive. Fabric is just like anything else — mysterious until you start learning about it. The ability to design and implement in fabric won’t solve all your problems, but it sure is a useful tool for the box.

WoF? Fat quarter? How much is a yard of fabric, anyway?

To prove it, I’m going to take you through the process of designing something in fabric. More specifically, a tool roll. These two words may conjure images of worn, oily leather or canvas, rolled out under the open hood of a car. But the tool roll is a broad, useful concept that easily and efficiently bundles up anything from socket wrenches to BBQ utensils and from soldering irons to knitting needles. Tool rolls are the best in flexible, space-saving storage — especially when custom-designed for your need.

In this case, the tools will be pens, notebooks, and index cards. You know, writer stuff. But the same can just as easily organize your oscilloscope probes. It’s usefully and a great first foray into building things with fabric if this is your first time.

Continue reading “Tool Rolls, The Fabric Design Challenge That Can Tidy Up Any Workshop”

Superbly Synchronized Servos Swaying Softly

LEDs and blinky projects are great, and will likely never fade from our favor. But would you look at this sweeping beauty? This mesmerizing display is made from 36 micro servos with partial Popsicle sticks pasted on the arms. After seeing a huge display with 450 servos at an art museum, [Doug Domke] was inspired to make a scaled-down version.

What [Doug] didn’t scale down is the delightful visuals that simple servo motion can produce. The code produces a three-minute looping show that gets progressively more awesome, and you can stare at that after the break. Behind the pegboard, a single, hardworking Arduino Uno controls three 16-channel PWM controllers that sweep the servos. We like to imagine things other than Popsicle sticks swirling around, like little paper pinwheels, or maybe optical illusion wheels for people with strong stomachs.

You won’t see these in the video, but there are five ultrasonic sensors mounted face-up on the back of the pegboard. [Doug] has optional code built in to allow the servo sticks to follow hand movement. We hope he’ll upload a demo of that feature soon.

Servos can be hypnotic as well as helpful, as we saw in this 114-servo word clock.

Continue reading “Superbly Synchronized Servos Swaying Softly”