Bee Minder Proves Not Even Bees Are Safe From Surveillance States

We all know how important bees are to our ecosystems and [Kris Winer]’s bee monitor provides a great way to monitor these amazing but delicate creature’s habitats, hopefully alerting us before a disaster strikes a vital hive.

The board is based around LoRa sensor tile called Cicada but redesigned to make it smaller and cheaper. LoRa is a popular low-power wide-area network running on sub-Ghz bands designed exactly for applications like this. This board has a nice suite of sensors. It can detect UVA, UVB, and the visible spectrum of light. It can also observe the temperature, pressure, and humidity. Importantly for bees, the accelerometer can detect the various vibrations of the hive as well as disaster events like vandalism.

The data is all logged into a Cayenne dashboard which the prospective farmer could view and analyze from anywhere. [Kris] mentions that the board is relatively easy to re-spin with a different sensor suite depending on the application. Technology like this can go along way towards a more sustainable future.

Protect Your Batteries Before You Wreck Your Batteries

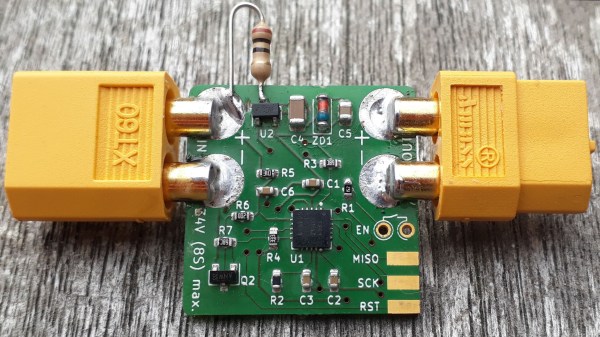
[Jan] is solving a problem many of us have had, deeply discharging our project’s batteries and potentially damaging the cells.

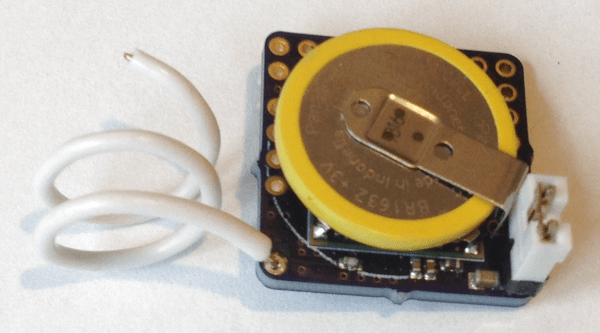
His board can handle batteries from 6 to 34 volts and supports both LiPo or Lion batteries. The board can be flexible about its cut-off voltage. It also has a feature we really like; the user can set a delay before it shuts off the battery: useful in cases where a heavy peak current draw causes the battery to operate at a lower-than-threshold voltage for a few seconds. Once the board is shut down it takes a manual reset to allow power to be drawn again.

His latest iteration of the board is an impressive 1 sq. inch in size! This can fit in just about any project and it’s even flexible in the choice of battery connector. Next time we have a high current draw project with expensive batteries or maybe a monitoring device that’s expected to run a long time we may throw one of these boards in there just to be safe.

A CNC Hacked Together In Pajamas

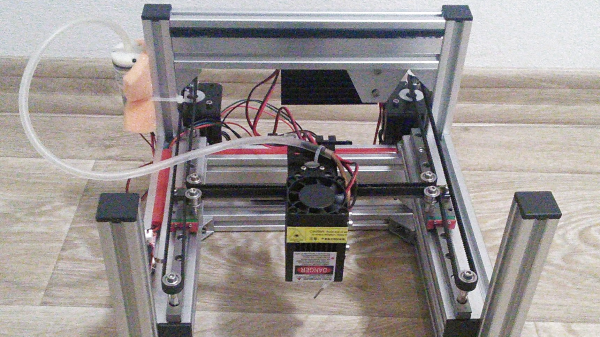
Sometimes you just gotta sit down and hack something together. Forget the CAD and the cool software toys; just hammer away until you have something working. That’s how [bobricus] ended up with this cute little laser engraver anyway.

For under $300 US of parts and a few nights working in his pajamas, the aptly named, pajama micro laser engraver is a pretty nice little machine for its class. Not having the space for a full size machine and not necessarily needing its capabilities he aimed to produce something compact.

The frame is aluminium extrusion, the movement is core-XY an H-bot on linear rails, and it appears to just be a grbl board with a Chinese laser module on it. He took a bit of care to make the frame a cube which allows him to easily vent the fumes from the little unit. There’s even a small air pump to blow the off-gas from the cutting away from the laser.

All in all a nice little hack useful for all sorts of things from solder masks to cutting wood veneers. You can see it zipping around in the video after the break.


Continue reading “A CNC Hacked Together In Pajamas”

Sixi 2, An Open Source 3D Printable 6 Axis Robot Arm

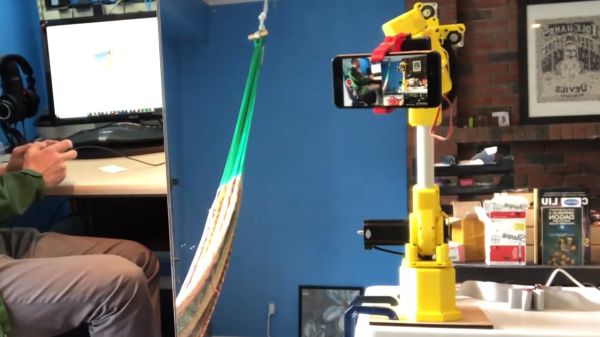
[Dan Royer] is taking some inspiration from Prusa’s business and is trying to build the same sort of enterprise around open source 3D printable robot arms. His 6 axis robot arm is certainly a strong first step on that road. 

As many people have learned, DIY robot arms are pretty difficult.  [Dan]’s arm has the additional complexity of being 3D printable with the ambitious goal of managing a 2kg payload at 840mm of reach. He’s already made significant progress. There’s a firmware, set of custom electronics, and a Fusion 360 project anyone can download and checkout. You can even control it with an Xbox controller.

The main board is an Arduino shield which outputs step and direction signals to stepper drivers. The gears are cycloidal and it appears there’s even some custom machining going on. When the parts are all laid out it becomes clear just how much effort has been put into this design.

It should be a pretty nice robot and might finally spur some of us to build the Iron Man style robot assistants we’ve always wanted. You can see the robot in action after the break.

Continue reading “Sixi 2, An Open Source 3D Printable 6 Axis Robot Arm”

Build Your Own Plasma Ball

The simple plasma ball – it graces science museums and classrooms all around the world. It shares a place with the Van de Graaf generator, with the convenient addition of spectacular plasma rays that grace its spherical surface. High voltage, aesthetically pleasing, mad science tropes – what would make a better DIY project?

For some background, plasma is the fourth state of matter, often created by heating a neutral gas or ionizing the gas in a strong electromagnetic field. The availability of free electrons allows plasma to conduct electricity and exhibit different properties from ordinary gases. It is also influenced by magnetic fields in this state and can often be found in electric arcs.

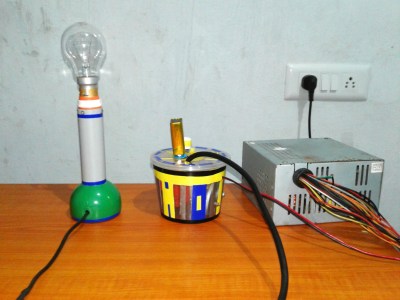
[Discrete Electronics Guy] built a plasma bulb using the casing from an old filament bulb and an ignition coil connected to a high voltage power supply. The power supply is based on the 555 timer IC. It uses a step-up transformer (the ignition coil) driven by a square wave oscillator circuit at a high frequency working as AC voltage. The square wave signal boosts the current into the power transistor, increasing its power.

The plasma is produced inside the bulb, which contains inactive noble gases. When touching the surface of the bulb, the electric arc flows to the point of contact. The glass medium protects the skin from burning, but the transparency allows the plasma to be seen. Pretty cool!

Continue reading “Build Your Own Plasma Ball”

Light Emitting Logic Gates Built From Scratch

What’s the weirdest computer you can think of? This one’s weirder.

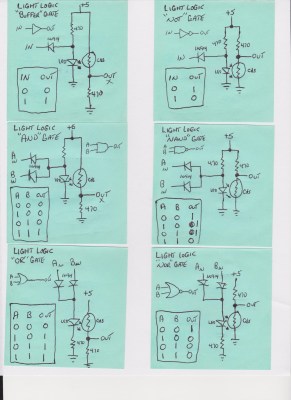
[Dr. Cockroach] figured out a way to create an inverting NOT gate from just one LED and two resistors (one being a photo-resistor). The Dr. has since built AND, NAND, OR, NOR, XOR and XNOR gates, as well as a buffer, incorporating light into every logic gate.

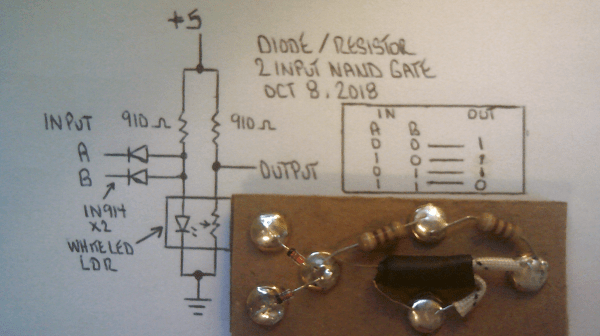
Traditional inverters – NOT gates – are already made with diodes (typically not light-emitting), resistors (typically not light-dependent), and bipolar transistors. The challenge was to reduce the number of transistors. The schematic from the very first test shows the slight modifications [Dr. Cockroach] made to incorporate light into the logic gate using a 910 Ohm, output LED, and an LED and LDR in parallel.

The output is initially 4.5V for logic 1 and 1.5V for logic 0. Adding two 1N914 diodes and an AND gate ahead of the inverter create a two-input NAND gate. With the two diodes reversed and a 910 Ohm resistor removed, a NOR gate is created.

The next step was to build a S-R latch using the NAND gates and inverters, which holds some basic memory. From there, with some size reductions, a Master-Slave J-K Flip Flop, similarly using NAND gates and inverters, can be built. The current state of the project is a working sequencer and counter. You can even see a smooth sine wave propagating through the LED chaser, which is typically built with ICs or transistors but in this case is built simply with LEDs, LDRs, resistors, and capacitors.

The upcoming plan is to use the gates to build a processor that only uses diodes, resistors, and capacitors. While it’s probably not going to be nearly as fast as any processors we have today, it should be interesting (and educational!) to be able to visually track the flow of data from one logic gate over to the next. Continue reading “Light Emitting Logic Gates Built From Scratch”

Daisy Chained Seven Segment Art Display


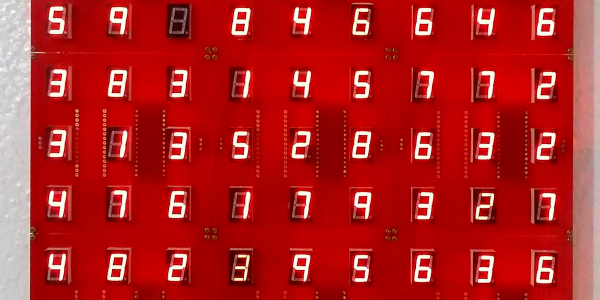
This seven segment art display makes use of a 81 seven segment red common cathode LED displays. The LEDs are arranged onto 100x100mm boards that each contain an Arduino Nano and 9 seven segment displays, daisy chained through three-pin headers located on the sides of the boards. The pins (power, ground, and serial) provide the signals necessary for propagating a program across each of the connected boards.

The first board – with two Arduino Nanos – sends instructions for which digits to light and drives the display, sending the instructions over to the next board on the chain.

In a multiplexed arrangement, a single Arduino Nano is able to drive up to 12 seven segment displays, but only 9 needed to be driven for the program, keeping D13’s built in LED and the serial pins free. Since no resistors are featured on the boards, current limiting is done through software. This was inspired by the Bubble LED displays on the Sinclair Scientific Calculator, and was done in order to achieve a greater brightness by controlling the current through the duty cycle.

The time between digits lighting up is 2ms, giving them some time to cool down. The animations in the demos featured falling and incrementing digits, as well as a random number generator using a linear feedback shift register.

Continue reading “Daisy Chained Seven Segment Art Display”