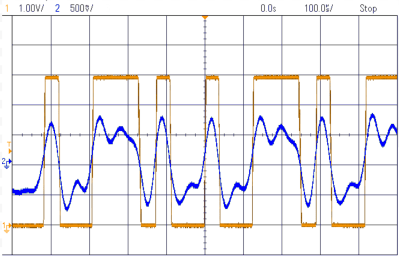
[Avian]’s dad got a new ham radio transceiver with a 3.5 mm jack, and his pile-of-cables got him a headphone cable from Bose headphones. He built a DB9 to 3.5 mm adapter with that one – and it failed to let data through, outputting distorted garbage of a waveform instead. With a function generator and an oscilloscope, [Avian] plotted the frequency response of the cable, which turned out to be quite far from a straight line. What was up?
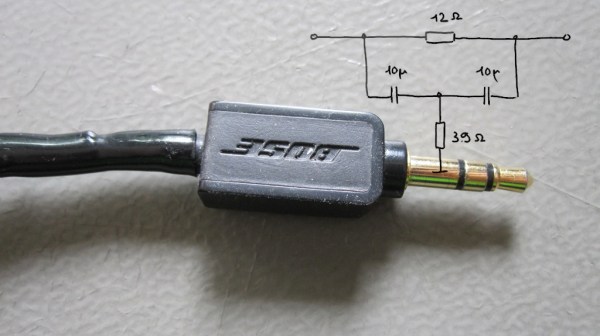
Taking the connector apart was a tricky job. A combination of blunt force and a nail polish remover soak didn’t quite get them all the way, so [Avian] continued to apply blunt force and took the jack apart with minimal casualties. Turned out that there was more to the 3.5 mm plug indeed — a whole PCB with a few resistors and capacitors, reverse-engineered into the schematic seen above.
Looks like Bose decided to tweak the audio characteristics of a specific pair of headphones, and an in-plug filter was, somehow, the most efficient solution. We probably shouldn’t expect to see this often, but it bears keeping in mind: next time your repurposed 3.5 mm cable doesn’t behave as expected, it would be prudent to do a capacitance test with your trusty meter or oscilloscope.
With how small MCUs have gotten, you can easily hide more than just a few capacitors! We don’t often see circuits built into cables, but when we do, it’s for malicious purposes.