Stuff An Android In Your Xbox Controller’s Memory Slot

What is this, 2009? Let’s face facts though – smartphones are computing powerhouses now, but gaming on them is still generally awful. It doesn’t matter if you’ve got the horsepower to emulate any system from the last millennium when your control scheme involves awkwardly pawing away at glass when what you need is real buttons. You need a real controller, and [silver] has the answer – a 3D printed phone mount for the original Xbox Controller.

It’s more useful than it initially sounds. The original Xbox used USB 1.1 for its controllers. With a simple OTG cable, the controllers can be used with a modern smartphone for gaming. The simple 3D printed clamp means you can have a mobile gaming setup for pennies – old controllers are going cheap and it’s only a couple of dollars worth of filament. The trick is using the controller’s hilariously oversized memory card slots – for some reason, Microsoft thought it’d be fun to repackage a 64MB flash drive into the biggest possible form factor they could get away with. The slots also acted as a port for online chat headsets, and finally in 2017, we’ve got another use for the form factor.

For the real die-hard purists, [silver] also shares a photo of a similar setup with a Nintendo 64 controller – including a big fat USB controller adapter for it, hanging off the back. Not quite as tidy, that one.

It’s a neat little project – we love to see useful stuff built with 3D printers. If you’ve been looking for something functional to print, this is it. Or perhaps you’d like to try these servo-automated 3D printed light switches?

Paper Airplane Machine Gun V2.0

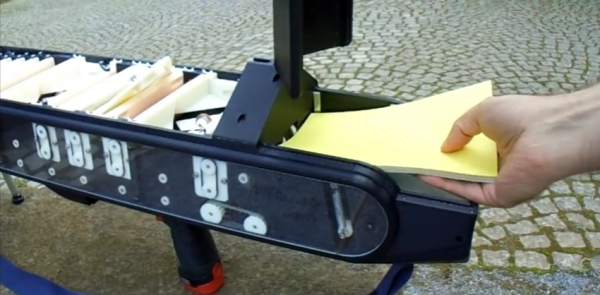
A little over two years ago we posted an amazing contraption that holds a stack of paper sheets, folds them into paper planes, and launches them. There’s now a newer version — the PFM A5 v2.0. It is over a meter long, weighs about 10 kilograms, and features a mind-boggling number of gears and moving parts. Video is embedded below.

In one end travels one sheet of paper after the next. At each stage in the process the paper is folded (symmetrically) and creased by a vertical wheel to make up the keel of the finished plane before launching out the other end. Amazing, and not a jam or “PC Load Letter” error message in sight!

This, of course, has a purpose… junk ads from the sky!

Continue reading “Paper Airplane Machine Gun V2.0”

Clear The Air Around Your CNC Router With A Custom Dust Shroud

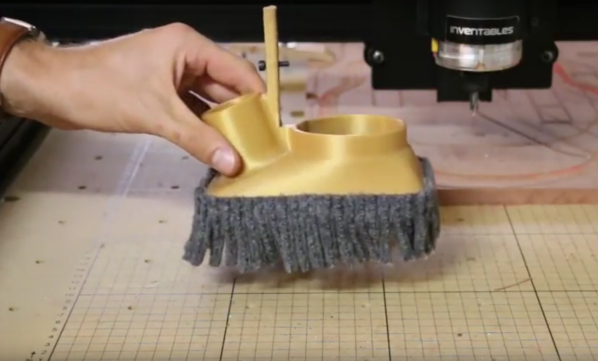
Using a CNC router is a dusty business if your material of choice is wood. Sure, you can keep things tidy by chasing the cutter around the table with a shop vac, but that sort of takes the fun out of having a machine that can make cuts without you. The big boy machines all have integrated dust collection, and now you can too with this 3D-printed CNC router dust shoe.

Designed specifically for the X-Carve with a DeWalt 611 router, [Mark Edstrom]’s brush is a simple design that’s almost entirely 3D printed. The shroud encloses the router body and clamps to the mounting bracket, totally surrounding the business end of the machine. The cup is trimmed with a flexible fringe to trap the dust and guide it to the port that fits a small (1-1/4″ diameter) shop vac hose. The hose is neatly routed along the wiring harness, and the suction is provided by a standard shop vac.

Files for the cup are up on Thingiverse; we suspect it’d be easy to modify the design to work with other routers and dust collectors. You might even find a way to shroud a laser cutter and capture the exhaust with a DIY filter.

Continue reading “Clear The Air Around Your CNC Router With A Custom Dust Shroud”

DIY Optical Sensor Breakout Board Makes DIY Optical Mouse

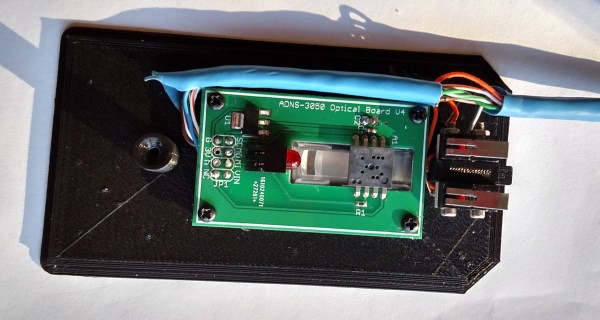
Wanting to experiment with using optical mouse sensors but a bit frustrated with the lack of options, [Tom Wiggins] rolled his own breakout board for the ADNS 3050 optical mouse sensor and in the process of developing it used it to make his own 3D-printed optical mouse. Optical mouse sensors are essentially self-contained cameras that track movement and make it available to a host. To work properly, the sensor needs a lens assembly and appropriate illumination, both of which mate to a specialized bracket along with the sensor. [Tom] found a replacement for the original ADNS LED but still couldn’t find the sensor bracket anywhere, so he designed his own.

Continue reading “DIY Optical Sensor Breakout Board Makes DIY Optical Mouse”

The Potowitzer: A Rapid Fire Potato Cannon

If you’ve ever fired a potato cannon, you’ll know that they are a raucous good time, but are somewhat clumsy to reload after each shot. Seeing an opportunity to improve on the design and minimize the delay between launches, [Danger First] have concocted a fast reloading potato cannon — or should I say — Potowitzer.

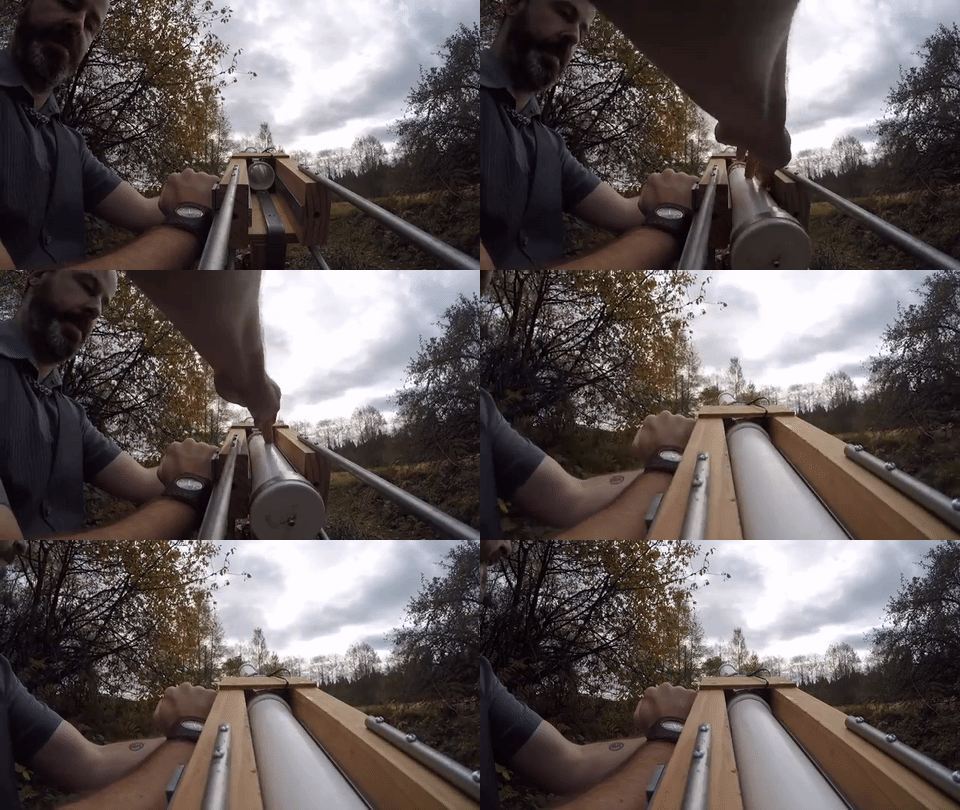
The key here is that they’ve gone through the extra effort of designing and building honest-to-goodness artillery rounds for their Potowitzer’s manual breech-loading mechanism. Foregoing the inconsistency of potatoes, they’ve 3D printed a bevy of bullets and sealed them with propane gas into PVC pipe cartridges. Metal contacts around the base to carry current from a BBQ lighter to the inside of the cartridge to ignite the propellant. Seeing it fire at about 18 rounds per minute is something special.

Continue reading “The Potowitzer: A Rapid Fire Potato Cannon”

Easy UFO Lights On Your Drone For Halloween

Sometimes it’s not so much what you put together, it’s how you use it. The folks at Adafruit have put up a project on how to dress up your drone with ‘UFO lights’ just in time for Halloween. The project is a ring of RGB LEDs and a small microcontroller to give any quadcopter a spinning ‘tractor beam light’ effect. A 3D printed fixture handles attachment. If you’re using a DJI Phantom 4 like they are, you can power everything directly from the drone using a short USB cable, which means hardly any wiring work at all, and no permanent changes of any kind to the aircraft. Otherwise, you’re on your own for providing power but that’s probably well within the capabilities of anyone who messes with add-ons to hobby aircraft.

One thing this project demonstrates is how far things have come with regards to accessibility of parts and tools. A 3D printed fixture, an off-the-shelf RGB LED ring, and a drop-in software library for a small microcontroller makes this an afternoon project. The video (embedded below) also demonstrates how some unfamiliar lights and some darkness goes a long way toward turning the otherwise familiar Phantom quadcopter into a literal Unidentified Flying Object.

Continue reading “Easy UFO Lights On Your Drone For Halloween”

Monstrous Suit Of Power Armor 3D Printed Over 140 Days

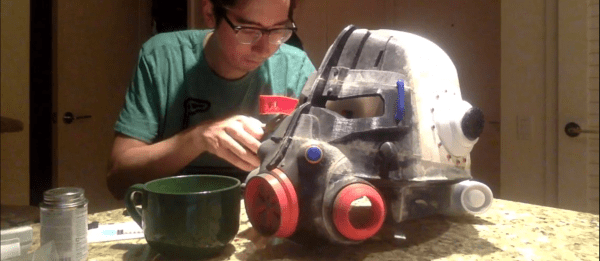
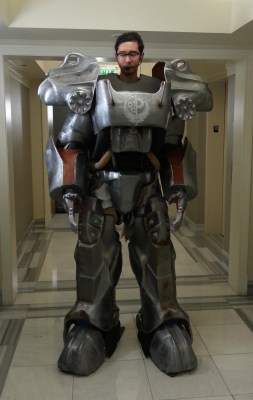
fallout-armour-3d-printed-no-helmet[hirocreations] printed an entire suit of enormous Fallout power armor on his Monoprice Maker Select 3D printer, which took some 140 days and over 120 pounds of IC3D PLA filament. Happily, [hirocreations] was able to arrange a sponsorship with IC3D for the build – who would be crazy enough to use so much filament over so long for an entire 7+ foot tall suit, right? Over those 140 days, the belts on the printer needed to be replaced twice but it otherwise chugged right along.

Most of the parts were printed at 0.46 mm layer height. Individual parts were welded (melted) together using what is essentially a soldering iron with a flat tip; many parts were too thin for any kind of joints or fixtures to be practical. Parts were smoothed with drywall spackle, lots of filler primer, and painted. Some of the parts – like the chest armor – are mounted on a frame made from PVC tubing. [hirocreations] may have gone through 120 pounds of filament, but the end result doesn’t weigh that much; the suit itself weighs in at 85-90 lbs, the rest of it went to support material, skirts, and print failures.

It was known from the start that weight could become a serious issue, so [hirocreations] went for a very light infill (10%) and 3-4 perimeter layers; he also extruded at a high temperature (~230C) which he said seemed to provide a very strong layer bond with the settings and filament he was using. So far, he says it’s taken some very hard knocks and nothing has broken or cracked. He has a short video series documenting the assembly, and you can see some of the raw armor parts before any finishing in one of the videos, embedded below.

Continue reading “Monstrous Suit Of Power Armor 3D Printed Over 140 Days”