While 3D printers of today are basically limited to plastics and resins, the holy grail of desktop fabrication is printing with metal. While we won’t be printing out steel objects on a desktop printer just yet, [Collin Ladd], [Ju-Hee So], [John Muth], and [Michael D. Dickey] from North Carolina State University are slowly working up to that by printing objects with tiny spheres of liquid metal.
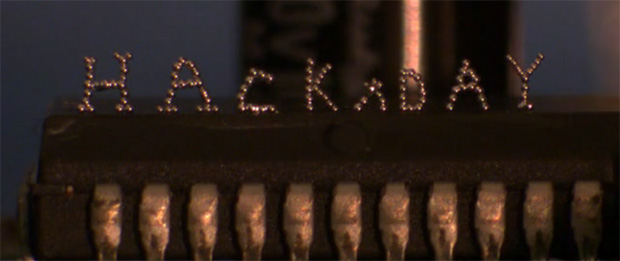
The medium the team is using for their metallic 3D prints is an alloy of 75% gallium and 25% indium. This alloy is liquid at room temperatures, but when exposed to an oxygen atmosphere, a very thin layer of oxide forms on a small metal bead squeezed out of a syringe. Tiny metal sphere by tiny metal sphere, the team can build up metallic objects out of this alloy, stacking the beads into just about any shape imaginable.
In addition to small metal spheres, [Collin] and his team were also able to create free-standing wires that are able to join electrical components. Yes, combined with a pick and place machine, a printer equipped with this technology could make true printed circuit boards.
Even though the team is only working on very small scales with gallium, they do believe this technology could be scaled up to print aluminum. A challenging endeavour, but something that would turn the plastic-squeezing 3D printers of today into something much more like the Star Trek replicators of tomorrow.
Video demo below, or check out [Collin]’s editing room floor and a vimeo channel. Here’s the paper if you’ve got a Wiley subscription.
Continue reading “3D Printing With Liquid Metals” →