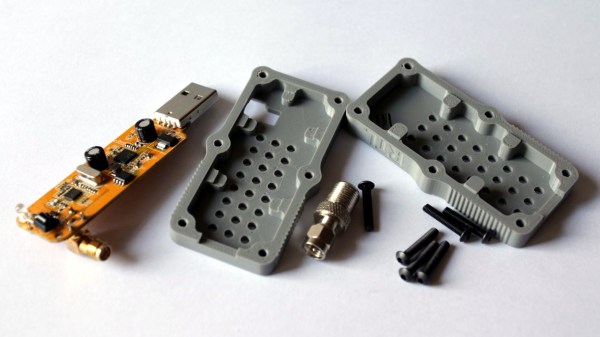
[ByTechLab] needed an enclosure for his R820T2 based RTL-SDR, which sports an SMA connector. Resolving to design and 3D print one in less than a day, he learned a few things about practical design for 3D printing and shared them online along with his CAD files.
The RTL-SDR is a family of economical software defined radio receivers, and [ByTechLab]’s’ enclosure (CAD files available on GrabCAD and STL on Thingiverse) is specific to his model. However, the lessons he learned are applicable to enclosure design in general, and a few of them specifically apply to 3D printing.
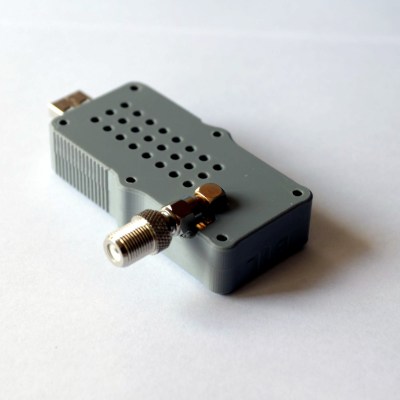
He started by making a basic model of the PCB and being sure to include all large components. With that, he could model the right voids inside the enclosure to ensure a minimum of wasted space. The PCB lacks any sort of mounting holes, so the model was also useful to choose where to place some tabs to hold the PCB in place. That took care of the enclosure design, but it also pays to be mindful of the manufacturing method so as to play to its strengths. For FDM 3D printing, that means most curved shapes and rounded edges are trivial. It also means that the biggest favor you can do yourself is to design parts so that they can be printed in a stable orientation without any supports.
This may be nothing that an experienced 3D printer and modeler doesn’t already know, but everyone is a novice at some point and learning from others’ experiences can be a real timesaver. For the more experienced, we covered a somewhat more in-depth guide to practical 3D printed enclosure design.
[ByTechLab]’s desire for a custom enclosure was partly because RTL-SDR devices come in many shapes and sizes, as you can see in this review of 19 different units (of which only 14 actually worked.)