Slow Cooking Filament

Getting good results from a 3D printer is like Goldilocks’ porridge. There are a lot of things that have to be just right. One common thing that gives people poor results is damp filament. This is especially insidious because the printer will work fine and then after some period time results degrade but it is no fault of the printer mechanics or electronics. There are many ways to attempt to dry filament, but [HydeTheJekyll] prefers using a slow cooker modified to operate with low air pressure.

We assume this works because the low pressure reduces the boiling point of water, allowing the water to boil off at temperatures that won’t distort the filament. The modifications aren’t very severe. You’ll need some hose and a pump along with some silicone caulk and petroleum jelly.

Continue reading “Slow Cooking Filament”

It’s UNIX. On A Microcontroller.

It’s difficult to convey in an era when a UNIX-like operating system sits in your pocket, how there was once a time when the mere word was enough to convey an aura of immense computing power. If you ran UNIX, your computer probably filled a room, and you used it for Serious Stuff rather than just checking your Twitter feed. UNIX machines may still perform high-end tasks, but Moore’s Law has in the intervening years delivered upon its promise, and your phone with its UNIX-like OS is far more powerful than that room-sized minicomputer of the 1970s. A single chip for a few cents can do that job, which begs the question: just how little do we need to run UNIX today? It’s something [Joerg Wolfram] could advise you upon, because he’s got a functional UNIX running on a microcontroller.

Of course, the UNIX in question is not exactly the same as the one you’d find on a supercomputer, either in the 1970s or now. Mini UNIX is a minimalist version of the operating system developed by [Heinz Lycklama] at Bell Labs four decades ago. It gives you a complete UNIX V6 system for the DEC PDP-11, but which needs only 56K of RAM, and no MMU. Emulating a PDP-11 on an STM32 microcontroller allows it to run happily, and while it’s not the most minimalist of microcontrollers it’s still a pretty cheap part upon which to run UNIX.

It’s doubtful whether a 1970s version of an operating system on a commodity microcontroller will take the world by storm, but that’s hardly the point of such a neat hack. It’s certainly not the first time we’ve seen similar work, though this PIC32 offering has a little more in the way of resources to offer.

Header image: Golonlutoj [CC BY-SA 3.0].

Hackaday Links Column Banner

Hackaday Links: June 3, 2018

All the Radio Shacks are dead. adioS, or something. But wait, what’s this? There are new Radio Shacks opening. Here’s one in Idaho, and here’s another in Claremore, Oklahoma. This isn’t like the ‘Blockbuster Video in Nome, Alaska’ that clings on by virtue of being so remote; Claremore isn’t that far from Tulsa, and the one in Idaho is in a town with a population of 50,000. Are these corporate stores, or are they the (cool) independent Radio Shacks? Are there component drawers? Anyone want to take a field trip and report?

A few years ago, [cnxsoft] bought a Sonoff WiFi switch to control a well pump. Despite this being a way to control the flow of massive amounts of water with an Internet of Things thing, we’re still rocking it antediluvian style, and for the most part this WiFi-connected relay worked well. Until it didn’t. For the past few days, the switch wouldn’t connect to the network, so [cnxsoft] cracked it open to figure out why. There was one burnt component, and more than one electrocuted insect. Apparently, an ant bridged two pins, was shortly electrocuted, and toasted a resistor. It’s a bug, a real bug, in an Internet of Things thing.

eInk is coming to license plates? Apparently. Since an eInk license plate already includes some electronics, it wouldn’t be much to add some tracking hardware for a surveillance state.

Hold up, it’s a press release about crypto hardware. No, not that crypto, the other crypto. Asus has announced a new motherboard that is capable of supporting twenty graphics cards. This isn’t a six-foot-wide motherboard; it’s designed especially for coin mining, and for that, the graphics cards really only need a PCIe x1 connection. The real trick here is not using PCIe headers, and instead piping everything over vertical-mount USB ports. Yes, this is a slight cabling nightmare. So, you still think the early 80s with fluorinert waterfalls and Blinkenlights that played Game of Life was the pinnacle of style in computer hardware? No, this is it right here.

Here’s a book you should readIgnition!: An Informal History of Liquid Rocket Propellants by John Drury Clark is a fantastic book about how modern liquid rocket fuel came to be. Want to know why 60s cartoons and spy movies always referenced a ‘secret rocket fuel formula’ when kerosene and liquid oxygen work just fine? This is that. Back when we covered it, the book, used, on Amazon, cost $500. It’s now in print again and priced reasonably. It’s on the Inc. 9 Powerful Books Elon Musk Recommends list, so you know it’s good. Thanks, [Ben] for sending this one in on the tip line.

Turning That Old Hoverboard Into A Learning Platform

[Isabelle Simova] is building Hoverbot, a flexible robotics platform using Ikea plastic trays, JavaScript running on a Raspberry Pi and parts scavenged from commonly available hoverboards.

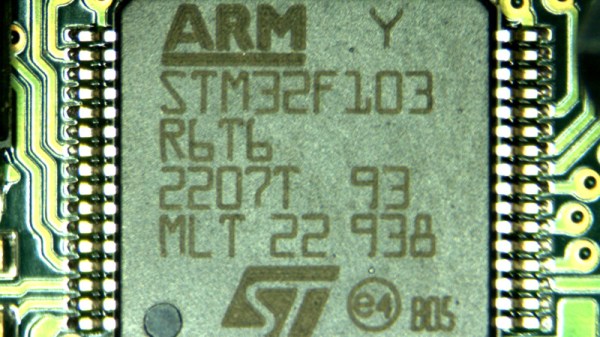
Self-balancing scooters a.k.a. Hoverboards are a great source of parts for such a project. Their high torque, direct drive brushless motors can drive loads of 100 kg or more. In addition, you also get a matching motor controller board, a rechargeable battery and its charging circuit. Most hoverboard controllers use the STM32F103, so flashing them with your own firmware becomes easy using a ST-link V2 programmer.

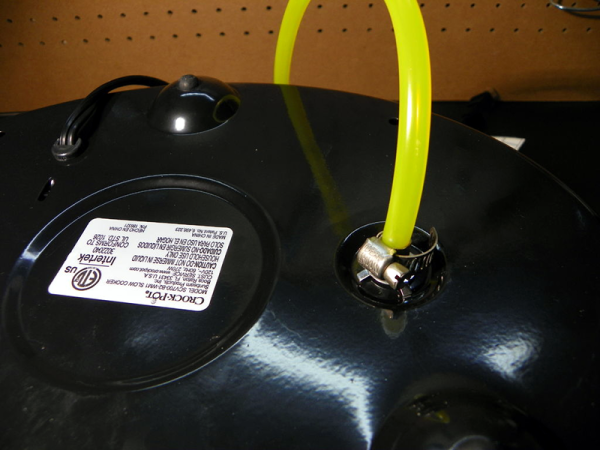
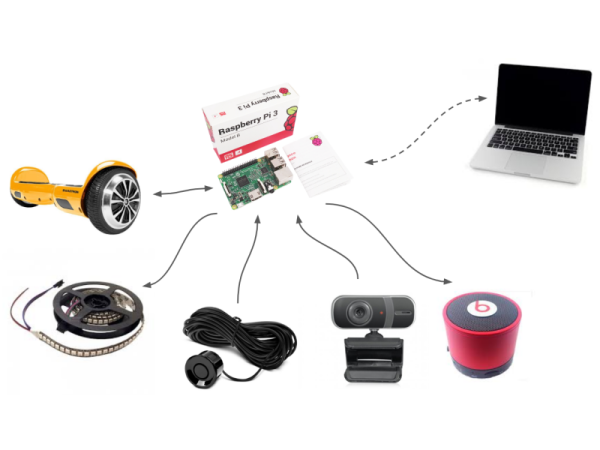
The next set of parts you need to build your robot is sensors. Some are cheap and easily available, such as microphones, contact switches or LDRs, while others such as ultrasonic distance sensors or LiDAR’s may cost a lot more. One source of cheap sensors are car parking assist transducers. An aftermarket parking sensor kit usually consists of four transducers, a control box, cables and display. Using a logic analyzer, [Isabelle] shows how you can poke around the output port of the control box to reverse engineer the data stream and decipher the sensor data. Once the data structure is decoded, you can then use some SPI bit-banging and voltage translation to interface it with the Raspberry Pi. Using the Pi makes it easy to add a cheap web camera, microphone and speakers to the Hoverbot.

Ikea is a hackers favourite, and offers a wide variety of hacker friendly devices and supplies. Their catalog offers a wide selection of fine, Swedish engineered products which can be used as enclosures for building robots. [Isabelle] zeroed in on a deep, circular plastic tray from a storage table set, stiffened with some plywood reinforcement. The tray offers ample space to mount the two motors, two castor wheels, battery and the rest of the electronics. Most of the original hardware from the hoverboard comes handy while putting it all together.

The software glue that holds all this together is JavaScript. The event-driven architecture of Node.js makes it a very suitable framework to use for Hoverbot. [Isabelle] has built a basic application allowing remote control of the robot. It includes a dashboard which shows live video and audio streams from the robot, buttons for movement control, an input box for converting text to speech, ultrasonic sensor visualization, LED lighting control, message log and status display for the motors. This makes the dashboard a useful debugging tool and a starting point for building more interesting applications. Check the build log for all the juicy details. Which other products from the Ikea catalog can be used to build the Hoverbot? How about a robotic Chair?

Continue reading “Turning That Old Hoverboard Into A Learning Platform”

3D Printed Clockwork Star Tracker

Astrophotography is one of those things you naturally assume must be pretty difficult; surely something so awesome requires years of practice and specialized equipment which costs as much as your car. You shake your fist at the sky (since you have given up on taking pictures of it), and move on with your life. Another experience you’ll miss out on.

But in reality, dramatic results don’t necessarily require sticker shock. We’ve covered cheap DIY star trackers before on Hackaday, but this design posted on Thingiverse by [Tinfoil_Haberdashery] is perhaps the easiest we’ve ever seen. It keeps things simple by using a cheap 24 hour clock movement to rotate a GoPro as the Earth spins. The result is a time-lapse where the stars appear to be stationary while the horizon rotates.

Using a 24 hour clock movement is an absolutely brilliant way to synchronize the camera with the Earth’s rotation without the hoops one usually has to jump through. Sure you could do with a microcontroller, a stepper motor, and some math. But a clock is a device that’s essentially been designed from the ground up for keeping track of the planet’s rotation, so why not use it?

If there’s a downside to the clock movement, it’s the fact that it doesn’t have much torque. It was intended to move an hour hand, not your camera, so it doesn’t take much to stall out. The GoPro (and other “action” cameras) should be light enough that it’s not a big deal; but don’t expect to mount your DSLR up to one. Even in the video after the break, it looks like the clock may skip a few steps on the way down as the weight of the camera starts pushing on the gears.

If you want something with a bit more muscle, we’ve recently covered a very slick Arduino powered “barn door” star tracker. But there’re simpler options if you’re looking to get some shots tonight.

Continue reading “3D Printed Clockwork Star Tracker”

$6 Weather Station Goes Where You Do

We admit, we see a lot of weather stations. What makes [Mike Diamond’s] take on this old favorite interesting is that it is tiny enough to carry with you, and uses your cell phone as a hotspot to deliver its data. Of course, that assumes you have a phone that can act as a hotspot.

The parts are straightforward, a power supply, an ESP8266, and a weather sensor board. It looks as though you could easily slip the whole affair into a tube or maybe a 3D printed enclosure. We were a little concerned about the bare wire used, but as [Mike] points out you can use insulated wire if you like, and we’d encourage you to do so.

Continue reading “$6 Weather Station Goes Where You Do”

Silicon Nanowires Create Flexible Photodetectors

Modern display and solar cell technologies are built with a material called Indium Tin Oxide (ITO). ITO has excellent optical transparency and electrical conductivity, and the material properties needed for integration in large-scale manufacturing. However, we’re not content with just merely “good enough” nowadays, and need better materials to build ever better devices. Graphene and carbon nanotubes have been considered as suitable replacements, but new research has identified a different possibility: nanowires.

Researchers from the Indian Association for the Cultivation of Science (IACS) and the Centre for Research on Adaptive Nanostructures and Nanodevices (CRANN) in Ireland have demonstrated a seamless silicon nanowire junction that can be used for photodetector and display technology.

Before you get lost in the jargon, let’s take a step back. A nanowire is just a very narrow length of wire, on the order of 1 nanometer across. When silicon is used at this scale, electrical charges can become stuck (called “charge trapping”), which means that the holes and electrons are separated, allowing for transistors and photovoltaics. By controlling where these holes form in the nanowire, you can create a “seamless” junction without using any dopant materials to create impurities, as is done in modern CMOS transistors

These material properties allow the functionality of a junction, but it still needs to be easily and repeatably manufactured. To solve this problem, the team put the nanowire transistors on a flexible polymer, which should enable flexible nanowire applications, such as a roll-up screen.

The first step towards a display is a simple photodetector, just consisting of a basic P-N junction, but they hope this technology will eventually be useful in “smart windows” due to the junctions’ applicability to photodetectors and cameras. Moving to emitting light for displays or creating a solar cell using this technology will probably take some time.

Do you have any experience with different materials for creating junctions? What would you do with a small, transparent photodetector? We’ve featured homebrew solar cells before, as well as creating DIY semiconductors. We’ve also seen silver nanowires for wearable circuits.

[Via IEEE Spectrum]