This is a tale of old CPUs, intensive SMD rework, and things that should work but don’t.
Released in 1994, Apple’s Powerbook 500 series of laptop computers were the top of the line. They had built-in Ethernet, a trackpad instead of a trackball, stereo sound, and a full-size keyboard. This was one of the first laptops that looked like a modern laptop.
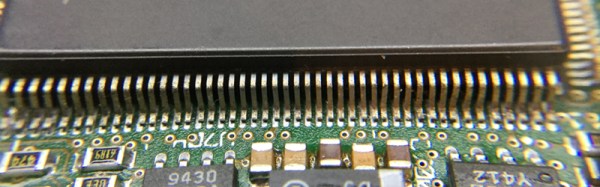
The CPU inside these laptops — save for the high-end Japan-only Powerbook 550c — was the 68LC040. The ‘LC‘ designation inside the part name says this CPU doesn’t have a floating point unit. A few months ago, [quarterturn] was looking for a project and decided replacing the CPU would be a valuable learning experience. He pulled the CPU card from the laptop, got out some ChipQuick, and reworked a 180-pin QFP package. This did not go well. The replacement CPU was sourced from China, and even though the number lasered onto the new CPU read 68040 and not 68LC040, this laptop was still without a floating point unit. Still, it’s an impressive display of rework ability, and generated a factlet for the marginalia of the history of consumer electronics.
Faced with a laptop that was effectively unchanged after an immense amount of very, very fine soldering, [quarterturn] had two choices. He could put the Powerbook back in the parts bin, or he could source a 68040 CPU with an FPU. He chose the latter. The new chip is a Freescale MC68040FE33A. Assured by an NXP support rep this CPU did in fact have a floating point unit, [quarterturn] checked the Mac’s System Information. No FPU was listed. He installed NetBSD. There was no FPU installed. This is weird, shouldn’t happen, and now [quarterturn] is at the limits of knowledge concerning the Powerbook 500 architecture. Thus, Ask Hackaday: why doesn’t this FPU work?