They’re back! The San Francisco autonomous vehicle hijinks, that is, as Waymo’s fleet of driverless cars recently took up the fun new hobby of honking their horns in the wee hours of the morning. Meat-based neighbors of a Waymo parking lot in the South Market neighborhood took offense at the fleet of autonomous vehicles sounding off at 4:00 AM as they shuffled themselves around in the parking lot in a slow-motion ballet of undetermined purpose. The horn-honking is apparently by design, as the cars are programmed to tootle their horn trumpets melodiously if they detect another vehicle backing up into them. That’s understandable; we’ve tootled ourselves under these conditions, with vigor, even. But when the parking lot is full of cars that (presumably) can’t hear the honking and (also presumably) know where the other driverless vehicles are as well as their intent, what’s the point? Luckily, Waymo is on the case, as they issued a fix to keep the peace. Unfortunately, it sounds like the fix is just to geofence the lot and inhibit honking there, which seems like just a band-aid to us.
74HCxx5 Articles
Keeping Track Of The Night Sky With Discrete Logic Chips
As hobbies go, stargazing has a pretty low barrier to entry. All you really need is a pair of Mark 1 eyeballs and maybe a little caffeine to help you stay up late enough. Astronomy, on the other hand, takes quite a bit more equipment, not least of which is a telescope and a way to get it pointed in the right direction at the right time, and to make up for the pesky fact that we’re on a moving, spinning ball of rock.
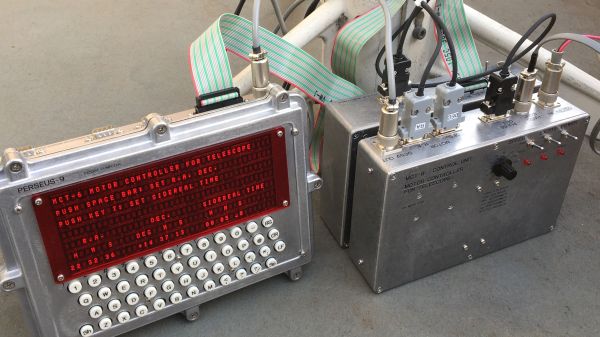
Yes, most of the equipment needed for real astronomy is commercially available, but [Mitsuru Yamada] decided to go his own way with this homebrew retro-style telescope motor controller. Dubbed MCT-6, the controller teams up with his dual-6502 PERSEUS-9 computer to keep his scope on target. There are a lot of literally moving parts to this build, including the equatorial mount which is made from machined aluminum and powered by a pair of off-the-shelf stepper-powered rotary stages for declination and right ascension. The controller that runs the motors is built completely from discrete 74HCxx logic chips that divide down a 7.0097-MHz crystal oscillator signal to drive the steppers precisely at one revolution per diurnal day. The pulse stream can also be sped up for rapid slewing, to aim the telescope at new targets using a hand controller.
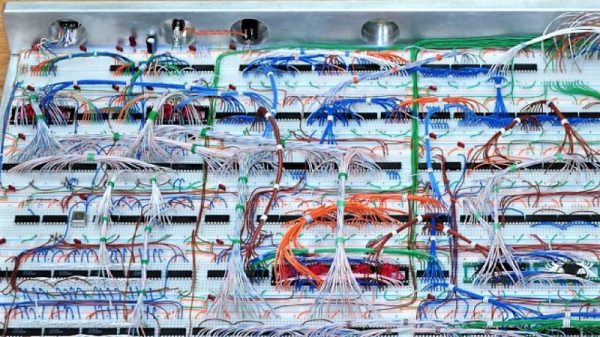
As impressive as all this is, the real star (sorry) of the show here is the fit and finish. In typical [Yamada-san] fashion, the impeccably wire-wrapped mainboard fits in a robust die-cast aluminum case that fits the retro aesthetic of the whole project. The PERSEUS-9 is used mainly as a display and control terminal, running custom software to show where the telescope is pointed and calculate the coordinates of various heavenly bodies. As a bonus, the 40×7 alphanumeric red LED display should be easy on dark-adapted eyes.
Hats off to [Mitsuru Yamada] on another fabulous build. If you haven’t had enough of his build style yet, be sure to check out his PERSEUS-8 or even his foray into the analog world.
Continue reading “Keeping Track Of The Night Sky With Discrete Logic Chips”
NeoPixel Punk Console Drives WS2812s Using 555 Timers
NeoPixels, a type of LED strip with individually addressable pixels, are a firm favorite among creators of intricate light effects. They are popular for their versatility and the ease with which you can daisy-chain them. Although the protocol to drive these little LEDs can be rather tricky to implement due to tight signal timing constraints.
However, [Adrian Studer] proved that driving WS2812-based LED strips like the NeoPixel series doesn’t necessarily require hand-optimized assembly code. In fact, it doesn’t require any code at all. He built the NeoPixel Punk Console, a device that creates a light show without even using a microcontroller. Just a handful of 555 timers and some 74HC series logic work together to produce pulses with approximately correct timings.
Operating the device is as easy as tweaking a few potentiometers, just like its namesake the Atari Punk Console. It’s quite a random process though, and it might be impossible to re-create a pattern that you liked. Also, the LEDs mostly light up in primary colors at full power, though [Adrian] plans to make an improved version that drives the red, green, and blue subpixels separately. But the fact that all of this is implemented by just a bunch of 555 timers makes it a rather impressive hack by any standard.
We’ve seen more than a few ways of driving NeoPixels or similar WS2812-based LED strips, though all of them use a microprocessor of some sort; you can fire up a classic 6502, use SPI and DMA on a PIC32, or just plug in a single ARM Cortex M0+.
Continue reading “NeoPixel Punk Console Drives WS2812s Using 555 Timers”
Homebrew 16-Bit Computer Is A Wire-Wrapped Work Of Art
Breadboard 8-bit computer builds seem all the rage these days, and with good reason: building your own CPU from the board up using discrete logic chips is a great way to really learn how microprocessors work. Not to mention that it’s an incredible flex. But once you’ve conquered the eight-bit, what do you do? Easy: build a 16-bit computer from 74HC logic chips.
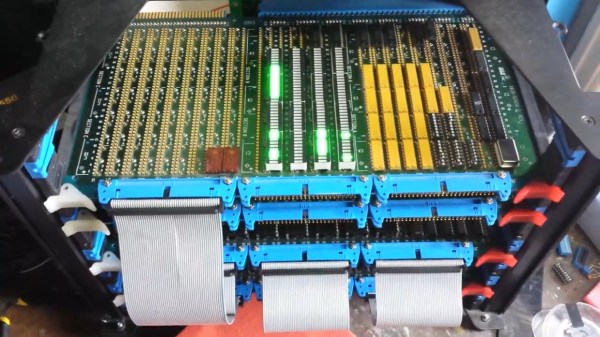
Attentive readers will likely remember this computer’s builder, [Paulo Constantino], from his previous work on 8-bit breadboard computers. As gloriously entropic as that tangled mass of wires was, it must have been a nightmare for [Paulo] to maintain. And so when the time came to upgrade, he wisely chose a more integrated construction method. The construction method is wire-wrapping, with multiple cards plugged into backplane and connected by ribbon cables. The whole card cage is far neater than the previous build, and seems to lend itself to rapid modifications. The top card in the cage acts as a control panel for now; eventually, [Paulo] planes to put a real front panel on the cage to support all the switches and blinkenlights such builds demand. Stretch goals include supporting audio and video and getting the machine online so anyone can log in.
The video below is an overview of the current state of the machine; earlier videos in the playlist cover the design and build in more detail. We hope to see schematics soon, and we’d love to know where to get some of those wire-wrap PCBs for projects of our own.
Continue reading “Homebrew 16-Bit Computer Is A Wire-Wrapped Work Of Art”
A 6502 Computer, With Acres Of Breadboard And Dozens Of Chips
Imagine you’re time-warped back to 1979 and tasked with constructing a personal computer. Could you do it? [RadicalBrad] thinks he can, and his 6502-based “Super VIC” build looks like it’s off to a great retrocomputing start.
Most emulations of old hardware these days go the FPGA route, and while we respect those projects immensely, there’s something to be said for applying a highly artificial constraint at the outset of a project. [RadicalBrad] chose to design like it’s 1979, and limited his ode to the machines of his youth to the 6502 CPU and logic and RAM chips available before 1980. The computer will support NTSC video output and 4-channels of 8-bit sound. No circuit boards will be used – everything is to be assembled on solderless breadboards. So far he has 48 (!) of them ganged together, which sounds like an enormous amount of space to work with, but he still found things crowded enough that some of the DIP bodies were trimmed a bit to fit more closely on the breadboards. The SRAM posed a problem, though, in that the 512K chips he wanted were not available in DIPs. To stay faithful to the constraints, he soldered the SOJ-packaged RAM chips into 40-PIN DIP headers – all 25 chips! We can’t recall a PC of the era sporting 12 megabytes of RAM, but no matter – it’s too cool not to love.
[RadicalBrad] has his work cut out for him, and this could take years to finish. We’re keen to follow his progress and can’t wait till it boots for the first time. Until it does, we’ll just gaze upon such discrete computing wonders as this almost-as-simple-as-possible computer, or even this delightfully noisy adder for a relay computer.


