Why Are We Only Just Now Hearing About LED Beaded Curtains

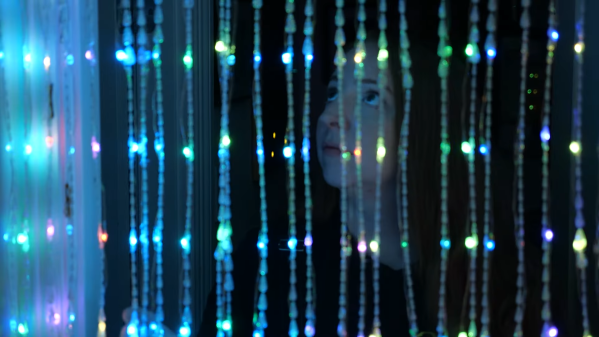
Beaded curtains are a pretty banal piece of home decor, unlikely to excite most interior design enthusiasts. Throw on some addressable LEDs, though, and you’ve got something eye-catching at the very least, as [Becky] demonstrates.

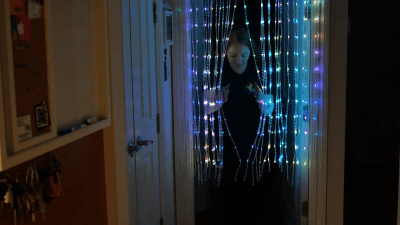
Joining the LED strands at the bottom made running the wiring easy but made walking through the blinds hard.

The project started with an existing beaded curtain as a base. A series of addressable LED strands were then carefully sewn to the beads using knots tied in plain sewing thread. The strands were configured as a single strand as far as the data lines were concerned, to make animation easy. Power was supplied to both ends of the strand to ensure nice and even brightness across the strands.

The brains of the system is a PixelBlaze controller, which makes it easy to wirelessly control the behavior of the strings. It’s the perfect tool for quickly whipping up fancy animations and pretty effects without hand-assembling a bunch of code yourself.

There was only a few problems with the project. [Becky] found a pretty passable LED beaded curtain from China midway through the project, which reduced her enthusiasm to finish the build. There were also issues walking through the curtain due to the wiring scheme she chose, where the bottom of one strand was connected to its neighbor.

Regardless, it’s a fun blinky build that brings some color to an otherwise drab doorway. It’s hard to complain about that! Video after the break.

Continue reading “Why Are We Only Just Now Hearing About LED Beaded Curtains”

Turn Your Furniture Into A Light Show With Hyelicht

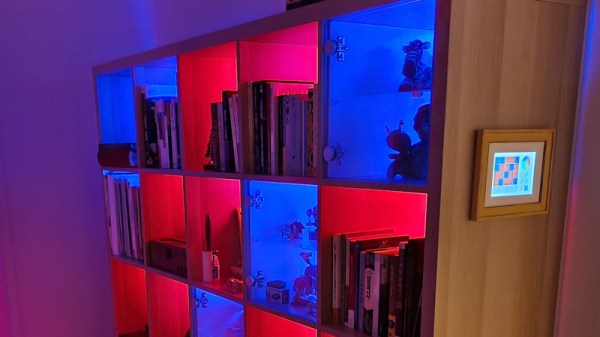
There’s something about the regimented square shapes of the IKEA Kallax shelf that convinced [Eike Hein] it could benefit from some RGB LED lighting, and while he could have simply used a commercial solution, he decided instead to develop Hyelicht: an incredibly well documented open source lighting system featuring multiple control interfaces and APIs. We’d say it was overkill, but truth be told, we dream of a world where everyone takes their personal projects to this level.

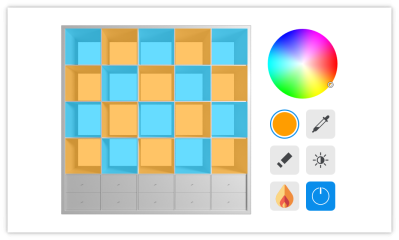
Hyelicht’s default touch UI

In the boilerplate configuration, [Eike] shows off controlling the LEDs using a graphical user interface running on a Waveshare 7″ touch screen mounted to the side of the shelf. That’s the most direct way of controlling the LEDs, as the touch screen is plugged into the Raspberry Pi 4B that’s actually running the software. But the same interface can also be remotely accessed by your smartphone or desktop.

You can also skip the GUI entirely and control the LEDs with a command line interface, or maybe poke Hyelicht’s HTTP REST interface instead. The system can even integrate with the Philips Hue ecosystem, if you prefer going that route.

The 5×5 Kallax shelf is the project’s official reference hardware, but of course it will work with anything else you might wish to cover with controllable LEDs. We’ve seen similar setups used to light storage bins in the past, but nothing that can even come close to the documentation and customization possibilities offered by Hyelicht. This is definitely a project to keep a close eye on if you’ve got the urge to add a little color to your world.

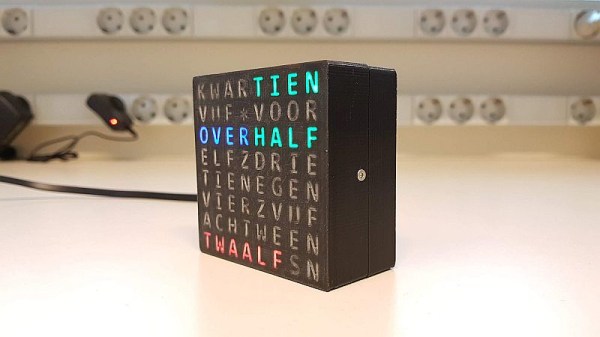
The word clock on a desk, with "tien", "over", "half" and "twaalf" lit

An Impeccably Documented Word Clock In Dutch

[Maarten Pennings] shares a word clock project – but not the regular kind. For a start, this clock is a shining demonstration of hobbyist-available 3D printing technologies, with embedded light guides for the letters printed in transparent filament, thanks to a dual-extruder printer. For a word clock, it’s surprisingly small – in fact, it uses an 8×8 addressable LED matrix, with words shown in different colors. If you’re looking to build a novel word clock, you’re all set here – [Maarten] tells all about this project’s story and provides a treasure trove of insights into designing all of its aspects!

The 8×8 limitation was initially set because he wanted to use a low-cost MAX7219 8×8 LED matrix module as a base for the clock. Thankfully, in Dutch, time can be expressed using shorter words — still, it had to be limited to 5-minute intervals. Extra effort had to be spent designing the layout — [Maarten] mentions his friend writing a solver that found a way to fit some words onto the layout diagonally. At some point, he switched from LEDs to Neopixels, and dug deep into addressable LED technology. For instance, he demonstrates Neopixel power measurements and current consumption calculations. This shows that the calculations indeed match the clock’s real consumption when measured by an external meter.

In the best of hacker traditions, all the source files are on Github — if you fancy yourself a Dutch word clock, you can build [Maarten]’s design easily! He provides extensive instructions on building this clock in the README, including a flashing and configuration tutorial, complete wiring diagrams, and a soldering guide. A manufacturing-grade amount of build information that won’t leave you guessing. He’s also added a fair number of animations, put plenty of effort into clock precision verification, and even investigated some Neopixel protocol minutiae. All in all, our hacker went all in on the capabilities while embracing the constraints. This reminds us of the similarly well-documented haptic word clock we covered just a year ago – check that one out, too!

Continue reading “An Impeccably Documented Word Clock In Dutch”

Throwback: Designing Addressable LEDs From Scratch

These days, addressable LEDs are all the rage. A little chip paired with each LED receives signals and modulates the light output as needed. [John Peterson] was working on a project along these very lines, designing his Curilights back in 2008!

[John] wasn’t the first to come up with the idea; he designed the Curilights to replicate a string of programmable LEDs he’d seen called Triklits. His design involved each RGB LED being fitted with a Microchip PIC 16F688 microcontroller, which could receive serial data and control the LED channels with PWM. These LEDs could then be strung up to create an addressable chain. It’s fundamentally the same concept as the WS2812, just in a larger format and built by hand. His design also had the benefit of non-volatile memory onboard the PICs, so animations could be stored even after power off. [John] later went on to build a controller for his lights, complete with sensors. It could be triggered by a motion sensor or light sensor, and would run animations on the string without the use of a computer.

While [John]’s design didn’t go on to bigger things or commercial success, it did win first place at the Third Annual Lantronix Wireless Design Contest. It also goes to show that many people will come around to the same idea when it makes good sense!

If you’re interested in the wider world of addressable LEDs, check out our breakdown on some of the products out there. Meanwhile, if you’re brewing up your own flashing, glowing projects, be sure to notify the tipsline!

2022 Sci-Fi Contest: CyberGlove Tests Your Reactions

Since the 1980s, we’ve seen innumerable attempts to revolutionize the way we interact with computers. Since the advent of keyboards and mice, we’ve seen everything from magic wands to electric gloves, with [Deemo Chen]’s project fitting into the latter category.

The build takes on a cyberpunk aesthetic, with addressable LEDs installed along each digit. The various digits light up randomly, and the wearer of the glove must tap a button on the corresponding digit in order to test their reaction times. An Arduino Uno runs the show, and keeps track of the score, displaying the results on an attached HD44870-compatible LCD.

The mess-o’-wires aesthetic, with bare electronics hanging off the glove, goes a long way to making this look like a proper bit of sci-fi kit. The lurid, colorful glow is a key part of this look, and something we’ve seen on many projects over the years.

Overall, the reaction trainer served as a great freshman project for [Deemo], along with their chums [Dhruv] and [Ryan]. Along the way, the team clearly picked up skills in microcontroller programming, as well as learning how to work with LCD displays and addressable LEDs. Master these skills and you can pull off some impressive feats. Video after the break.

Continue reading “2022 Sci-Fi Contest: CyberGlove Tests Your Reactions”

Finally, A Mapping Tool For Addressable LED Strings

Addressable LED strings have made it easier than ever to build fun glowable projects with all kinds of exciting animations. However, if you’re not going with a simple grid layout, it can be a little difficult to map your strings out in code. Fear not, for [Jason Coon] has provided a tool to help out with just that!

[Jason]’s web app, accessible here. is used for mapping out irregular layouts when working with addressable LED strings like the WS2812B and others that work with libraries like FastLED and Pixelblaze. If you’re making some kind of LED globe, crazy LED tree, or other non-gridular shape, this tool can help.

The first step is to create a layout of your LEDs in a Google Sheets table, which can then be pasted into the web app. Then, the app handles generating the necessary code to address the LEDs in an order corresponding to the physical layout.

[Jason] does a great job of explaining how the tool works, and demonstrates it working with a bowtie-like serpentine layout with rainbow animations. The tool can even provide visual previews of the layout so you can verify what you’ve typed in makes sense.

It’s a great tool that we recently saw put to use on [Geeky Faye’s] excellent necklace project. Video after the break. Continue reading “Finally, A Mapping Tool For Addressable LED Strings”

Tutorial Teaches You To Use Neopixels With Micropython

Addressable LEDs are wonderful things, with products like Neopixels making it easy to create all kinds of vibrant, blinking glowables. However, for those without a lot of electronics experience, using these devices can seem a bit daunting. [Bhavesh Kakwani] is here to help, with his tutorial on getting started with Neopixels using the MicroPython environment. 

The tutorial flows on from [Bhavesh’s] Blink example for MicroPython, and is aimed at beginners who are learning for the first time. It explains the theory behind RGB color mixing that allows one to generate all manner of colors with WS2812B-based LED strings, and how to code for the Raspberry Pi Pico to make these LEDs do one’s bidding.

The guide even covers the use of the Wokwi simulation tool. This is a great way for beginners to test their projects before having to play with actual hardware. This is useful for beginners, because it’s a great way to catch mistakes – is there a software problem, or did they push the soldering iron through the microcontroller? It’s also a technique that pays dividends when working on more complicated projects.

Whether you’re entirely new to the embedded world, or just want to learn the intricacies of talking to addressable LEDs and make sense of color mixing theory, this tutorial will serve you well. Before you know it, you’ll be building glowing projects with the best of them!