CP/M Is Now Freer Than It Was

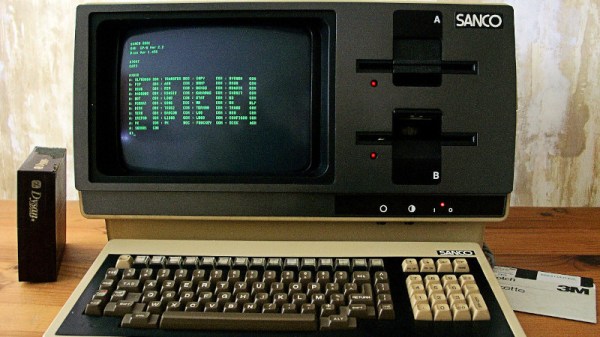
It’s easy to think of the earlier history of desktop computing operating systems in terms of DOS, Windows, and Mac OS with maybe a bit of AmigaOS, TOS, or RiscOS thrown in. But the daddy of desktop computing, the OS that put word-processors and spreadsheets in 1970s offices and had a huge influence on what followed, isn’t among that list. Digital Research’s CP/M ran initially on Intel 8080-based machines before losing out to MS-DOS as IBM’s choice for their PC, and then gradually faded away over the 1980s. Its source has been available in some form with a few strings for a long time now, but now we have confirmation from Digital Research’s successor company that it’s now available without restrictions on where it can be distributed.

For years it was something an operating system that had been bypassed by the hardware and hacker communities, as the allure of GNU/Linux was stronger and most available CP/M capable machines were also 1980s 8-bit gaming platforms. But with the more recent increased popularity of dedicated retrocomputing platforms such as the RC2014 it’s become a more common sight in our community. Brush up your command line skills, and give it a go!

Header: Michael Specht, CC BY-SA 3.0.

Cracking The MiFare Classic Could Get You Free Snacks

[Guillermo] started a new job a while back. That job came with an NFC access card, which was used for booking rooms and building access. The card also served as a wallet for using the vending machines. He set about hacking the card to see what he could uncover.

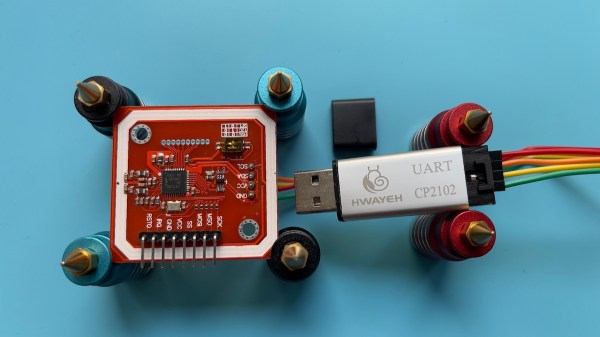
Initial scans with NFC Tools revealed the card was an Infineon MIFARE Classic Card 1k. These cards are considered fairly old and insecure by now. There’s plenty of guides online on how to crack the private keys that are supposed to make the card secure. Conveniently, [Guillermo] had a reader/writer on hand for these very cards.

[Guillermo] was able to use a tool called mfoc to dump the keys and data off the card. From there, he was able to determine that the credit for the vending machines was stored on the card itself, rather than on a remote server.

This means that it’s simple to change the values on the card in order to get free credit, and thus free snacks. However, [Guillermo] wisely resisted the urge to cash in on candy and sodas. When totals from the machine and credit system were reconciled, there’d be a clear discrepancy, and a short investigation would quickly point to his own card.

He also managed to successfully clone a card onto a “Magic Mifare” from Amazon. In testing, the card performed flawlessly on all systems he tried it on.

It goes to show just how vulnerable some NFC-based access control systems really are. RFID tags are often not as safe as you’d hope, either!

Because It’s Cool To Make A Watch That Thin

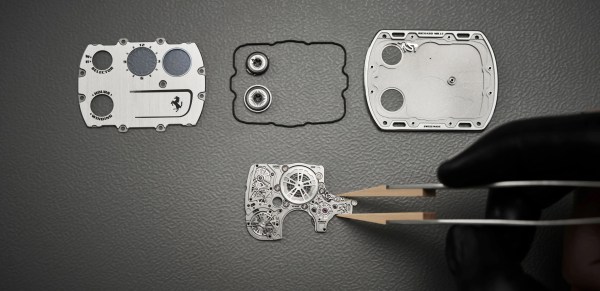
Recently [Richard Mille] and Ferrari (yes, that Ferrari) announced the thinnest mechanical watch ever made, the RM UP-01.

It measures a scant 1.75mm thick (~1/16 of an inch). The aesthetic is debatable, and the price tag is not even listed on the page, but we suspect it is a rather significant sum. But setting aside those two things, we’d like to step back and appreciate this as a piece of art. This is not a practical watch by any stretch of the imagination. This watch is the equivalent of a human-powered airplane. Impractical, costly, and not as effective as other modern mechanically-powered solutions. But that doesn’t make it any less impressive.

Since it is so thin, a regular stacked assortment of gears wasn’t an option. So instead, the gears were distributed over the watch’s surface, which led to a thin watch face. This means that winding is manual to save space, and a single winding will last around 45 hours. The heartbeat of any mechanical watch is the escapement. So they had to redesign the escapement to be flatter, doing away with the guard pin and the safety roller, instead using the anchor fork to bank the lever in case of unexpected forces or shocks.

The design is incredible but perhaps just as noteworthy is the fact that it could be machined. Machined out of titanium with a micron of accuracy, which is an incredible feat if you’ve seen a savage discussion of measurements. The smaller and more accurate you get, the steeper the difficulty curve.

A short teaser is available after the break.

Continue reading “Because It’s Cool To Make A Watch That Thin”

Throwback: Designing Addressable LEDs From Scratch

These days, addressable LEDs are all the rage. A little chip paired with each LED receives signals and modulates the light output as needed. [John Peterson] was working on a project along these very lines, designing his Curilights back in 2008!

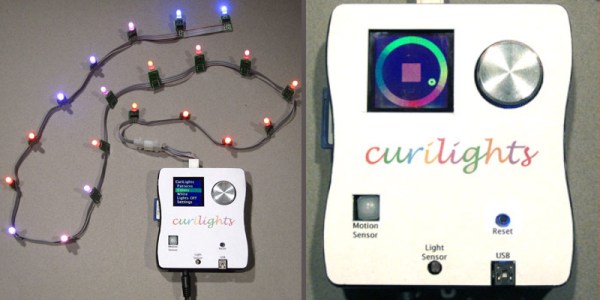
[John] wasn’t the first to come up with the idea; he designed the Curilights to replicate a string of programmable LEDs he’d seen called Triklits. His design involved each RGB LED being fitted with a Microchip PIC 16F688 microcontroller, which could receive serial data and control the LED channels with PWM. These LEDs could then be strung up to create an addressable chain. It’s fundamentally the same concept as the WS2812, just in a larger format and built by hand. His design also had the benefit of non-volatile memory onboard the PICs, so animations could be stored even after power off. [John] later went on to build a controller for his lights, complete with sensors. It could be triggered by a motion sensor or light sensor, and would run animations on the string without the use of a computer.

While [John]’s design didn’t go on to bigger things or commercial success, it did win first place at the Third Annual Lantronix Wireless Design Contest. It also goes to show that many people will come around to the same idea when it makes good sense!

If you’re interested in the wider world of addressable LEDs, check out our breakdown on some of the products out there. Meanwhile, if you’re brewing up your own flashing, glowing projects, be sure to notify the tipsline!

One Shot IR Helper Is A Great Beginner Project

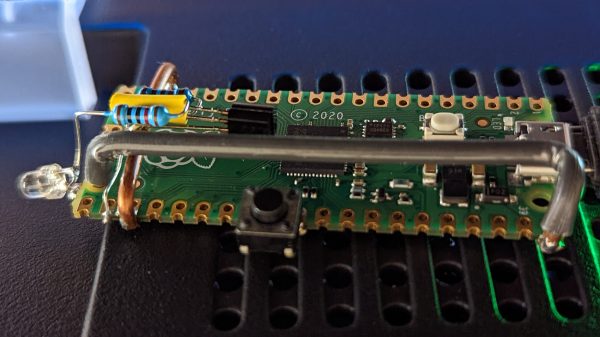
Sometimes you need a little utility device to do a very simple job, and do it well.This one-shot IR helper from [Gregory Sanders] is just that. 

[Gregory] had a TV that didn’t support automatically turning on when the power was applied. This is frustrating when you like to leave devices switched hard off when not in use to save on standby energy draw. Thus, there needed to be a way to send the screen an on signal when his multi-monitor setup was powered on.

A simple circuit paired with a Pi Pico was pressed into service. The Pico flashes an IR LED, squirting out the requisite code to tell the TCL branded TV to switch on. [Gregory] figured out the codes by using an Arduino to read the output of the TV’s remote with an IR sensor. The hook here is the code is written in MicroPython, using IR libraries from [Peter Hinch].

Now, when [Gregory] powers up his rig, the IR sender will trigger the TV to switch on. It’s a little frustrating that the auto-on function wasn’t available in the factory, but regardless, now everything’s working as it should. If you want to do this in reverse, consider building a TV-B-Gone or a silencer for the boomboxes used by dancing grandmas!

Overwhelmed By Odd Inputs: The Contest Winners And More

The Odd Inputs and Peculiar Peripherals Contest wrapped up last week, and our judges have been hard at work sifting through their favorite projects. And this was no easy task – we had 75 entries and so many of them were cool in their own right that all we can say is go check them all out. Really.

But we had to pick winners, not the least because Digi-Key put up three $150 gift certificates. So without further ado, here are the top three projects and as many honorable mentions as you have fingers and toes – if you don’t count your thumbs.

The Prize Winners

Keybon should be a mainstream commercial product. It’s a macro keypad with an OLED screen per key. It talks to an application on your desktop that detects the program that you currently have focused, and adapts the keypress action and the OLED labels to match. It’s a super-slick 3D-printed design to boot. It’s the dream of the Optimus Maximus, but made both DIY and significantly more reasonable as a macro pad. It’s the coolest thing to have on your desk, and it’s a big winner!

On the ridiculous side of keyboards, meet the Cree-board. [Matt] says he got the idea of using beefy COB LEDs as keycaps from the bad pun in the name, but we love the effect when you press down on the otherwise blinding light – they’re so bright that they use your entire meaty finger as a diffuser. Plus, it really does look like a keypad of sunny-side up eggs. It’s wacky, unique, and what’s not to love about that in a macropad?

Finally, [Josh EJ] turned an exercise bike into a wireless gamepad, obliterating the choice between getting fit and getting high scores by enabling both at the same time. An ESP32-turned-Bluetooth-gamepad is the brains, and he documents in detail how he hooked up a homebrew cadence sensor, used the heart-rate pads as buttons, and even added some extra controls on top. Watching clips of him pedaling his heart out in order to push the virtual pedal to the metal in GRID Autosport, we only wish he were screaming “vroooom”. Continue reading “Overwhelmed By Odd Inputs: The Contest Winners And More”

Bringing Some Discipline To An SDR Transmitter

The proliferation of software-defined radio (SDR) technology has been a godsend for RF hobbyists. SDR-based receivers and transmitters have gotten so cheap that you’ve probably got a stick or two lying around your bench right now — we can see three from where we sit, in fact.

But cheap comes at a price, usually in the form of frequency stability, which can be prohibitive in some applications — especially amateur radio, where spectrum hygiene is of the utmost concern. So we were pleased to see [Tech Minds] tackle the SDR frequency stability problem by using a GPS-disciplined oscillator. The setup uses an ADALM-PLUTO SDR transceiver and a precision oscillator from Leo Bodnar Electronics. The oscillator can be programmed to output a rock-solid, GPS-disciplined signal over a wide range of frequencies. The Pluto has an external oscillator input that looks for 40 MHz, which is well within the range of the GPSDO.

Setup is as easy as plugging the oscillator’s output into the SDR’s external clock input using an SMA to UFL jumper, and tweaking the settings in the SDR and oscillator. Not all SDRs will have an external clock input, of course, so your mileage may vary. But if your gear is suitably equipped, this looks like a great way to get bang-on frequency — the video below shows just how much the undisciplined SDR can drift.

Like any good ham, [Tech Minds] is doing his bit to keep his signals clean and on target. His chief use case for this setup will be to work QO-100, amateur radio’s first geosynchronous satellite repeater. We’ve got to say that we hams living on the two-thirds of the globe not covered by this satellite are just dying to get a geosynchronous bird (or two) of our own to play with like this.

Continue reading “Bringing Some Discipline To An SDR Transmitter”