Handheld 3D Scanning, Using Raspberry Pi 4 And Intel RealSense Camera

Raspberry Pi 4 (with USB 3.0) and Intel RealSense D415 depth sensing camera.

When the Raspberry Pi 4 came out, [Frank Zhao] saw the potential to make a realtime 3D scanner that was completely handheld and self-contained. The device has an Intel RealSense D415 depth-sensing camera as the main sensor, which uses two IR cameras and an RGB camera along with the Raspberry Pi 4. The Pi uses a piece of software called RTAB-Map — intended for robotic applications — to take care of using the data from the camera to map the environment in 3D and localize itself within that 3D space. Everything gets recorded in realtime.

This handheld device can act as a 3D scanner because the data gathered by RTAB-Map consists of a point cloud of an area as well as depth information. When combined with the origin of the sensing unit (i.e. the location of the camera within that area) it can export a point cloud into a mesh and even apply a texture derived from the camera footage. An example is shown below the break.
Continue reading “Handheld 3D Scanning, Using Raspberry Pi 4 And Intel RealSense Camera”


Shoot The Moon With This Homebrew Hardline RF Divider

You can say one thing for [Derek]’s amateur radio ambitions — he certainly jumps in with both feet. While most hams never even attempt to “shoot the Moon”, he’s building out an Earth-Moon-Earth, or EME, setup which requires this little beauty: a homebrew quarter-wave hardline RF divider, and he’s sharing the build with us.

For background, EME is a propagation technique using our natural satellite as a passive communications satellite. Powerful, directional signals can bounce off the Moon and back down to Earth, potentially putting your signal in range of anyone who has a view of the Moon at that moment. The loss over the approximately 770,000-km path length is substantial, enough so that receiving stations generally use arrays of high-gain Yagi antennas.

That’s where [Derek]’s hardline build comes in. The divider acts as an impedance transformer and matches two 50-ohm antennas in parallel with the 50-ohm load expected by the transceiver. He built his from extruded aluminum tubing as the outer shield, with a center conductor of brass tubing and air dielectric. He walks through all the calculations; stock size tubing was good enough to get into the ballpark for the correct impedance over a quarter-wavelength section of hardline at the desired 432-MHz, which is in the middle of the 70-cm amateur band. Sadly, though, a scan of the finished product with a NanoVNA revealed that the divider is resonant much further up the band, for reasons unknown.

[Derek] is still diagnosing, and we’ll be keen to see what he comes up with, but for now, at least we’ve learned a bit about homebrew hardlines and EME. Want a bit more information on Moon bounce? We’ve got you covered.

Continue reading “Shoot The Moon With This Homebrew Hardline RF Divider”

Magnets Turn Flexible PCB Into Electric Grasshopper

Just because something doesn’t seem to have an apparent purpose, that doesn’t mean we shouldn’t try making it anyway. As flexible PCBs become cheaper and easier to order from low-scale fab houses, we’re seeing hobbyists experiment with new uses for them such as [Carl Bugeja]’s jumping circuit.

The circuit is based a coil printed on the flexible PCB itself acting as an electromagnet, but unlike other designs which use the same trick, in this one the coil is made to be the static side of an actuator. Attached to the circuit with folding arms is a stack of two permanent magnets, which work as the moving part. Since the magnets make up most of the mass of the circuit, as they’re pushed down and sprung back up, it causes the whole thing to leap around just under one centimeter off the table like a little electric grasshopper.

This is far from [Carl]’s first appearance here on Hackaday, and he’s been clearly busy exploring new uses for flexible PCBs with their properties as electromagnets, from making POV displays with them to small robots that move around through vibration. We’re excited to see what else he can come up with, and you can see this one in action after the break.

Continue reading “Magnets Turn Flexible PCB Into Electric Grasshopper”

Using A Vending Machine Bill Acceptor With Arduino

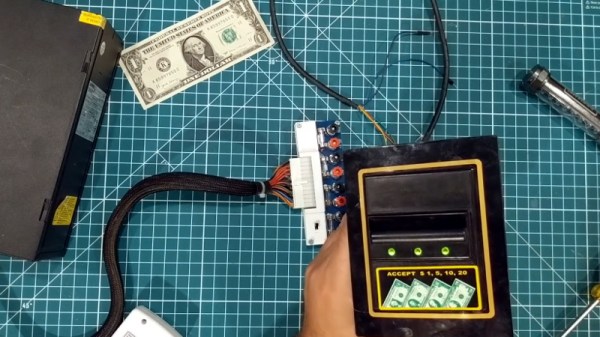
We’ve all seen, and occasionally wrestled with, bill acceptors like the one [Another Maker] recently liberated from an arcade machine. But have you ever had one apart to see how it works? If not, the video after the break is an interesting peak into how this ubiquitous piece of hardware tells the difference between a real bill and a piece of paper.

But [Another Maker] goes a bit farther than just showing the internals of the device. He also went through the trouble of figuring out how to talk to it with an Arduino, which makes all sorts of money-grabbing projects possible. Even if collecting paper money isn’t your kind of thing, it’s still interesting to see how this gadget works on a hardware and software level.

As explained in the video, a set of belts are used to pull the bill past an array of IR LEDs. The hardware uses these to scan the bill and perform some dark magic to determine if it’s a genuine piece of currency. [Another Maker] notes that these readers actually need to receive occasional firmware updates to take into account new bill designs. In fact, the particular unit he has is so out of date that it won’t accept modern $5 bills; which may explain how he got it for free in the first place.

Years ago we saw one of these bill acceptors used to make a DIY Bitcoin ATM. Of course back then, a few bucks would get you a semi-reasonable amount of BTC. These days you would skip the paper currency and do it all digitally.

Continue reading “Using A Vending Machine Bill Acceptor With Arduino”

Chatty Coaster Agitates, In A Friendly Way

Awkward silences can be highly uncomfortable. Thankfully, they’re a problem that can be solved by technology. Chatty Coaster aims to do just this, detecting pauses in conversation and interjecting with helpful questions to move things along.

The coaster is built around an Arduino Micro, which uses a microphone to detect audio levels in the room. When it detects an extended silence, it then fires off a sound clip using a SparkFun audio breakout board. The questions vary from plain to politically sensitive, so there’s a good chance you could get some spicy conversation as a result. Any talking device runs a risk of being more annoying than helpful, and there’s certainly a risk that Chatty Coaster could fall into this category. Choosing the right content seems key here.

Overall, while this may not be the ultimate solution to boring company, it could get a laugh or two and serves as a good way to learn how to work with audio on microcontrollers. Video after the break.

We’ll admit, when we were reading this one, we thought we had déjà vu. But this one’s a lot less blamey.

Continue reading “Chatty Coaster Agitates, In A Friendly Way”

Perhaps August Dvorak Is More Your Type

One of the strangest things about human nature is our tendency toward inertia. We take so much uncontrollable change in stride, but when our man-made constructs stop making sense, we’re suddenly stuck in our ways — for instance, the way we measure things in the US, or define daytime throughout the year. Inertia seems to be the only explanation for continuing to do things the old way, even when new and scientifically superior ways come along. But this isn’t about the metric system — it’s about something much more personal. If you use a keyboard with any degree of regularity, this affects you physically.

Many, many people are content to live their entire lives typing on QWERTY keyboards. They never give a thought to the unfortunate layout choices of common letters, nor do they pick up even a whisper of the heated debates about the effectiveness of QWERTY vs. other layouts. We would bet that most of our readers have at least heard of the Dvorak layout, and assume that a decent percentage of you have converted to it.

Hardly anyone in the history of typewriting has cared so much about subverting QWERTY as August Dvorak. Once he began to study the the QWERTY layout and all its associated problems, he devoted the rest of his life to the plight of the typist. Although the Dvorak keyboard layout never gained widespread adoption, plenty of people swear by it, and it continues to inspire more finger-friendly layouts to this day.

Continue reading “Perhaps August Dvorak Is More Your Type”

Reverse Engineering A Ceiling Fan Remote

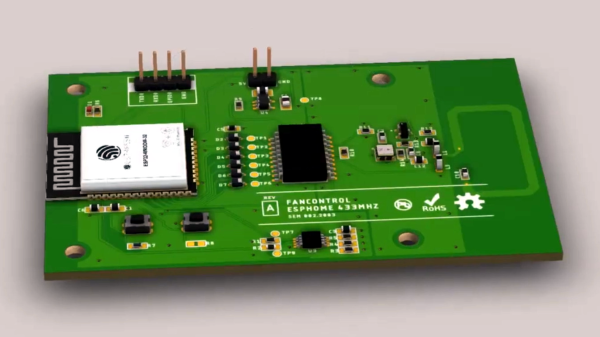
In the quest to automate everything in your home, you no doubt have things that aren’t made with home automation in mind. Perhaps your window AC unit, or the dimmer in your dining room. [Seb] has several ceiling fans that are controlled by remotes and wanted to connect them to his home automation system. In doing so, [Seb] gives a good overview of how to tackle this problem and how to design a PCB so he doesn’t have a breadboard lying around connected to the guts of his remote control.

There are several things [Seb] needs to figure out in order to connect his fans to Home Assistant, the home automation system he uses: He needs to determine if the circuit in the remote can be powered by 5 or 3.3 V, he needs to connect the circuit to an ESP32 board, and he needs to figure out if he can create a custom PCB that combines the circuit and the ESP32 into one. The video goes through each of these steps and shows the development of each along the way.

There’s a lot of info in the video, so it might need to be slowed down a bit to see all the details. There are some other reverse engineering of home automation gear on the site, here, or, you might want to build your own remote to control your automated devices.

Continue reading “Reverse Engineering A Ceiling Fan Remote”