Fixing Issues With Knockoff Altera USB Blasters

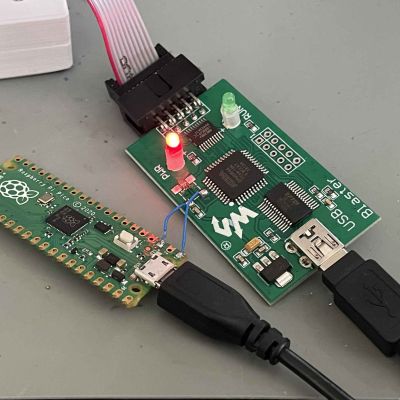
Using an external MCU as a crude clock source for the Altera CPLD. (Credit: [Doug Brown])
One exciting feature of hardware development involving MCUs and FPGAs is that you all too often need specific tools to program them, with [Doug Brown] suffering a price tag aneurysm after checking the cost of an official Altera/Intel USB Blaster (yours for $300) to program a MAX 10 FPGA device with. This led him naturally down the path of exploring alternatives, with the $69 Terasic version rejected for ‘being too expensive’ and opting instead for the Waveshare USB Blaster V2, at a regretful $34. The amazing feature of this USB Blaster clone is that while it works perfectly fine under Windows, it works at most intermittently under Linux.

This led [Doug] down the path of reverse-engineering and diagnosing the problem, ultimately throwing in the towel and downclocking the Altera CPLD inside the adapter after finding that it was running a smidge faster than the usual 6 MHz. This was accomplished initially by wiring in an external MCU as a crude (and inaccurate) clock source, but will be replaced with a 12 MHz oscillator later on. Exactly why the problem only exists on Linux and not on Windows will remain a mystery, with Waveshare support also being clueless.

Undeterred, [Doug] then gambled on a $9 USB Blaster clone (pictured above), which turned out to be not only completely non-functional, but also caused an instant BSOD on Windows, presumably due to the faked FTDI USB functionality tripping up the Windows FTDI driver. This got fixed by flashing custom firmware by [Vladimir Duan] to the WCH CH552G-based board after some modifications shared in a project fork. This variety of clone adapters can have a range of MCUs inside, ranging from this WCH one to STM32 and PIC MCUs, with very similar labels on the case. While cracking one open we had lying around, we found a PIC18 inside, but if you end up with a CH552G-based one, this would appear to fully fix it. Which isn’t bad for the merest fraction of the official adapter.

Thanks to [mip] for the tip.

An RF Engineer’s FPGA Learning Journey

[KF5N] admits he’s not a digital design engineer; he’s more into the analog RF side of things. But he’s recently taken on a project to communicate between a Ubuntu box and an Intel MAX10 FPGA. He did a presentation at a recent ham radio convention about what he’d learned and how you could get started.

The video talks a lot about the Intel (used to be Altera). However, the nearly 40 minute video after the break isn’t a step-by-step tutorial so even if you are interested in other devices, you’ll probably enjoy watching it. If you’ve programmed even one FPGA, this video likely won’t hold your interest — you aren’t the target audience. However, at about 00:31 he does recommend some books and some very inexpensive FPGA boards, so it’s not a total wash.

[KF5N] talks about what an FPGA is and how it’s different from a microcontroller. He also recommends Cornell’s [Bruce Land’s] course materials. He wasn’t a big fan of the online courses he tried. Of course, since he’s using an Intel chip, he also recommended the Intel courses. A lot of the video covers how to save on getting a development board. The Cornell class calls for a $250 board that is pretty powerful. That’s also pretty expensive, so he recommends a lighter version for about $85.

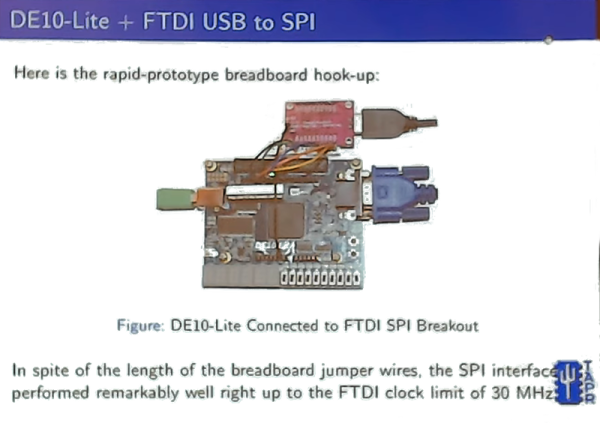
He also talks about the toolchain and his project to interface to his Linux box. He wound up with an SPI interface that ran up to 30 MHz. He also talks about using Julia to build a driver to talk to the interface on the PC side.

We didn’t notice him mentioning our own FPGA bootcamp, although he did mention projects on Hackaday.io. If you want to see a similar video but with open source tools, [David Williams] did a talk at Superconference that gives the same kind of overview but with Yosys and other related tools.

Continue reading “An RF Engineer’s FPGA Learning Journey”

X-Ray Vision For FPGAs: Using Verifla

Last time I talked about how I took the open source Verifla logic analyzer and modified it to have some extra features. As promised, this time I want to show it in action, so you can incorporate it into your own designs. The original code didn’t actually capture your data. Instead, it created a Verilog simulation that would produce identical outputs to your FPGA. If you were trying to do some black box simulation, that probably makes sense. I just wanted to view data, so I created a simple C program that generates a VCD file you can read with common tools like gtkwave. It is all on GitHub along with the original files, even though some of those are not updated to match the new code (notably, the PDF document and the examples).

If you have enough pins, of course, you can use an external logic analyzer. If you have enough free space on the FPGA, you could put something like SUMP or SUMP2 in your design which would be very flexible. However, since these analyzers are made to be configurable from the host computer, they probably have a lot of circuitry that will compete with yours for FPGA space. You configure Verifla at compile time which is not as convenient but lets it have a smaller footprint.

Continue reading “X-Ray Vision For FPGAs: Using Verifla”

Hands On With The Arduino FPGA

All of the tools you need to work with the FPGA Arduino — the Vidor — are now in the wild!

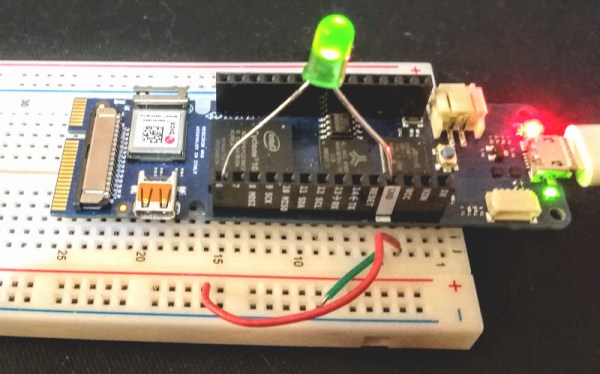
We reported earlier that a series of French blog posts finally showed how all the pieces fit together to program the FPGA on the Arduino MKR4000 Vidor board. Of course, I wasn’t content to just read the Google translation, I had to break out the board and try myself.

I created a very simple starter template, a tool in C to do the bitstream conversion, required, and bundled it all together in one place. Here’s how you can use my starter kit to do your own FPGA designs using the Vidor. I’m going to assume you know about FPGA basics and Verilog. If you don’t, why not check out the FPGA boot camps first?

The first thing you’ll want to do is grab my GitHub repo. You’ll also need the Arduino IDE (a recent copy) and Intel’s Quartus software. Inside, you’ll find three directories, two of which contain slightly modified copies of original Arduino files. But before you start digging in, let’s get the high-level overview of the process.

Continue reading “Hands On With The Arduino FPGA”

Learn FPGA With This Persistence Of Vision Hack

Everybody wants to give FPGA development a try and here’s a great way to get into it. You can build your own Persistence of Vision display using a $30 dev board. It’s a fun project, and you’ll learn quite a bit about designing for an FPGA, as well as using the Quartus design software.

The inspiration for this article comes from [vpecanins] who did an example project where you wave the board back and forth and a message appears in mid air. This uses the MAX1000, a pretty powerful yet odd FPGA board for about $30. It contains an Intel MAX10 (when did Intel start making FPGAs? Remember, Intel bought Alterra back in 2015). I find the board odd because it also holds an accelerometer that you can talk to using SPI. That’s a little strange for a generic FPGA board, but paired with eight on-board LEDs it’s perfect for this demo.

Since I didn’t find any written documentation for this example, I thought we’d help out and take you on a step-by-step tour of the project. What’s more, in a future installment, I’ll show you how to make some significant changes to the tutorial that will make it even more practical as a base for other projects.

Continue reading “Learn FPGA With This Persistence Of Vision Hack”

Tiny Arduino + FPGA = Sno

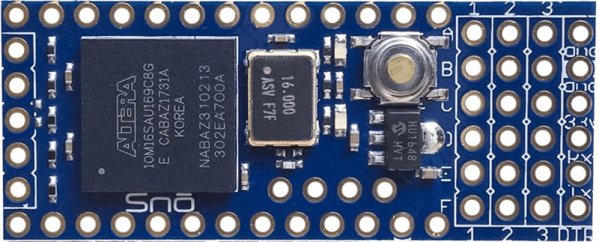
Alorium rolled out a new product late last year that caught our attention. The Sno (pronounced like “snow”) board is a tiny footprint Arduino board that you can see in the video below. By itself that isn’t that interesting, but the Sno also has an Altera/Intel Max 10 FPGA onboard. If you aren’t an FPGA user, don’t tune out yet, though, because while you can customize the FPGA in several ways, you don’t have to.

Like Alorium’s XLR8 product, the FPGA comes with preprogrammed functions and a matching Arduino API to use them. In particular, there are modules to do analog to digital conversion, servo control, operate NeoPixels, and do floating point math.

Continue reading “Tiny Arduino + FPGA = Sno”

Another Introduction To FPGAs

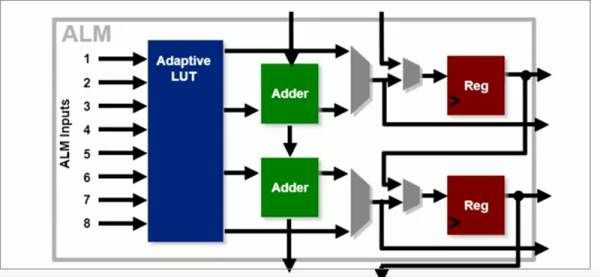
FPGAs can have a steep learning curve, so getting started tutorials are a popular topic. Intel recently published a video titled “Basics of Programmable Logic: FPGA Architecture” and you can see it below. Of course, Intel bought Altera, so the material has a bit of Altera/Intel flavor to it, but the course is generic enough that the concepts will apply to just about any FPGA.

Of course, if you do want to use Quartus, there are quite a few follow-on courses, including the wonderfully named “Become a [sic] FPGA Designer in 4 Hours.” We’d really like to see a sequel titled “Become a Proficient FPGA Designer in 9 Months” but Google didn’t turn that one up.

Continue reading “Another Introduction To FPGAs”