NESPoise – A Nice Looking NES Clone

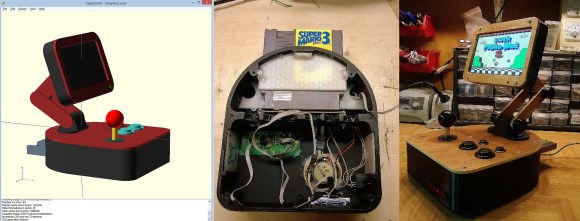
[Dave] tipped us about the latest project he just finished: a posable, desktop NES clone arcade machine. This idea came to be when its creator gathered a few bits and pieces he had lying around: an NES Retro Entertainment System (Retrobit RES, found for less than $25) and an arcade stick with its buttons. [Dave] then bought a 7″ car DVD screen (less than $40) and started a first standard arcade-looking design with OpenSCAD. As the first draft was relatively boring, he let it mature for a bit until he got another idea, shown in the picture above.

The final result is made of 3D printed PLA and varnished luaun plywood which gives the console a VCS style retro look. Many hours were required to 3D print the different parts using a Makerbot Replicator 2. [Dave] disassembled his Retrobit RES to layout its parts inside the case and  also replaced the original voltage regulator with a 7805 on a big heatsink. This may be one of the best ‘nintendo’ hacks we have received over the years, but there have been others that also take cartridges.

A Raspberry Pi Arcade Stick

rpiArcadeStick

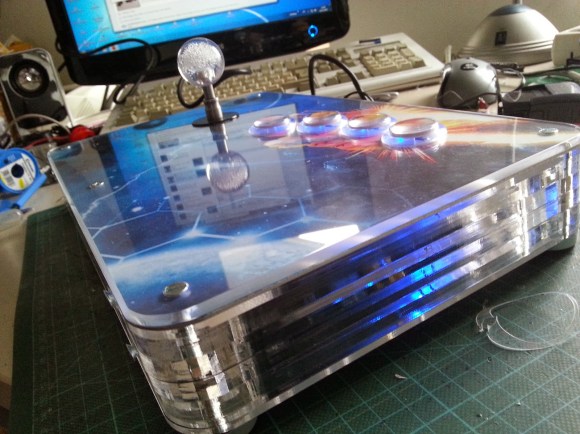
There are plenty of Raspberry Pi arcade builds out there, but rarely do we come across something as sleek as [Jochen Zurborg’s] RasPi Arcade Stick. The build combines everything you’d expect from other RasPi arcade projects, but manages to pack everything into the form factor of a portable stick modeled on the Neo Geo 4’s button layout. It may not be as small as the tiny MAME cabinet from last year, but it definitely delivers a more authentic arcade experience.

[Jochen] had previously developed an add-on PCB for the Pi called the PiJamma, which simplifies connections from the RasPi’s GPIOs by providing a JAMMA interface for the controller(s). The Pi and the PiJamma sit inside a custom-made acrylic enclosure and hook up to the buttons and joystick above. Rather than try to fit the Pi directly against a side panel for access to the various outputs, [Jochen] rerouted the USB, HDMI, and headphone jacks and arranged them into a tidy row on the back side of the box. The top piece of the enclosure consists of a sheet of aluminum wrapped in custom artwork, with an additional sheet of acrylic on top for protection. [Jochen] also modified each of the arcade buttons to include LEDs that illuminate the buttons’ acrylic holder, and the case itself appears to have been cut into slats on each side to provide better ventilation.

Check out his project blog for further details and for a huge gallery of progress photos, then see a quick video of the RasPi Arcade Stick after the break.

Continue reading “A Raspberry Pi Arcade Stick”

Turning A Storefront Into A Video Game

invasion

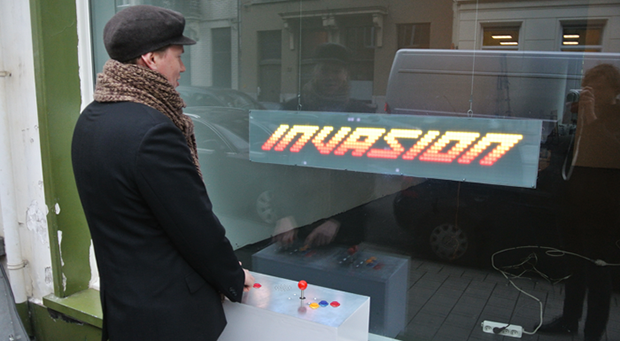
[Kris]’ house/office has a huge store window, and instead of covering it up with newspapers, decided to do something cool. He’s had projections and other art pieces on display for his neighbors, but his new storefront arcade game very likely beats all of those.

Every video game needs a display, and this one is no slouch. The display is a 16*90 matrix of WS2812 LEDs with inset into a laser cut grid and put behind a layer of plexiglass. With this grid, the display has a great raster effect that’s great for the pixeley aesthetic [Kris] was going for. In front of the window is an MDF and steel arcade box powered by an Arduino Due.

The game is driven by the Adafruit neopixel library, with a few modifications to support alpha blending. There’s no external memory for this game – everything is running on a second Arduino Due inside the window.

It’s a great looking game, and if you’re ever in [Kris]’ area – behind the zoo in Antwerp – you’re free to walk up and give this game a spin.

Video demo below.

Continue reading “Turning A Storefront Into A Video Game”

Mini Supergun PCB

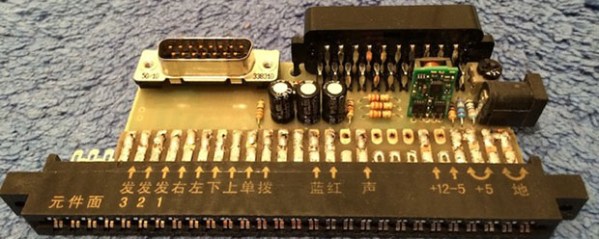
A few decades ago, Japanese manufacturers of arcade games realized they should make a connector for all their boards that provides the power, controller, video, and audio I/O. This became the JAMMA standard and it make arcade owner’s lives awesome. Because you can buy arcade boards off the Internet, arcade enthusiasts figured out they could build their own console with an ATX power supply, AV connectors, and a few controllers. These ‘superguns’ as they’re called are big devices with wires all over the place. [Charlie] wanted to condense the size of his supergun and ended up creating a single PCB solution (link dead, try the Internet Archive version).

The JAMMA compatable boards require a few power connections; +5 V, +12 V, and -5 V. Of all the boards [Charlie] has collected so far, he realized only one used the negative supply. This, along with a big 12V laptop power supply, means the only power connection for this mini supergun is a single barrel connector.

For the controls and A/V, DSub and SCART connectors are commonplace. Laying these parts out in Eagle resulted in a single-sided board that is easily fabbed by etching with a toner transfer at home.

There are a few problems with the build, as [Charlie] admits. Some of the pins on the JAMMA connector aren’t on the board. These are only ground pins on the pinout, and so far everything works okay. It’s still a great project, though, that turns old arcade boards into a playable device with a minimal amount of hardware.

A Killer Arcade Cabinet For Halloween

slaughterhouseArcade

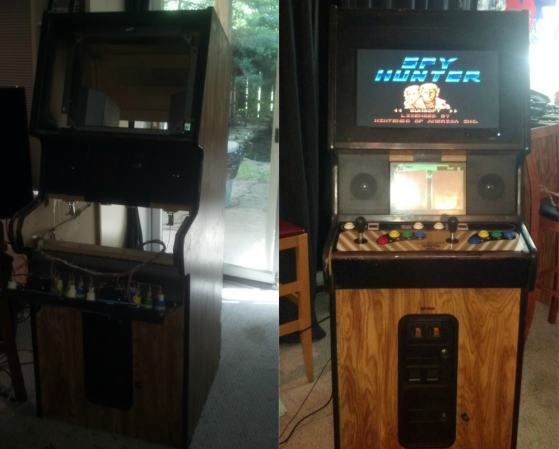
It’s already pretty cool that [Clay] co-owns an Arcade, but he’s really impressed us with his custom-made Splatterhouse cabinet built to get his patrons in the Halloween spirit! A Namco brawler title from 1988, Splatterhouse came in an unadorned and otherwise forgettable cabinet. [Clay] salvaged an old Williams Defender, coating the sides with a cocktail of drywall compound, sand, and paint to achieve a stone texture. He then carved up some pink insulation foam into a tattered “wooden” frame and used it as a monitor bezel. For accents, he fashioned strips of latex to resemble torn flesh and placed them among the boards. The control panel is yet another work of art: [Clay] 3D printed a life-size human femur for the game’s joystick, and converted the buttons to look like eyeballs.

[Clay] decided to go beyond the stunning cosmetics, though, and tapped into the game’s CPU with a custom daughterboard that detects different in-game events and state changes such as player health. An ATMega165 uses four PWM outputs connected to a number of LEDs inside the cabinet and around the monitor bezel to react to the different events. If a player takes damage, red lights flash around the monitor. Inserting a coin or dying in the game causes a different set of LEDs behind the marquee to go nuts.

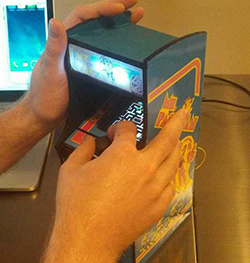
Check out his detailed project page for more information and see a video overview below. If building a full-scale arcade machine is out of your budget, you can always make a tiny one.

Continue reading “A Killer Arcade Cabinet For Halloween”

Custom Arcade Control Panel

Anybody can fire up an emulator and play arcade games of yesteryear, but if you want to capture more of the nostalgia, you should build a custom arcade control panel. [Quinn] started her build by narrowing down which games she was most interested in playing, and decided on a straightforward 2-player setup. The biggest challenge was finding joysticks that would allow for switchable 4-way or 8-way control: some games such as Ms. Pac Man were made for 4-way joystick input, and the added positions on a 8-way can lead to confused inputs and frustrated players.

[Quinn] found the solution with a pair of Ultimarc Servo Stik joysticks, which use a servo motor to swap between 4 and 8-way mode. The output from both the joysticks and the buttons feed into an iPac encoder, which converts the signal to emulate a USB keyboard. The panel was first mocked up on butcher paper, with dimensions borrowed from various games: the panel itself resembles Mortal Kombat 2, while the buttons are spaced to match X-Men vs Street Fighter 2. [Quinn] chose some spare melamine—plywood with a plastic coating—to construct the panel, drilled some holes and used a router to carve out space for the joysticks. A USB hub was added to power the servos and to make room for future additions, which [Quinn] will have no difficulty implementing considering that her electrical layout is enviably clean. To cap it all off, she fit two “coin slot” buttons: a quarter placed into a slot serves as a start button when pressed.

Be sure to see the videos after the break that demonstrate the coin buttons and the servos, then check out a different retro joystick hack for a tripod controller, or look to the future with the Steam Controller.

Continue reading “Custom Arcade Control Panel”

Have A Router? Build A Skeeball Machine

skee

There are a lot of hackerspaces and maker labs all around the world that have amazing capabilities for manufacturing. Mills, lathes, drill presses, laser cutters, and CNC routers are no stranger to the any maker’s arsenal of tools. Do you know what isn’t? A DIY Skeeball machine.

This, ‘should be a project for every hackerspace’ project is the brainchild of [fungus amungus] over on Instructables. Despite what you might think about the complexities of building a Skeeball machine, [fungus’] build is actually rather simple, and also easily transportable.

The main material used in the build is seven sheets of 3/4″ plywood. These sheets were cut out on a ShopBot CNC router, and held together with screws in a tab-and-slot construction scheme. The playfield is covered with cork for what we assume is a proper Skeeball experience, and all the electronics controlled by an Arduino and Laptop.

The electronics for this build are very simple – just a few IR distance sensors mounted under the holes. The laptop is running a Processing sketch to display the score on a TV above the cage, allowing for some improvements in the gameplay and scoring system of the original Skeeball machines.

It’s a really fantastic project, and something that we’re sure will be the center of attention wherever [fungus] brings it.

Continue reading “Have A Router? Build A Skeeball Machine”