[Ray] just tipped us about his latest project: the SquareWear Mini, which basically is an improved version of the SquareWear 2.0 that we featured a month ago. For our readers that may have missed it, the SquareWear is essentially a wearable Arduino platform running at 3.3V and 12MHz. Both versions are based on an ATMega328 microcontroller running the V-USB library to provide USB connectivity, put together with diverse onboard peripherals.
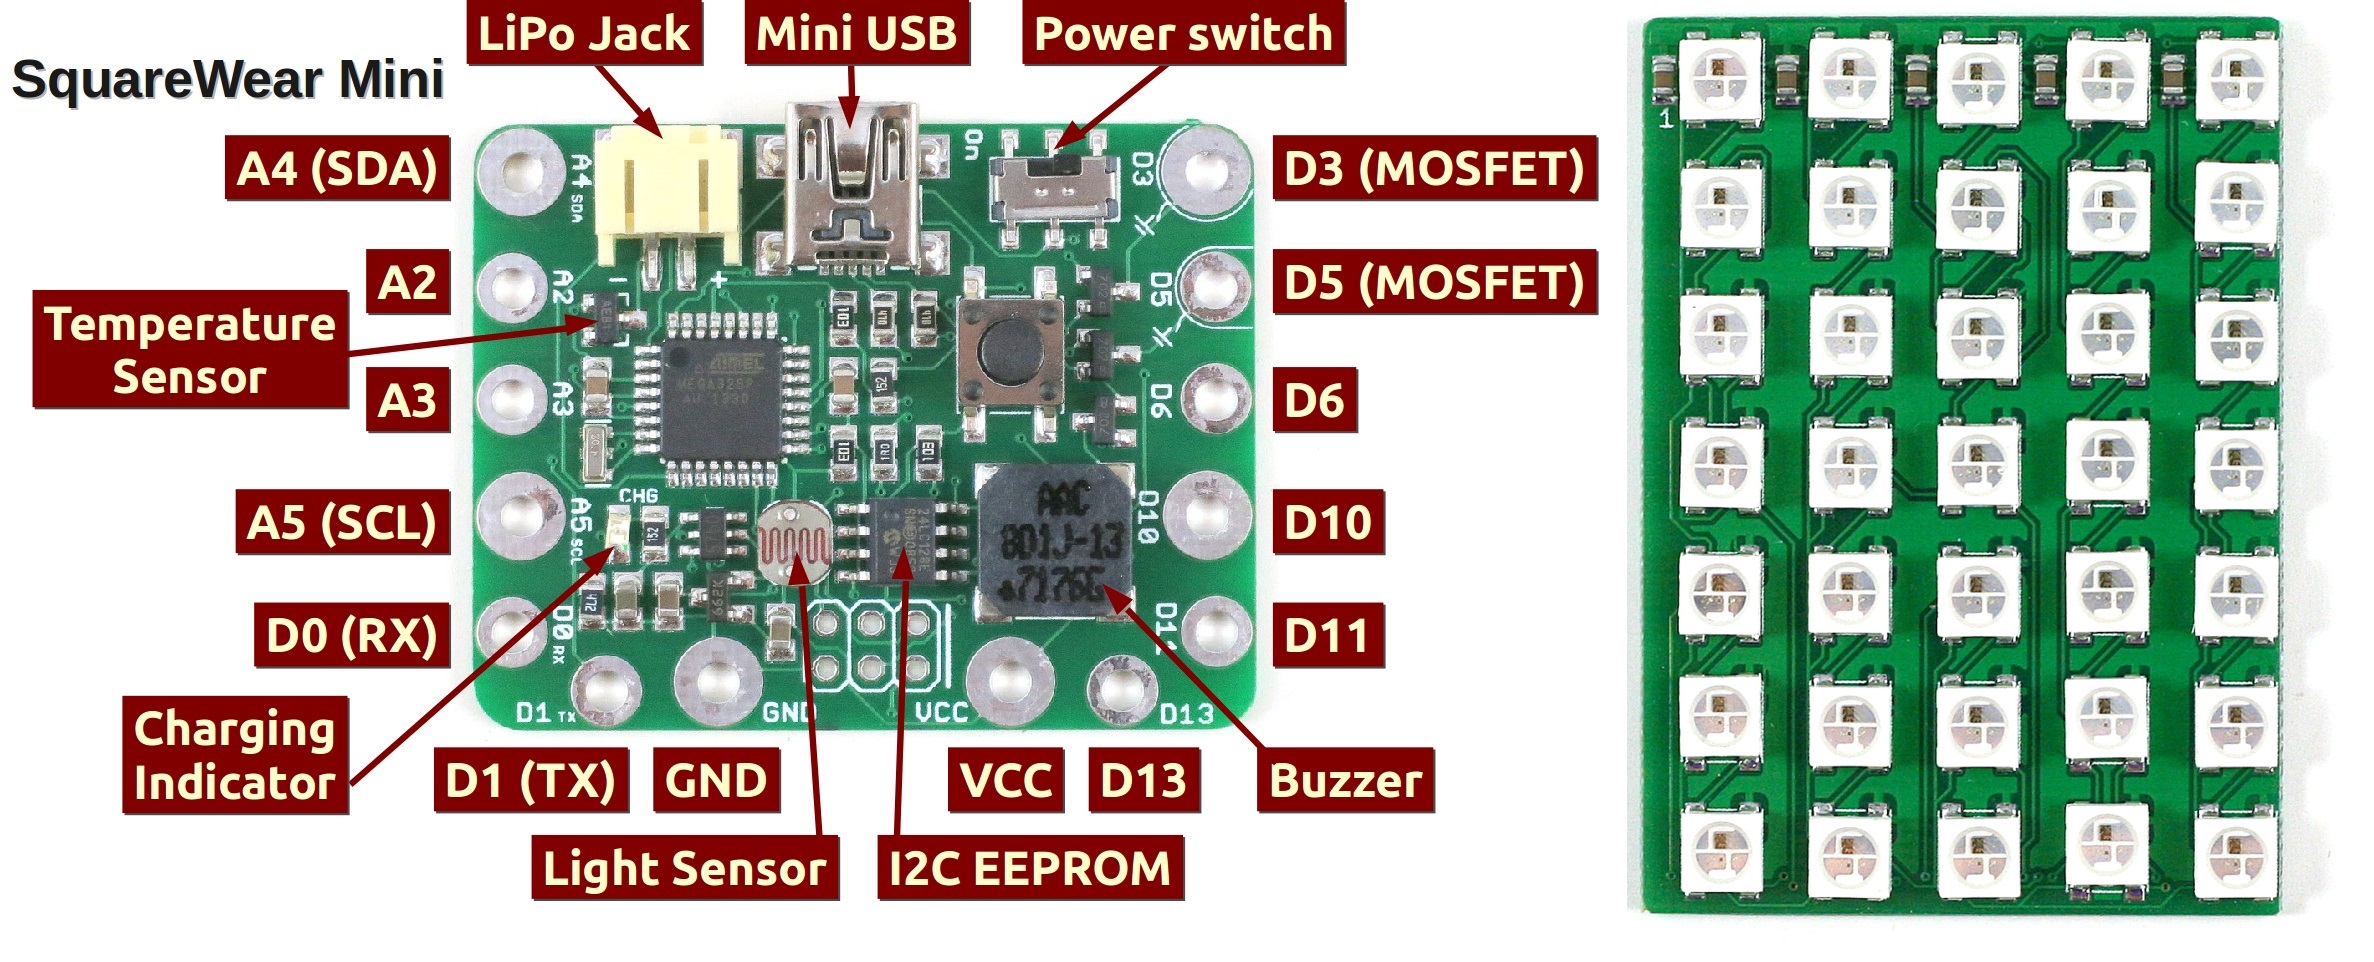
As you can see in the picture above, the Mini includes 2 N-MOSFETs, one temperature sensor, one light sensor, a 16KB EEPROM memory, one buzzer, a one cell LiPo battery connector together with one charging controller, and finally a power switch (USB/battery). It is supposed to be 25% smaller than the SquareWear 2.0 and is optimized to work with a WS2812B-based 5×7 RGB LED matrix that [Ray] also designed. The latter can easily be cascaded in X/Y directions with other LED matrices in order to expand the overall display.
At last, [Ray] created a software to design animations and upload them to the SquareWear . A presentation video of the complete system is embedded after the break and you can download all the design files on GitHub.
Continue reading “Introducing The SquareWear Mini, With Its Chainable Color LED Matrix”