Ultrasmall Arduino

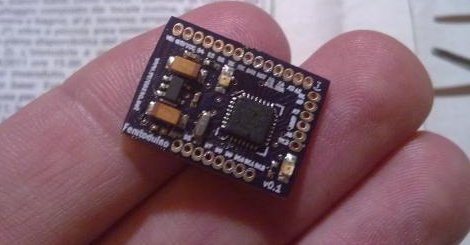
[Fabio Varesano’s] new Arduino compatible board packs a full power punch in a ultra compact layout, measuring at 20.7×15.2 mm, the Femtoduino is probably the smallest 328 based Arduino compatible board around. Most of the staples are present, an QFN atmega328, an MIC5205 low dropout regulator good for a couple hundred milli amps, 16MHz ceramic resonator, reset, power indicator and pin 13 LEDs, but you will need to provide your own serial connection (FTDI, MAX232 etc) and another AVR programmer to get the Arduino boot loader onto the chip.

Since the board is small (smaller than a pro mini) it is not directly breadboard friendly. Even though the hole spacing is 0.05 inch, the size is large enough for “normal” wire to fit into fine, if you wish to use 0.1 inch spacing there is a handy break out board you can make where the Femtoduino just snaps in.

Everything needed to make one of your own is provided on the website, schematics, kicad files, bill of materials, Gerbers for both the board and the breakout board, though we would like to see this as a pre-made board soon, join us after the break for a video and see why.

Continue reading “Ultrasmall Arduino”

The Wandering Arduinobot

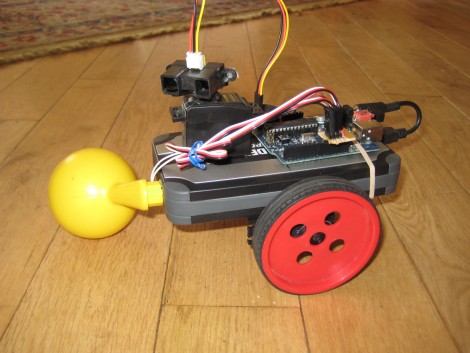
You almost have to love this Arduino based robot just because of the wheels and third leg support. Look closely, do you recognize them? Yep, they’re Capsela parts! That’s a blast from the past and we wonder why we don’t see the strange building toys of yore used in more hacks?

But we digress, this little bugger guy uses continuous rotation servos for locomotion. Perched atop the body is a third servo which scans an IR range finder back and forth to look out for obstacles in its path. The body itself is a Black and Decker rechargeable battery pack called Pocket Power which includes a USB port for a regulated 5V supply. One thing’s for sure, this little guy is fantastic at avoiding pizza and beer… you’ll just have to see for yourself after the break.

Continue reading “The Wandering Arduinobot”

Ski Pole Persistence Of Vision

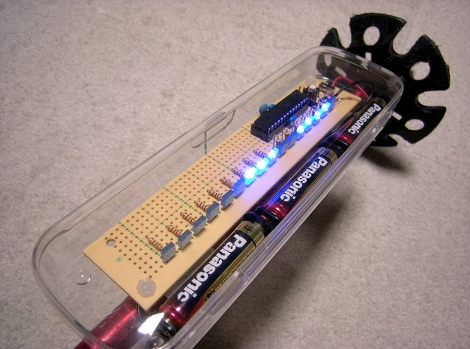
[Powder4u] wanted to make a persistence of vision display for his bicycle but with 50 cm of snow on the ground it’s hard to get out and ride right now. Instead he made this persistence of vision ski-pole accessory. We asked him to share some details and he obliged. It’s made using an Arduino compatible ATmega168, LEDs with resistors, and installed on some protoboard. The enclosure is a clear pencil case, which isn’t water tight but he’s tried to bolster that with some creative scotch tape placement. There’s no sensor to detect which direction the board is moving in so displaying alpha-numeric messages will have some issues, but as you can see he managed to display image data without issue.

We’re used to night skiing with floodlights along the slopes. This would be a fun little thing to have along with you on those dark lift rides.

Nimbus, The Wall-following Robot

nimbus_wall_following_robot

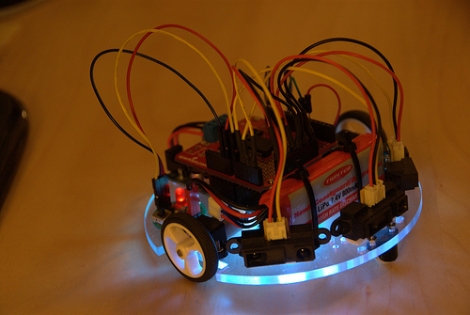
[Johannes] sent in the latest iteration of an ongoing project – Nimbus, the wall-follwing robot. Originally operating on a cardboard frame, the robot has undergone several revisions as you can see by reading through his blog. Nimbus started out as a simple, Arduino-powered robot, but the project has progressed nicely over time. The last revision simply avoided walls, using a Sharp IR proximity sensor to detect, then avoid obstacles. The most recent model sports a nice polycarbonate frame as well as two additional IR proximity sensors, allowing Nimbus to navigate quite well, following walls and avoiding obstacles with ease. It does get caught up from time to time on carpets and wires, but overall Nimbus is a great little robot. [Johannes] even added a small RGB status LED for the bottom of the bot, communicating its navigation status to the operator at all times. This is done by flashing various colors when objects have been discovered or have moved out of sight – it’s a really novel addition.

Keep reading for a video of Nimbus navigating his way around, and don’t forget to check out the Nimbus photo stream.

Continue reading “Nimbus, The Wall-following Robot”

What Development Board To Use? (Part Two)

We asked for responses to our last Development Board post, and you all followed through. We got comments, forum posts, and emails filled with your opinions. Like last time, there is no way we could cover every board, so here are a few more that seemed to be popular crowd choices. Feel free to keep sending us your favorite boards, we may end up featuring them at a later date!

Continue reading “What Development Board To Use? (Part Two)”

Valentine’s Day Love Song Machine

tellart_bell_ensemble

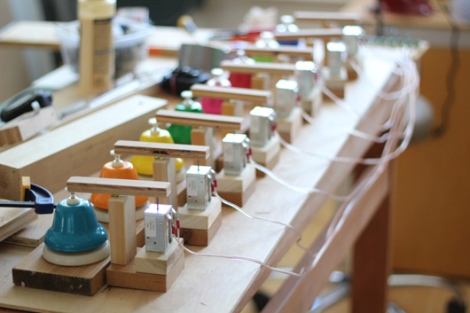
Just in time for Valentine’s day, [Adam Meyer] and the folks over at tellart.com have put together a little project they call the “Love Song Machine“. Using a web-based form, anyone can submit a song, which will then be played on a system of bells that they have set up in their office. You can choose from several pre-defined love songs, or you can create your own unique arrangement with which to serenade them. Once you are ready to go, your song will be queued up, and you can watch a video of your creation as it is being played.

The system is comprised of 8 solenoid-actuated bells which are all controlled by the Arduino they have hooked up to their web server. It’s a pretty fun idea, and there are sure to be plenty of people submitting songs, so get yours in before things get too busy!

Keep reading to see a video preview of their system in action.

Continue reading “Valentine’s Day Love Song Machine”

Radio-controlled LED Light Show

HL1606_radio_controlled_light_show

[Alan] was commissioned to make some wearable, radio-controlled LED strips for the Travelling Light Circus. It has taken some time, but he has recently finished some prototypes, and thought it was a good time to do a writeup on the project. The system is managed by a single controller unit, which communicates with any number of LED driver units, each controlling 4 HL1606 LED strips. The light displays are synchronized across all of the LED driver units via a 2.4 GHz radio, with each driver falling into synch almost immediately after being powered on. While some might be turned off to the fact that he uses Arduino Pro Minis to control the LEDs, this is far from a simple project.

[Alan’s] blog contains several posts about this project, with everything documented in detail. He spends quite a bit of time talking about the project’s software, as well as hardware issues he ran into along the way.

His blog is a must read, but even more so, it is a must see. The lighting effects are mesmerizing, as there are a ton of different light patterns these units can generate, so be sure to check out the following video of the lights in action.

Continue reading “Radio-controlled LED Light Show”