Alien Inspired Cyberdeck Packs Vintage Atari 800XL

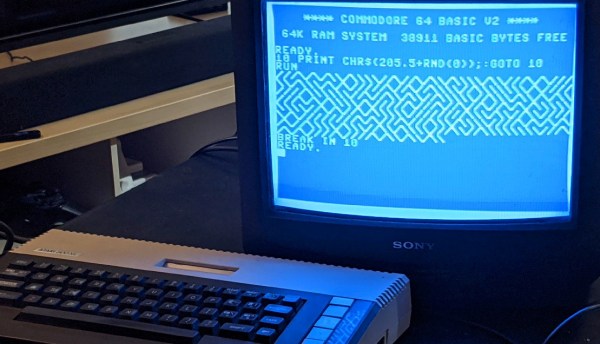
Sticking a Raspberry Pi in a Pelican-style case and calling it a cyberdeck has become something of a meme these days, and while we certainly don’t look down on such projects, we recognize they can get a bit repetitive. But we think this one is unique enough to get a pass. Sure [eizen6] mounted a Pi inside of a rugged waterproof case, but it’s simply serving as a display for the real star of the show: a vintage Atari 800XL computer.

The overall look of the build, from the stenciled Nostromo on the back to the self-destruct warning sticker over the display is a reference to Alien. Partly because both the film and the Atari 800 were released in 1979, but also because [eizen6] says this particular aesthetic is simply the way computers should look. The visual style is also meant to signify that the project embraces the old ways despite the sprinkling of modern technology.

A custom cable lets the 800XL run on USB power.

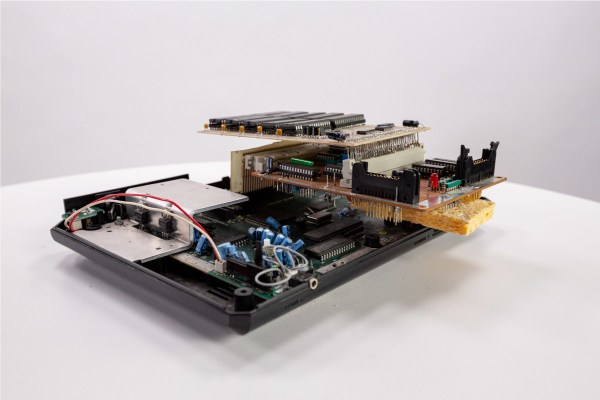
To that end, retro aficionados will be happy to hear that the Atari appears to be completely unmodified, with [eizen6] going as far as nestling the nearly 40 year old computer in foam rather than permanently mounting it to the case. The various cables for power, video, and data have all been terminated with the appropriate connectors as well, so everything can be easily unplugged should the 8-bit machine need to be returned to more pedestrian use.

In the top half of the case, [eizen6] has mounted the Raspberry Pi 3B+, a seven inch touch screen, a USB hub, and a SIO2SD that allows loading Atari disk images from an SD card. Using a USB capture device, video from the Atari can be shown on the Pi’s display with a simple VLC command. With a USB keyboard plugged into the hub, the Pi can be put to more advanced use should the need arise. It’s also worth noting that, thanks to a custom cable, the Atari is running off of a USB power bank. With a second USB power bank dedicated to running the Pi and its LCD display, this retro cyberdeck is fully mobile.

We’ve seen plenty of modern builds that try and recapture the look and feel of retro computers, but very few that actually integrate the genuine article. While the aesthetic might not be everyone’s cup of tea, we can all appreciate the respect shown for the original hardware in this build.

Modern Network Adapter For Retro Computers

Universal Serial Bus, or USB, is so ingrained in modern computing that it’s hard to imagine a time without it. That time did exist, though, and it was a wild west of connector types, standards, and interfacing methods. One of the more interesting interfaces of the time was the SIO system found in 8-bit Atari computers which ended up sharing a lot of the features of modern USB, and its adaptability is displayed in this modern project which brings WiFi, Bluetooth, USB, and SD card slots to any old Atari with an SIO port.

The project is called FujiNet and it uses the lightweight protocol of SIO to add a number of modern features to the 8-bit machine. It’s based on an ESP32, and the chip performs the functions of a network adapter by bridging WiFi and Bluetooth to the Atari. It does this by simulating drives that would have potentially been used on the Atari in its time, such as a floppy disk drive, an RS232 interface, or a modem, and translating them to the modern wireless communication protocols. It even has the ability to emulate a printer by taking the output of the print job from the Atari and converting it to PDF within the device itself.

Not only does this bring a lot of functionality to the Atari, which you may be able to use to view sites like retro.hackaday.com, but the FujiNet is housed in a period-appropriate 3D-printed case that matches the look and feel of the original Atari. If you need a more generic solution for your retrocomputing networking adventures that isn’t limited to SIO, we recommend grabbing a Raspberry Pi to handle that.

Thanks to [Gavin] for the tip!

Access An 8-bit Atari Through Twitter

Building a retro computer, or even restoring one, is a great way to understand a lot of the fundamentals of computing. That can take a long time and a lot of energy, though. Luckily, there is a Twitter bot out there that can let you experience an old 8-bit Atari without even needing to spin up an emulator. Just tweet your program to the bot, and it outputs the result.

The bot was built by [Kay Savetz] and accepts programs in five programming languages: Atari BASIC, Turbo-Basic XL, Atari Logo, Atari PILOT, and Atari Assembler/Editor, which was a low-level assembly-type language available on these machines. The bot itself runs on a Raspberry Pi with the Atari 800 emulator, rather than original hardware, presumably because it’s much simpler to get a working network connection on a Pi than on a computer from the 80s. The Pi runs a python script that polls Twitter every two minutes and then hands the code off to the emulator.

[Kay]’s work isn’t limited to just Ataris, though. There’s also an Apple II BASIC bot for all the Apple fans out there that responds to programs written in AppleSoft BASIC. While building your own retro system or emulating one on other hardware is a great exercise, it’s also great that there are tools like these that allow manipulation of retro computers without having to do any of the dirty work ourselves.

Miniature Faux Floppy For 8-Bit Atari Looks The Part

There’s plenty of fun to be had with retrocomputers of yesteryear, but for modern users, it can be something of a culture shock. Going back to floppy disks after all these years is a reminder of just how far storage technology has come in terms of speed, reliability, and of course, capacity. Luckily, there are ways to combine the best of both worlds.

Floppy drive emulators for classic computers are of course nothing new, but we think this one [c0pperdragon] has put together is worthy of a closer look. Not only does the ATmega32U4 based emulator have an exceptionally low part count, but the code has been written in the Arduino IDE. Both features make it easy for new players to duplicate and revise the design should they feel so inclined. In a pinch you could even implement it on a breadboard with a garden variety Arduino.

The emulator is housed in a 3D printed enclosure designed to look like an era-appropriate Atari 1050 Disk Drive, except you’re using SD cards instead of floppies. The firmware can mimic two physical drives and supports up to 100 disk images on each SD card. The user interface is about as simple as it gets, with two push buttons and a pair of seven-segment LEDs to indicate which disk image is currently loaded up.

We’ve seen some very elaborate disk emulators over the years, but there’s something compelling about how straightforward this version is. If it helps a few more people experience the unique joys of retrocomputing, it’s a win in our book.

Retrocomputing Spray Paints: Amiga Beige, Commodore, And ATARI Grey

[retrohax] has provided vintage computer guidance for years, and part of that guidance is this: sometimes using paint as part of restoration is simply unavoidable. But the days of tediously color-matching to vintage hardware are gone, thanks to [retrohax] offering custom-mixed spray paints in Amiga 500 Beige, C-64 Beige, and ATARI ST/SE Grey. (At the moment only delivery within Poland is available due to shipping restrictions, but [retrohax] is working on a better solution.)

As a companion to making these vintage colors available, there is also a short how-to guide on how to properly prep and spray paint a computer case for best results that talks a little about the challenges in color matching to vintage hardware, and how getting custom paints mixed makes life much easier. Hackers may value making do with whatever is available, but we can also appreciate the value of having exactly the right material or tool for the job.

It’s not every day we see someone mixing custom spray paint colors, but off the shelf options don’t always cut it. Another example of getting specialty materials made from the ground up is custom plywood specifically designed for laser-cutting puzzles, something done because the troubles that came with off-the-shelf options were just not worth the hassle.

38 Years Later, The Atari 2600 Learns To Speak

Back in the early 1980s, there was a certain fad in making your computer produce something resembling human speech. There were several hardware solutions to this, adding voices to everything from automated telephone systems to video game consoles, all the way to Steve Jobs using the gimmick to introduce Macintosh to the world in 1984. In 1982, a software-based version of this synthesis was released for the Atari 8-bit line of computers, and ever since them [rossumur] has wondered whether or not it could run on the very constrained 2600.

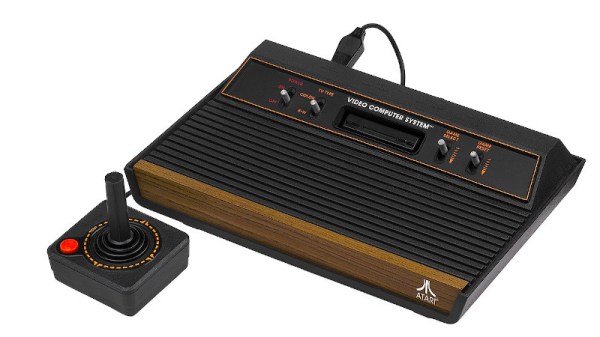
Fast-forward 38 years and he found out that the answer was that yes, it was indeed possible to port a semblance of the original 1982 Software Automatic Mouth (or SAM) to run entirely on the Atari 2600, without any additional hardware. To be able to fit such a seemingly complicated piece of software into the paltry 128 bytes (yes, bytes) of RAM, [rossumur] actually uses an authoring tool in order to pre-calculate the allophones, and store only those in the ROM. This way, the 2600 alone can’t convert text to phonemes, but there’s enough space left for the allophones, which are converted into sound, that about two minutes of speech can fit into one cartridge. As for why he went through the trouble, we quote the author himself: “Because creating digital swears with 1982 speech synthesis technology on a 1977 game console is exactly what we need right now.”

For this project, [rossumur] has written an incredibly interesting article on speech synthesis in order to explain the SAM engine used here. And this isn’t his first time on the website either, always cramming software where it shouldn’t fit, such as a “Netflix”-like streaming service, or 8-bit console emulators, both on nothing but an ESP32 microcontroller. Check this one out in action after the break.

Continue reading “38 Years Later, The Atari 2600 Learns To Speak”

Retro Game Bow Tie

[Greg] loves hacking his bow ties. Back in high school, he added some bright RGB LEDs to the bow tie he wore to prom and even won the male best-dressed award. Recently he decided to try another bow tie hack, this time giving his tie some retro arcade game feels.

He decided to use an ATtiny85 and to experiment doing some more lower-level programming to refresh his skills. He wrote all his libraries from scratch which really helped him learn a lot about the ATtiny in the process. This also helped him make sure his code was as efficient as possible since he had quite a bit of memory constraints using the ATtiny85 (only 512 bytes of RAM).

He designed the body of the bow tie with wood. He fit all the electronics inside the body while allowing the ATtiny to protrude out of the body giving his bow tie some wanted hacker aesthetic. Of course, he needed to access the toggle switch to play the game, so he made a slot for that as well.

Nice addition to the electronics bow tie collection on Hackaday. Really aesthetic design if you ask us. And you know how much we love retro games.

Continue reading “Retro Game Bow Tie”