Adding Persistent Memory And Ethernet To Vintage Arcade Machines

z80_bus_tapper

If you are a frequent reader, you are undoubtedly familiar with hacker [Sprite_tm]. He has been working with fellow members of the TkkrLab hackerspace to get things ready for their official grand opening on May 28th, and wrote in to share a project he recently completed to kick things off.

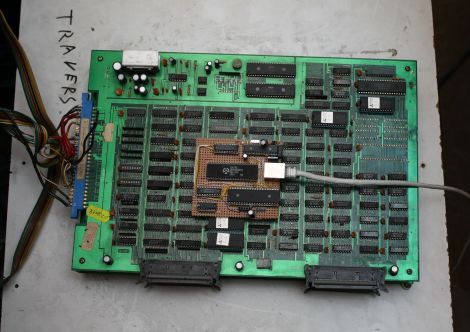
As part of their preparations, they have been stocking the joint with all sorts of hacker-friendly goodies including plenty of tools and Club Mate, as well as a vintage ‘1943’ arcade cabinet. The game is a group favorite, though every time the power is turned off, it loses all of the hard-earned high scores. [Sprite_tm] knew he could improve on the current paper-based score register, so he pulled the machine open to see what could be done.

He used an AVR to tap into the machine’s Z80 logic board, allowing him to read and write to the entirety of the game’s RAM whenever he pleased. This enabled him to keep tabs on the high scores, restoring them to memory whenever the machine is powered back on. The addition of the AVR also allowed him to add a TCP/IP interface, which is used to send high scores to Twitter whenever someone beats the previous record.

His modular bus tap can be used in all sorts of Z80-based hardware, so if you have some vintage equipment laying around, be sure to swing by his site for a more detailed look at the build process.

BAMF2011: ChipKIT Is Arduino To The Power Of 32

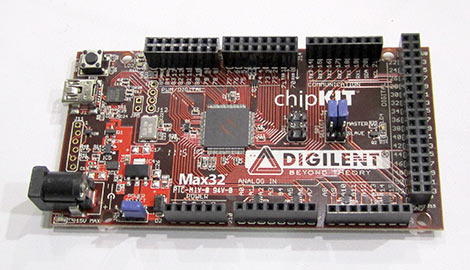
If you’ve been hungry for more power for your microcontroller projects, but reluctant to dump your investment in Arduino shields or the libraries and community knowledge that go with them all, Digilent has you covered. Their new chipKIT boards are built around the Microchip PIC32 MCU…a powerful 32-bit chip that until recently was left out of the cross-platform scene. A majority of code and quite a number of Arduino shields will work “out of the box” with the chipKIT, and the familiar development tools are available for all three major operating systems: Windows, Mac and Linux.

We first mentioned these a couple weeks ago, but the software was unavailable at the time. Seeing the development tools in action was quite unexpected…

Continue reading “BAMF2011: ChipKIT Is Arduino To The Power Of 32”

ir_power_meter

Monitor Your Home’s Power Usage On The Cheap

[Paul] was pretty sure that he and his family used a lot of electricity throughout the day. Admittedly, he enjoys his creature comforts, but was wiling to try living a little greener. The problem was, he had no idea how much electricity he was using at a given time.

While some power companies offer devices allowing homeowners to monitor their energy usage, [Paul’s] did not. After a bit of research however, he was ready to build a power monitoring system of his own. He found that his meter emits a small infrared pulse every time a watt-hour of electricity is consumed, so his system counts how many flashes occur to measure usage.

The counting circuit is pretty simple consisting of only an AVR, a resistor, a capacitor, and a phototransistor. The data is fed to a computer where the results are graphed with gnuplot.

It’s quite a useful little hack, and undoubtedly far cheaper than purchasing a whole house power monitor.

Simple AVR Based GPS Tracker

The latest project from Lucidscience.com is a simple AVR based GPS tracker. As usual, the instructions here are quite in-depth including schematics and step by step procedures all the way down to modifying cables when necessary. What we found interesting is that the GPS module he’s using is so simple. It only requires 3 wires, one for power, one for serial communication, and one for a heartbeat.

For the microprocessor, he’s using an ATMega 324, which is a bit of processing overkill but he needed the SRAM for the GPS point storage. You could obviously expand to external storage but the goal here was to keep it extremely simple. Actually, there just isn’t a whole lot here other than the microprocessor, the GPS module, and a level converter. After wrapping up the circuit he goes on to explain how to get the data into Google Earth for display. After a few trips around the block you can see the results are quite nice.

Open Hacker Conference Badge Project Needs Your Help!

[Aestetix] writes in to tell us that the OpenAMD (Attendee Meta-Data) project is working on a new revision of their hardware, to be debuted at CCC Camp this fall.

For the uninitiated, OpenAMD combines an Active RFID tracking system with social networking, and is completely open-source. You walk into the conference, put on the OpenAMD badge, and suddenly you can see yourself as a dot moving around on a map. Or you can log into the social networking site, create a profile, and watch as your personal information is pulled into the mesh, which then tells you talks you might like, people you might like, where those people are, and more. There’s even an open API where you can create your own ‘killer’ apps, which may include games or other interesting aggregates of the attendee information.

Continue reading “Open Hacker Conference Badge Project Needs Your Help!”

AVR HVSP On A Tiny Breadboard

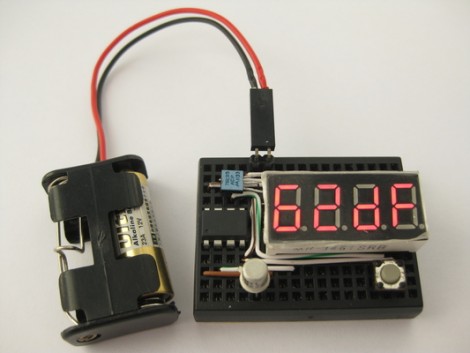
AVR chips are convenient because you can program them in circuit at their operating voltage. That is, unless you screw up the fuse settings and they’ll no longer listen to an In System Programmer. If you find yourself facing this problem, just build this circuit on a breadboard and ‘unbrick’ by holding down the button.

The circuit seen above is a High Voltage Serial Programmer. This is one of two high voltage protocols used by AVR chips; HVSP is for chips that don’t have enough pins to use High Voltage Parallel Programming. This rendition uses a 12V power source, which is the level necessary for the high voltage method. A 7805 linear regulator joins the mix to provide operational voltage, along with one transistor, an ATtiny2313 to control the circuit, a four-digit 7-segment display for feedback, and one button for control.

Watch the video after the break to see an ATtiny13 programmed to disable the reset pin using a breadboarded programmer. That chip is then easily rescued, having been automatically recognized by using its device signature.

Continue reading “AVR HVSP On A Tiny Breadboard”

Keep Fun In Check With A Parental Count Down Timer

Gaming industry software engineer [Pedantite] writes in to let us know about his latest endeavor, an AVR based parental assistant timer: Good Times.   Looking for a new project that would be both useful and interesting, his wife suggested a “time out/ time’s up timer”. Like most of us [Pedantite]’s children are well studied in the arts of procrastination and mischief.  In the kids’ case this leads to time outs and break time running amok. The solution, in this case, is pretty much an advanced DIY egg timer with fun sounds.

The timer sports all of your basic countdown-timer functions including a 4 digit 7-segment LED output display, stop light style LED indicators, and controls to start/pause and stop the count down. The count down time can be input via the +5 minute, +1 minute, and +15 second buttons. There is even a happy/sad button to toggle between “time out” and “break time” modes. Two Atmel micros power the device, an AT Tiny 2313V for the capacitive touch keypad and an AT Mega 644P for the display, audio, and time measurement.  There are a lot of excellent techniques used in the build, some which we have covered here:  Four 595 Shift registers for the display; A 4 bit r2r DAC for audio output.

[Pedantite] is still in the process of writing up the project in multiple posts, and would love to know what you all want to hear about. Check out his blog for details and a quick video of the timer in action! Also, if you are interested in capacitive buttons, check out part 2 of the writeup.