Simple AVR Based GPS Tracker

The latest project from Lucidscience.com is a simple AVR based GPS tracker. As usual, the instructions here are quite in-depth including schematics and step by step procedures all the way down to modifying cables when necessary. What we found interesting is that the GPS module he’s using is so simple. It only requires 3 wires, one for power, one for serial communication, and one for a heartbeat.

For the microprocessor, he’s using an ATMega 324, which is a bit of processing overkill but he needed the SRAM for the GPS point storage. You could obviously expand to external storage but the goal here was to keep it extremely simple. Actually, there just isn’t a whole lot here other than the microprocessor, the GPS module, and a level converter. After wrapping up the circuit he goes on to explain how to get the data into Google Earth for display. After a few trips around the block you can see the results are quite nice.

Open Hacker Conference Badge Project Needs Your Help!

[Aestetix] writes in to tell us that the OpenAMD (Attendee Meta-Data) project is working on a new revision of their hardware, to be debuted at CCC Camp this fall.

For the uninitiated, OpenAMD combines an Active RFID tracking system with social networking, and is completely open-source. You walk into the conference, put on the OpenAMD badge, and suddenly you can see yourself as a dot moving around on a map. Or you can log into the social networking site, create a profile, and watch as your personal information is pulled into the mesh, which then tells you talks you might like, people you might like, where those people are, and more. There’s even an open API where you can create your own ‘killer’ apps, which may include games or other interesting aggregates of the attendee information.

Continue reading “Open Hacker Conference Badge Project Needs Your Help!”

AVR HVSP On A Tiny Breadboard

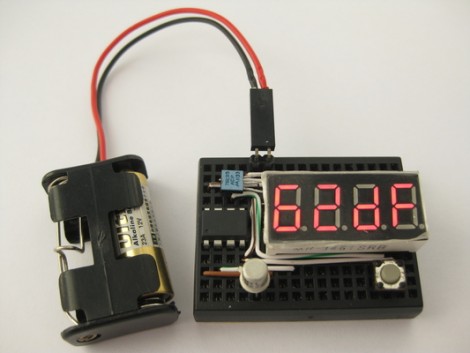
AVR chips are convenient because you can program them in circuit at their operating voltage. That is, unless you screw up the fuse settings and they’ll no longer listen to an In System Programmer. If you find yourself facing this problem, just build this circuit on a breadboard and ‘unbrick’ by holding down the button.

The circuit seen above is a High Voltage Serial Programmer. This is one of two high voltage protocols used by AVR chips; HVSP is for chips that don’t have enough pins to use High Voltage Parallel Programming. This rendition uses a 12V power source, which is the level necessary for the high voltage method. A 7805 linear regulator joins the mix to provide operational voltage, along with one transistor, an ATtiny2313 to control the circuit, a four-digit 7-segment display for feedback, and one button for control.

Watch the video after the break to see an ATtiny13 programmed to disable the reset pin using a breadboarded programmer. That chip is then easily rescued, having been automatically recognized by using its device signature.

Continue reading “AVR HVSP On A Tiny Breadboard”

Keep Fun In Check With A Parental Count Down Timer

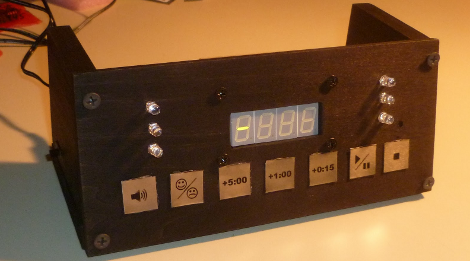
Gaming industry software engineer [Pedantite] writes in to let us know about his latest endeavor, an AVR based parental assistant timer: Good Times.   Looking for a new project that would be both useful and interesting, his wife suggested a “time out/ time’s up timer”. Like most of us [Pedantite]’s children are well studied in the arts of procrastination and mischief.  In the kids’ case this leads to time outs and break time running amok. The solution, in this case, is pretty much an advanced DIY egg timer with fun sounds.

The timer sports all of your basic countdown-timer functions including a 4 digit 7-segment LED output display, stop light style LED indicators, and controls to start/pause and stop the count down. The count down time can be input via the +5 minute, +1 minute, and +15 second buttons. There is even a happy/sad button to toggle between “time out” and “break time” modes. Two Atmel micros power the device, an AT Tiny 2313V for the capacitive touch keypad and an AT Mega 644P for the display, audio, and time measurement.  There are a lot of excellent techniques used in the build, some which we have covered here:  Four 595 Shift registers for the display; A 4 bit r2r DAC for audio output.

[Pedantite] is still in the process of writing up the project in multiple posts, and would love to know what you all want to hear about. Check out his blog for details and a quick video of the timer in action! Also, if you are interested in capacitive buttons, check out part 2 of the writeup.

Guide For Working With AVR Microcontrollers

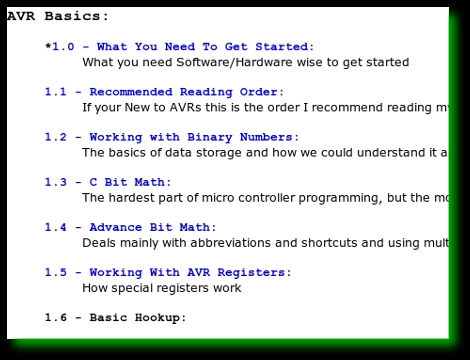
[Q] wrote in to let us know about the AVR-Guide he’s been working on. It looks like he’s finished posting about 80% of the content he planned for in his initial draft outline. We read through several of the sections and found them to be concise, yet able to present information in a way that’s easy to grasp. The screenshot above shows the most basic block of information to get started with AVR microcontrollers. We’ve covered the same information in our AVR tutorial series and think that reading through both will give you a strong understanding of the knowledge needed to work with 8-bit microcontrollers with confidence. But this resource doesn’t stop after the basics. If you’re looking to bolster your knowledge of all the features the AVR line has to offer there’s also sections explaining Digital I/O, Interrupts, Timers, Analog I/O, Communications, and Miscellaneous topics.

The site is called QEEWiki. We logged in using a Google account (this is hosted as a Google site) but didn’t see a way to edit the information. If this truly is a Wiki and you know how to edit pages please leave a comment about it after the break.

Micro Audio Player Can Hide Behind A Postage Stamp

The original iPod shuffle was a pretty small device, there’s no doubt about that. However, in the world of miniature audio players, [Chan] is no slouch either.

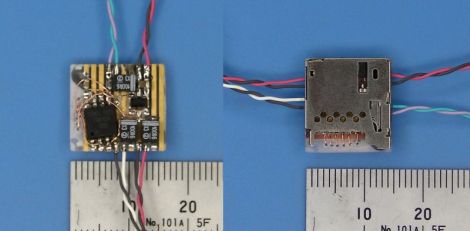
A few years ago, he set out to construct a micro audio player that used little more than a small microcontroller and a microSD memory card. He chose an ATinyX5 series microcontroller to run the show, utilizing its pair of PWM output pins to directly drive the speakers. Since there is no built-in amplifier, the audio volume is not loud, but it does sound reasonable if you use a set of high efficiency desktop speakers. He does mention that the sound can easily be amplified after passing the signal through a filter, so there is hope for those of you who like your music turned up to 11.

The only downside we can see is that the audio player can only process Wave files, but it’s hard to expect more from a DIY audio player smaller than a postage stamp. It would be great to see what sort of micro-handiwork [Chan] could perform if he were to update his design and build a full-functioning MP3 player based upon this project.

A VFD Clock That Tells The Time, Then Tells You To **** Off

sweary_vfd_clock

Clocks are relatively simple devices – they tell time, and most often sport a handful of other utilitarian features like alarms and radios. Rarely though, do you see a clock that will wake you up in the morning and also curse at you shortly thereafter. [Matt Evans] clearly thought that clocks need to pack a little more attitude, so he built his girlfriend a clock that not only tells time, but spouts off nasty phrases as well. What a lucky gal!

The clock was constructed using IV-17 VFD tubes, each bearing 16 light-able segments. It seemed wasteful to simply use the tubes to tell time, so [Matt] got busy adding other features to the clock. It has an alarm, a calendar that is always stuck on his girlfriend’s birthday, and an ambient light sensor to dim the tubes at night. It also sports a variable rudeness setting, allowing for mild insults when family members are present, and extremely foul language for when your frat brothers swing by.

He has plenty of pictures on his site, but we’re betting people will want to see schematics and some source code. After all, Mother’s Day is but a few months away!