Speeding Up BeagleBone Black GPIO A Thousand Times

For both the Raspberry Pi and BeagleBone Black, there’s a lot of GPIO access that happens the way normal Unix systems do – by moving files around. Yes, for most applications you really don’t need incredibly fast GPIO, but for the one time in a thousand you do, poking around /sysfs just won’t do.

[Chirag] was playing around with a BeagleBone and a quadrature encoder and found the usual methods of poking and prodding pins just wasn’t working. By connecting his scope to a pin that was toggled on and off with /sysfs he found – to his horror – the maximum speed of the BBB’s GPIO was around three and a half kilohertz. Something had to be done.

After finding an old Stack Overflow question, [Chirag] hit upon the solution of using /dev/mem to toggle his pins. A quick check with the scope revealed he was now toggling pins at 2.8 Megahertz, or just about a thousand times faster than before.

VT100 Gets BeagleBoned

vt100

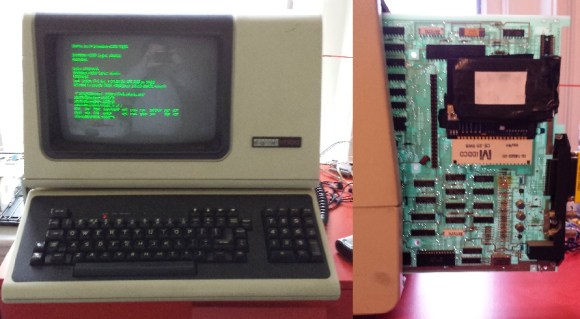
How do you make a great terminal even better?  The answer is simple: add a BeagleBone Black to it! [Brendan] got his hands on one of the staples of classic computing, the DEC VT100 terminal.  The VT100 was produced from 1978 to 1983. The terminal was so widely used that it became the standard for other terminals to emulate. Open any terminal program today and chances are you’ll find a setting for VT100 emulation.

[Brendan] originally hooked his terminal up to a laptop running Linux. The terminal, cables, and the laptop itself became quite a bit to manage on a small desk. To combat this he decided to add a BeagleBone Black inside the terminal case. It turns out the VT100 actually lends itself to this with its Standard Terminal Port (STP) connector. The STP was designed to add a “paddle board” in-line with the serial stream of the terminal. DEC and third party manufacturers used this port to add everything from disk drives to entire CPM computers to the VT100.

[Brendan] began by designing a board to interface between the VT100 and the BeagleBone. The board level shifts serial lines from the BeagleBone to the VT100. The STP also allows the terminal to provide power to the BeagleBone Black.  He did notice some power glitches as the supply of the VT100 came up. This was solved with a standard TI TL77xx voltage supervisor chip. The hardest part of the entire design was the card edge connector for the STP. [Brendan] nailed the dimensions on the first try.  In the end [Brendan] was rewarded with a very clean installation that didn’t require any modification to a classic piece of hardware.

We should note that most PCB houses use Electroless Nickel Immersion Gold (ENIG) as their standard coating. This will work for a card edge connector that will be plugged in and removed a few times.  Cards that will be inserted and removed often (such as classic console cartridges) will quickly scrape the ENIG coating off. Electroplated Gold over Nickel is the classically accepted material for card edge connectors, however the process most likely is not going to come cheap in hobbyist quantities.

BeagleBone Black Does CNC With RAMPS

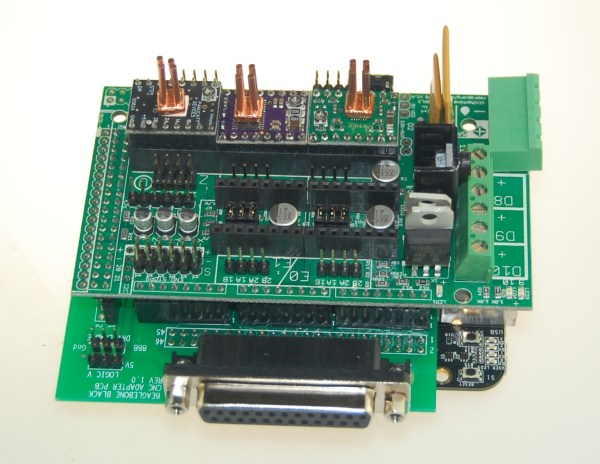
[Bart] Wanted to try controlling a CNC with his BeagleBone black, but didn’t want to invest in a CNC Cape. No problem – he created his own translator board for RAMPSLinuxCNC for the BeagleBone Black has been available for a few months now, and [Bart] wanted to give it a try. He started experimenting with a single stepper motor and driver.  By the time he hooked up step, direction, and motor phases, [Bart] knew he needed a better solution.

Several CNC capes are available for the BeagleBone boards, but [Bart] had a RAMPS board just sitting around, waiting for a new project.  Most RepRap fans have heard of the RAMPS – or Reprap Arduino Mega Pololu Shield.  In fact, we covered them here just a few days ago as part of our 3D Printering series.   RAMPS handle all the I/O needed for 3D printing, which carries over quite nicely to other CNC applications as well.   The downside is that they’re specifically designed for the Arduino Mega series. Continue reading “BeagleBone Black Does CNC With RAMPS”

Octoscroller Takes The Hexascroller To The Next Level

octosc2

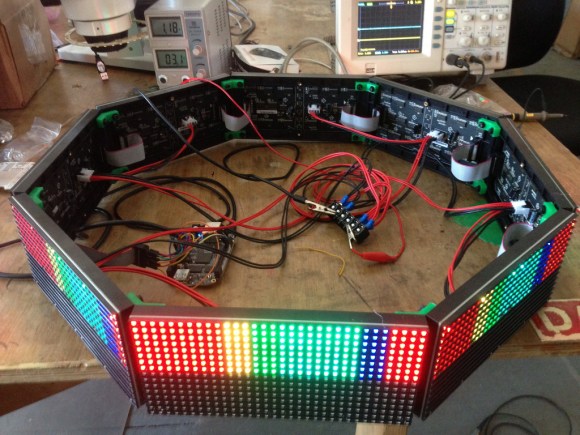
The folks at NYCResistor have a new toy in the Octoscroller. For a couple of years now the NYCResistor crew has used the HexaScroller as a clock and general alert system. Now that RGB LED panels are cheaply available, the group decided to upgrade both the number of sides and the number of colors.

Octoscroller uses eight 16×32 RGB LED panels. These panels are relatively easy to interface to, but require constant refresh even to display a static image. This makes them both memory and CPU intensive for smaller microcontrollers. Brightness control via PWM only increases the difficulty.

On the plus side, the panels are structurally strong. This allows the Octoscroller to avoid the plywood ring which made up the frame of the Hexascroller. 3D printed brackets and hardware were all that was needed to complete the Octoscroller frame.

The brain of the this beast is a BeagleBone Black running LEDscape along with some custom software. Imagery comes from the Disorient Pyramid.

If you’re in the New York area, NYCResistor plans to offer classes on building your own Octoscroller.  You can also see the Octoscroller in person at MakerFaire NYC this weekend.

RF Wireless Kernel Module For Raspberry Pi, BeagleBone And Others

rfm12b-kernel-module

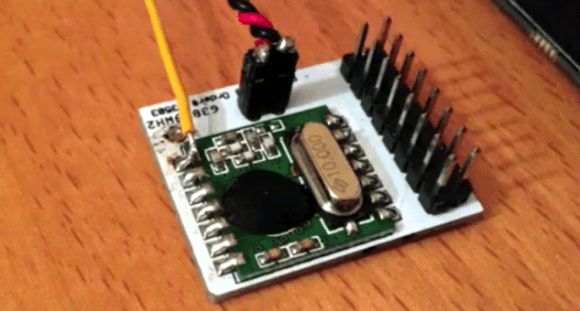
If you’ve done any wireless work with hobby electronics you probably recognize this part. The green PCB is an RFM12B wireless board. They come in a few different operating bandwidths, the 433 MHz is probably the most common. They’re super easy to interface with a small microcontroller but what about an embedded Linux board? That is the focus of this project, which builds a kernel driver for the RF module.

You can get your own RFM12B for a few bucks. They’re quite versatile when paired, but a lot of inexpensive wireless consumer goods operate on this band so the board can be used to send commands to wireless outlets, light fixtures, etc. [Georg] has been working with the BeagleBone, BeagleBone Black, and Raspberry Pi. His software package lets you build a kernel module to add an entry for the device into the /dev directory of a Linux system. So far the three boards listed are all that’s supported, but if you have five I/O pins available it should be a snap to tailor this to other hardware.

Wondering what else you can do with the setup? This will get the receiving end of a text-messaging doorbell up and running in no time.

Continue reading “RF Wireless Kernel Module For Raspberry Pi, BeagleBone And Others”

Update: Live Video Played On LED Strip Display

update-live-video-on-led-strip-display

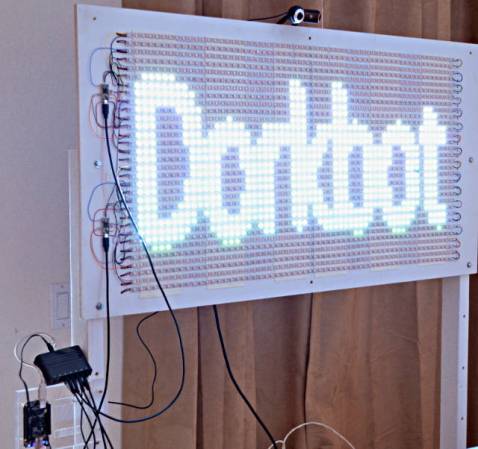
[Paul] took this LED display along with him to Maker Faire. To give it some interactivity he figured out a way to make it play live video. It is also activated using some stomp actuators built from piezo speaker elements and rubber floor mats.

This moves his original project in new directions. Back in February he was showing off the RGB LED strip display. He had it playing video but that was all dependent on using previously processed files. This upgrade uses a BeagleBone Black (the newest rendition of the ARM-based development board). [Paul] had tried using a Raspberry Pi board but had trouble with the webcam (mounted above the LED display) dropping frames. With the new board he is able to use the Video4Linux API to capture 30 frames per second and push them out to the display.

So far he’s had five out of the 1920 LEDs die on him. This shows off a couple of good things about using strips like this. A dead pixel doesn’t affect its neighbors. And replacement is as easy as cutting the ribbon on either side of the bad component, then soldering a new segment in place.