Bike Stand

Dirt Cheap Plywood Bike Holder

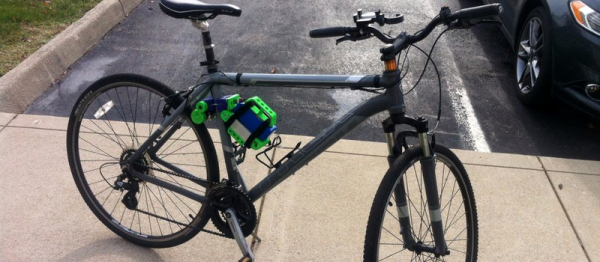
Commuting to work on a bicycle saves tons of dough, but sometimes storing your bike isn’t that easy. [Lewis] has been playing around with a few prototype bike stands and seems to have found the ticket, and it’s way cheaper –maybe even free, if you have the supplies. All you need is a single strip of plywood, and some wood screws, or wood glue! Well, that and a woodworking clamp.

The stand is designed to clamp onto 4×4 posts, or even a 2×4 stud. It’s great for storing bikes along your fence! It’s built purposefully snug, which allows you to add a small clamping force to make for a very rigid stand, suitable for even old steel-framed clunkers. Hooray for friction! Oh and if you’re happy with the location you could always get rid of the clamp and screw it in place instead.

Simple? Yup. Effective? Totally.

Oh and if it’s still crummy old winter where you live, why not beat the cold weather blues with an indoor bicycle roller?

IFS Trike

DIY Reverse Trike Bike Has Sick IFS

There is certainly no shortage of bicycle builds out there on the ‘net. We’re not talking custom race bikes or anything here, we mean cool odd-ball bikes built just because. We’ve seen trike conversions before, both with single wheels in the front and in the back, but today we stumbled across something we haven’t seen before.

[Kong79] has built a reverse trike, with 2 wheels in the front. That by itself is nothing new but this trike has an independent front suspension, meaning each wheel can move up and down independently from the other.  This particular build uses a double A-arm setup that keeps the axle of the wheel near parallel with the ground throughout its range of travel.

The trike started off as a standard mountain bike. The front fork was removed to make way for the new front suspension. There is a new box frame that was welded up and positioned directly below the head tube. This frame will support all 4 A-arms. Speaking of the A-arms, they certainly aren’t off the shelf units. Take a look, the uppers are bike forks and the lowers were welded together from bike frame tubes.

The spindles are where it gets a little tricky but [Kong79] made it happen with his resourcefulness. Bike head tubes, head bearings and standard stems make up the spindle components and are responsible for allowing each front wheel to steer. Each spindle is connected to the steering column by a tie rod scrounged from an ATV.  The shocks were found at a motorcycle scrap yard.

This is a pretty unique build and it’s sure great to see people doing stuff like this. For more trick trikes, check out this wooden one or this no-weld-required recumbent.

Grinding A Bicycle Crank For Power Analysis

For [Mark] and [Brian]’s final project for [Bruce Land]’s ECE class at Cornell, they decided to replicate a commercial product. It’s a dashboard for a bicycle that displays distance, cadence, speed, and the power being generated by the cyclist. Computing distance, cadence and speed is pretty easy, but calculating power is another matter entirely.

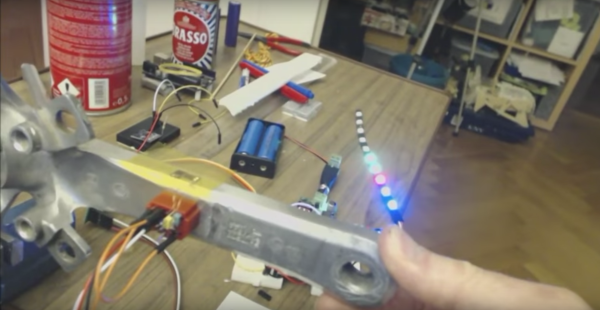
The guys are using an ATMega1284 to drive an LCD, listen in on some Hall Effect sensors, and do a few calculations. That takes care of measuring everything except power. A quick search of relevant intellectual property gave then the idea of measuring torque at the pedal crank. For that, [Mark] and [Brian] are using a strain gauge on a pedal crank, carefully modified to be stiff enough to work, but flexible enough to measure.

A custom board was constructed for the pedal crank that measures a strain gauge and sends the measurements through a wireless connection to the rest of the bicycle dashboard. It works, and the measurements in the classroom show [Brian] is generating about 450 W when pedaling at 33 mph.

Video below.

Continue reading “Grinding A Bicycle Crank For Power Analysis”

unicycle

Offset Unicycle Built Mostly From A Single Bicycle

[Lou’s] friends all said that it would be impossible to build a unicycle that had offset pedals. Moving the pedals to the front of the unicycle would throw off the balance and prevent the user from being able to ride it. [Lou] proved them wrong using mostly components from a single donor bicycle.

The donor bike gets chopped up into a much smaller version of itself. The pedals stay attached in the original location and end up being out in front of the rider. The seat is moved backwards, which is the key to this build. Having the rider’s legs out in front requires that there be a counter balance in back. Moving the seat backwards gets the job done with relative ease.

To prevent the hub from free wheeling, [Lou] lashes the sprocket directly to the wheel spokes using some baling wire. He also had to remove the derailer and shorted the chain. All of this gives the pedals a direct connection to the wheel, allowing for more control. The video does a great job explaining the build quickly and efficiently. It makes it look easy enough for anyone to try. Of course, actually riding the unicycle is a different matter. Continue reading “Offset Unicycle Built Mostly From A Single Bicycle”

RGB Bike Rim Lights

[Yvo] sent us his latest creation, this awesome POV RGB bicycle rim light build, which features a circular interweaving of common RGB LEDs that face outward along the rim as they display constantly changing animations based on the wheel’s rpm.

Like many POV wheel builds, [Yvo]’s takes advantage of a hall effect sensor and stationary magnet to determine how fast the wheels are spinning. Unlike most POV builds, however, [Yvo’s] creation doesn’t have just one or two RGB sticks clamped onto a spoke. Instead, his wheels boast several individual RGB LED modules mounted along the rim.

Each wheel has six modules, and each module contains a scratch-build LED controller (a daisy chain of 74HC595 shift registers) that fits into a custom-made 3D-printed enclosure. The enclosures mounts onto some aluminum strips along with the RGB LEDs, and the aluminum strips mount to the wheels by straddling the rim.

At speed, the lights go into POV mode to simulate headlights / brakes with white in the front and red in the back. Check out the difference these custom circular modules make when riding and when at rest in a video below.

Continue reading “RGB Bike Rim Lights”

DiY Bike Roller

DIY Bicycle Roller Helps Cure The Winter Blues

Winter’s a-brewing and that is a downer for the everyday cycling enthusiast. There are certainly ‘bike trainers’ out on the market that will let you ride in your living room but they clamp to (or require replacing the) the rear axle. These bike trainers hold the bike in an upright position so that the rider can’t tip the bike and might feel a little boring for some. There is another indoor biking solution called a bicycle roller which is, just as it sounds, a few rollers on the ground that the bike wheels rest on and is not attached to the bike by any mechanical means. When the rider pedals the bike, the bike wheels spin the rollers. Even with the lack of forward momentum the spinning of the wheels is enough for the rider to stay upright.

[Sky-Monkey] wanted to bike during inclement weather and felt that a bike roller was simple enough for him to try building one. He likes building things and already had all the necessary parts kicking around his shop. The rollers are standard 3″ PVC pipe with plywood discs pressed into each end. The discs are counter-bored to accept standard skate bearings. Off the shelf steel rod make up the axles. The 3 rollers and axle assemblies are mounted in a wood frame made from dimensional lumber. It’s important that the front bike wheel also spins so [Sky-Monkey] made a power transmission belt out of cloth strap that spins the front roller with the rear.

The result is a fully functional bike roller that only cost a few hours of time to make. Video of this puppy in action after the break….

Continue reading “DIY Bicycle Roller Helps Cure The Winter Blues”

Edge Lit Plastic Bike

Edge-Lit Clear Plastic Bike Combines Nighttime Riding Safety With Aurora Borealis Flair

Several years ago [dan] saw some plastic frame bikes designed by MIT students. Ever since he saw those bikes he thought it would be cool to make an edge-lit plastic framed bike.

The frame is made from 1/8″ and 3/8″ thick polycarbonate sheet. The parts were designed with tongue and grooves so they fit together nicely. The joints were glued to hold everything together. Holes were drilled in the edge of the plastic large enough to fit an LED. Once the LED was inserted in the hole, it was wired up and secured with hot glue. There are about 200 LEDs on the bike, powered by a constant current LED driver circuit that [dan] designed specifically for this project.

The build process was certainly not flawless. For example, the plastic holding the bottom bracket (where the crank and pedals attach) broke. This can be avoided by increasing the amount of material in that area prior to cutting out the pieces. [dan] was able to fiberglass his broken parts back together.

[dan] admits that the bike is heavy and a little wobbly, but is definitely ride-able. He did us a favor and made all his CAD files available to anyone that wants to make one themselves. If polycarbonate is too expensive for your blood, check out this bike make from cardboard.