Nikkor Optical Glass

Glass work is always a feast for the eyes, especially when it is hot glass. Watch as a Nikkor lens is made from beginning to end. It is wonderful to see the care taken to search by eye for defects, refraction issues, clarity etc. It may just be for the video, but it seems that the workers truly do take pride in their product.

What I found somewhat surprising was the amount of work that went into refining the glass BEFORE it was even put into a lens mold. I would have assumed that much of the work would have come after.

Submersible Camera Snaps Pics Of Ocean Going Predators

RPi-submersible-camera-rig
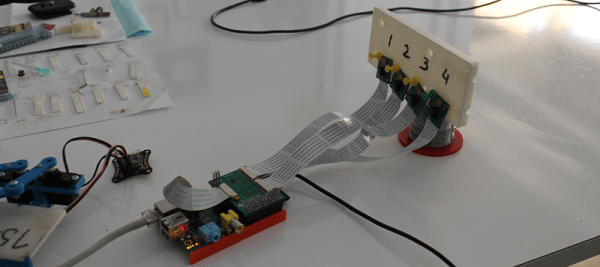
This camera rig uses a Raspberry Pi to send a camera down fifty meters (mirror on RPi blog) in order to spy on sharks. We got really excited at first thinking that it might be using the camera module from the Raspberry Pi Foundation but that isn’t the case. Do keep reading though, there’s a lot of cool stuff involved in this one.

The project used a collection of camera units spread over a large area to monitor shark activity. Each is mounted on an anchored buoy, using solar panels and a lead acid gel battery for power. The RPi itself remains topside in a waterproof box. It connects to the camera using a 50-foot Ethernet patch cable.

We figure the challenge of building the hardware parallels that of designing an underwater ROV. The camera needs an enclosure that can stand up to the pressure at that depth while allowing the cable to pass through it. There is also an interesting note in the project log about getting the camera exposure settings to behave.

Camera-based Touchscreen Input Via An FPGA

piano-hero-uses-camera-based-touch-input

[Chonggang Li] wrote in to share a link to the final project he and [Ran Hu] built for their embedded systems class. It’s called Piano Hero and uses an FPGA to implement a camera-based touch screen system.

All of the hardware used in the project is shown above. The monitor acts as the keyboard, using an image produced by the FPGA board to mark the locations of each virtual key. It uses a regular VGA monitor so they needed to find some way to monitor touch inputs. The solution uses a camera mounted above the screen at an obtuse angle. That is to say, the screen is tilted back just a bit which allows the images on it to be seen by the camera. The FPGA board processes the incoming image, registering a key press when your finger passes between the monitor and the camera. This technique limits the input to just a single row of keys.

This should be much simpler than using a CCD scanner sensor, but that one can track two-dimensions of touch input.

Continue reading “Camera-based Touchscreen Input Via An FPGA”

Bending And Printing A Curved Camera Dolly Track

How lucky is [Transistor Man] that he found the materials for the tracks of this curved camera dolly just lying around the shop? The three rails making up the system are quarter-inch diameter and he was able to bend them by hand with the help of a 55 gallon drum. But to hold them in place so that the camera dolly would run smoothly he had to find a way to precisely space the tracks.

The robot arm you see in the picture above is a 3D printer which ended up being the easiest solution to the problem. With a bit of trial and error he found a design that holds the tracks in place without interfering with the camera sled’s progress. From there he devised a mounting system which uses three camera tripods to hold the track. You can see a test video shot from the dolly track embedded after the jump. It’s the opposite of the bullet time rigs [Caleb’s] been working on lately.

We figure the spacers would work for any track shape, but if you’re going for a complicated route you need some type of pipe bender to help out.

Continue reading “Bending And Printing A Curved Camera Dolly Track”

Hacker Sends This Through The Mail To Record A Video Of The Process

[Ruben van der Vleuten] wanted to get a look at the adventure a package experiences when shipped from one place to another. So he threw together this mishmash of components to record the experience. We certainly enjoyed watching the fast motion video found after the break. We wonder what the shipping agency thinks about this sort of thing?

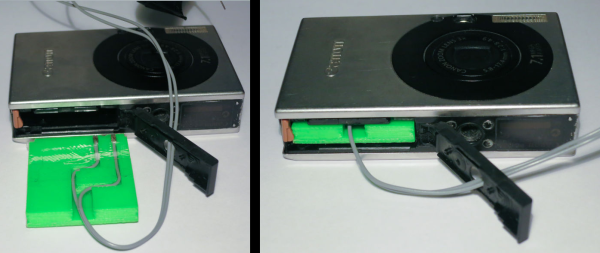
Camera, digital storage, and battery technology have gotten to the point that it’s both cheap and easy to do this sort of surveillance. But there are a few logistical things that [Ruben] took into account to make this work quite well. First off, he need to hide the camera in a way that would ensure the package didn’t look suspicious. He ended up writing his name on the side of the box and boring a hole through one of the black letters which is smaller than a pea and very hard to spot. To make sure he wasn’t recording a ton of empty (dark) frames he also included electronics to sense motion. When the package is moving the video is always rolling. when not moving the hardware wakes for just 3 seconds every minute to shoot video.

Continue reading “Hacker Sends This Through The Mail To Record A Video Of The Process”

Building A Vehicle Parking Camera

rpi-backup-camera

We’re never really sure what to call these things. When we say “back up camera” it sounds distinctly like a redundancy system for when the primary camera fails to work. But it is used for when you move in reverse in an automobile. [Jeremy Blythe] built the distance sensing video system using a Raspberry Pi board as the brain.

The flexibility of Linux and the power of the RPi board ended up making it pretty easy to get everything working together. He’s using a Microsoft Lifecam Cinema HD camera, which connects to one of the USB ports on the board. Just above that you can see the infrared distance sensor which is connected to the RPi’s GPIO header using one of Adafruit’s Pi Cobbler breakout boards. This also facilitates the connection to the 176×220 color LCD screen.

In the video after the break you can see [Jeremy] testing out the system by moving his hand in front of the sensor. Python is used to grab the image from the camera, draw a circle on it, and overlay the distance in centimeters at the bottom. Once his hand is within 30cm the overlay turns red and the work STOP is displayed. Pretty neat!

Continue reading “Building A Vehicle Parking Camera”

DIY $6 Serial Cable For Vintage Apple QuickTake Cameras

diy-serial-cable-for-vintage-apple-cameras

Knowing he was a guy who liked electronics and taking things apart, one of [Erik]’s friends sent him a vintage Apple QuickTake 100/150 digital camera as a bit of a joke. [Erik] enjoyed the gift, but since his friend hadn’t sent the necessary serial cable he really couldn’t do that much with it. He searched online only to discover the cable is very difficult to find these days, and thus very expensive. So, being the handy guy he is, he built his own.

Starting with an Apple MiniDin8 Male cable, he cut off one end and attached the wiring to a RJ45 connector. That got plugged into a modular adapter with a DB9 Female Plug end and wired up. The procedure required no soldering, and cost less than $6. Awesome.

Unfortunately the lack of serial cable isn’t the only problem he faced. QuickTake isn’t compatible with newer Apple computers that use Intel. You have to either have a much older Mac, or use a Windows XP emulator. If that wasn’t bad enough, the cameras only want to save photos in QuickTake file format. Luckily, [Erik] documents how he overcome all these issues in his post.

[Thanks Erik]