Many of the projects we feature on Hackaday are motivated by pure greed. Not on the part of the hacker, mind you; but rather the company that’s charging such an outrageous price for a mass produced item that somebody decides they can do the same thing cheaper as a one-off project. Which is precisely how [Bryan Kevan] ended up building his own carbon fiber tube wrapping machine. Not only do the finished tubes look fantastic, but they cost him a fraction of what even the “cheap” commercial ones cost.
The principle behind producing the tubes is really pretty simple: carbon fiber ribbon (or “tow”, in the official parlance) gets wrapped around a rotating mandrel, ideally in interesting patterns, and epoxy is added to bind it all together. When it’s hardened up, you slide the new carbon fiber tube off the mandrel and away you go building a bike frame or whatever it is you needed light and strong tubes for. You could even do it by hand, if you had enough patience.
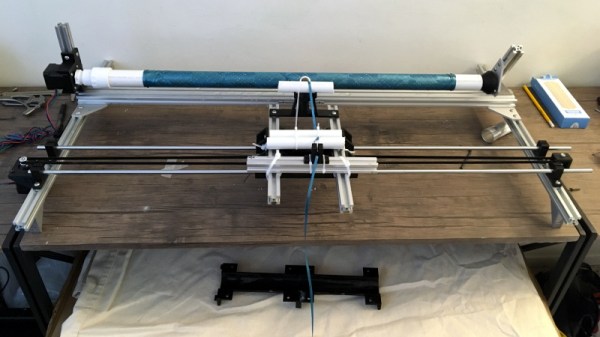
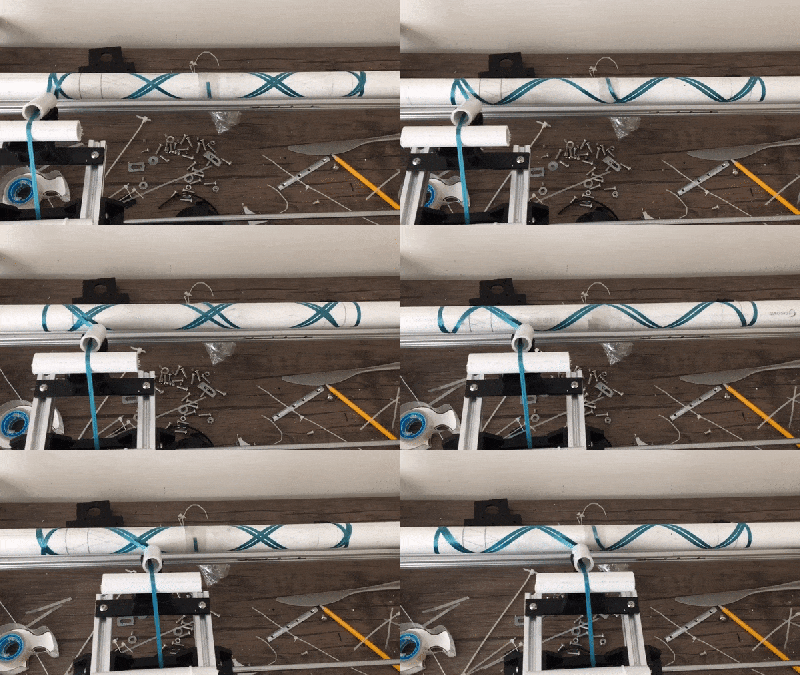 [Bryan] had done it by hand before, but was looking for a way to not only automate the process but make the final product a bit more uniform-looking. His idea was to rotate a horizontal PVC pipe as his mandrel, and move a “car” carrying the carbon fiber ribbon back and forth along its length. The PVC pipe just needs to rotate along its axis so he figured that would be easy enough; and using a GT2 belt and some pulleys, getting the carbon-laying car moving back and forth didn’t seem like much of a challenge either.
The frame of the winder is built from the hacker’s favorite: 20/20 aluminum extrusion. Add to that an Arduino Uno, two stepper motors with their appropriate drivers, and the usual assortment of 3D printed odds and ends. [Bryan] says getting the math figured out for generating interesting wrap patterns was a bit tricky and took a fair amount of trial and error, but wasn’t a showstopper. Though we’d suggest following his example and using party ribbon during testing rather than the carbon stuff, as producing a few bird nests at the onset seems almost a guarantee.
One of the trickiest parts of the project ended up being removing the carbon fiber tubes from the PVC mandrel once they were done. [Bryan] eventually settled on a process which involved spraying the PVC with WD-40, wrapping it in parchment paper, and then using a strip of 3M blue painter’s tape to keep the parchment paper from moving. If you can toss the whole mandrel in the freezer after wrapping to shrink it down a bit, even better.
So was all this work worth it in the end? [Bryan] says he was originally looking at spending up to $70 USD per foot for the carbon fiber tubes he needed for his bike frame, but by buying the raw materials and winding them himself, he ended up producing his tubes for closer to $3 per foot. Some might question the strength and consistency of these DIY tubes, but for a ~95% price reduction, we’d be willing to give it a shot.
Years ago we covered a Kickstarter campaign for a very similar carbon winder. Probably due to the relatively limited uses of such a gadget, the winder didn’t hit the funding goal. But just like the current wave of very impressive homebrew laser cutters, the best results might come from just building the thing yourself.

 Cortex 1 was launched as part of
 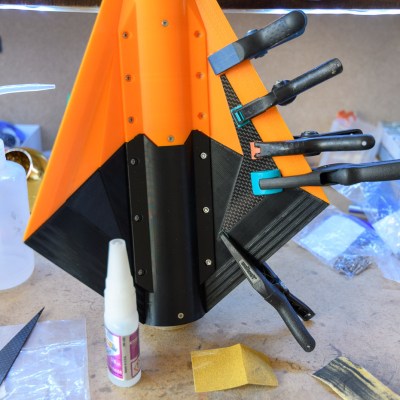 Cortex 2 uses a different rocket motor from its predecessor, which led to another interesting design issue. The new motor is similar to hobby solid rocket motors where a small explosive charge at the top of the motor blows some time after the fuel is gone. This charge is meant to eject a parachute, but the Cortex 2 is not designed to use this method, and so the gasses must be vented. [Foaly] was understandably not enthusiastic about venting hot gasses through the mostly-PLA rocket body. Instead, a cylindrical cartridge was designed that both encases the motor and redirects any gasses from the explosive charge out the rear of the rocket. That cartridge was SLA printed out of what looks to us like Formlabs’