Squishy Miter Saw Shroud Spares You The Sneezy Bits

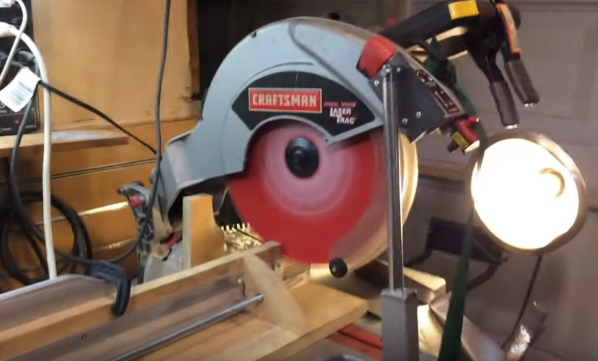
Let’s be honest. When it comes to operating miter saws, these tools kick dust out the back like a spray paint can. Most of us have accepted this quirk as-is, but not [Inspire Woodcraft] who’s on a mission to achieve near perfect dust collection. And he nearly has it. With a budget dust collection setup, he’s able to eliminate over 90% of the dust from his cuts, and others who’ve adopted his setup can vouch for his results.

The solution comes in two pieces. First, he focuses on creating a new dust shroud or “boot” for collecting dust through the vacuum hookup on the back of the saw. What’s key here is that this dust boot is made from squishy silicone, enabling it to flare outwards and spread out as the saw travels downward into the material. It’s clear that [Inspire Woodcraft] has gone through dozens of material and shape iterations, but the result is sturdy enough to stay open with the vacuum running through the back hose attachment.
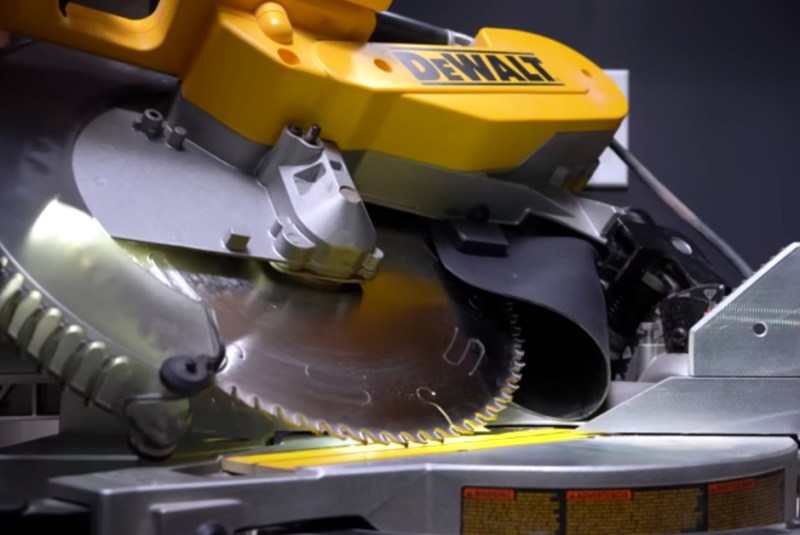
With the dust nearly perfectly funneled from the back, the second tweak focuses on rerouting stray dust away from the table and directly into this boot. [Inspire Woodcraft] later noticed that dust collection from the bottom of his miter saw simply didn’t exist, so dust would accumulate at his feet.

His solution? To create a second shroud that fits under the throat plate that takes sawdust once destined for the ground and ejects it backwards and straight into the dust collection boot.

Altogether, this setup solves a long-existing problem with a handful of commodity parts and a few 3D prints. [Inspire Woodcraft] has also chronicled his journey in such detail where you too could recreate his solution from the video. But if you’re feeling lazy, and you’re lucky enough to own the same Dewalt DW716 or DWS716 model miter saws, you can simply snag a kit from his website.

If all this talk of miter saws has your reaching for a screwdriver to see what modified mayhem you can unleash with yours, look no further than this LED hack that adds a shadow line to your cuts.

Continue reading “Squishy Miter Saw Shroud Spares You The Sneezy Bits”

An Automatic Shop Vac Dust Extractor

Finding cheap or even free tools in the second-hand adverts is probably a common pursuit among Hackaday readers. Thus many of you will like [DuctTape Mechanic], have a row of old woodworking bench tools. The experience we share with him is a lack of dust extraction, which makes his adaption of a second-hand shop vac as an automatic dust extractor for his chop saw worth a watch. Take a look, we’ve put the video below the break!

The system hooks up a relay coil to the saw’s on/off switch, which controls the vacuum’s power. It’s thus not the most novel of hacks, but there are a few things to be aware of along the way and who among us doesn’t like watching a bit of gentle progress on a workshop project? The 120V current taken by both vacuum and saw sound excessive to those of us used to countries with 230V electricity, but the relay is chosen to easily serve that load. What’s nice about the automatic system is that being at the bench is not accompanied by the constant deafening noise of the shop vac, and save for when the saw is in use the bench is both dust-free and mercifully quiet.

If you happen to have a solid state relay in your parts bin, here’s another way to achieve a similar result.

Continue reading “An Automatic Shop Vac Dust Extractor”

Stepper-Controlled Chop Saw Automates A Tedious Job

We’re not going to question why [Absorber Of Light] needs to cut a bazillion little fragments of aluminum stock. We assume his reasoning is sound, so all we’re interested in is the automated chop saw he built to make the job less tedious, and potentially less finger-choppy.

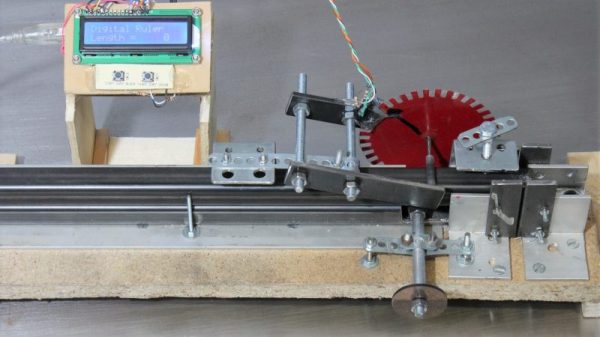
There are probably many ways to go about this job, but  [Absorber] leaves few clues as to why he chose this particular setup. Whatever the reason, the build looks like fun, with a long, stepper-driven threaded rod pushing a follower down a track to a standard chop saw. The aluminum stock rides in the track and gets pushed out a set amount before being lopped off cleanly as the running saw is lowered by a linear actuator. The cycle then repeats until the stock is gone.

An Arduino controls the stock-advance stepper in the usual way, but the control method for the linear actuator is somewhat unconventional. A second stepper motor has two cams offset by 180° on the shaft. The cams actuate four microswitches which are set up in an H-bridge configuration. The stepper swivels back and forth to run the linear actuator first in one direction then the other, with a neutral position in between. It’s an interesting approach using mechanical rather than the typical optical isolation. Check it out in action in the video below.

We’ll admit to some curiosity as to the use of the coupons this rig produces, so maybe we’ll get lucky with some details from [Absorber Of Light] in the comment section. After all, we knew exactly what the brass tubes being cut by the similar “Auto Mega Cut-O-Matic”  were being used for.

Continue reading “Stepper-Controlled Chop Saw Automates A Tedious Job”

How To Turn A Chainsaw Into A Chopsaw

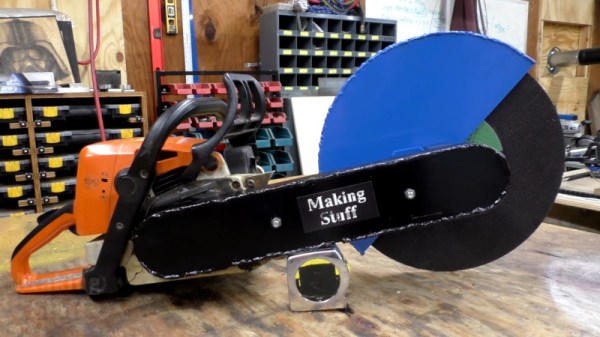
If you’re doing a lot of metal working, a chop saw is a great tool to have. It’s an easy and quick way to do a lot of neat, clean accurate cuts. [Making Stuff] wanted to do just that, but didn’t have a chop saw lying around. Instead, an old Stihl chainsaw was placed on the bench, and hacking ensued (Youtube link, embedded below).

To achieve this, it was necessary to source some parts and make some modifications to the chainsaw. The clutch bell was removed, and modified to mount a roller chain sprocket. An arm was then built, which mounted a pair of journal bearings at the far end. Another sprocket was installed at this end, along with a shaft which mounts the cutting wheel. Finally, a guard was fitted over the cutting wheel to give the build a semblance of safety.

[Making Stuff] notes that the chainsaw can readily be converted back to its standard purpose, needing only to refit the original parts and replace the modified clutch bell with a stock one. It’s a great way to get two tools out of one, and we’re sure it will prove useful in future projects.

If you’ve got a taste for wacky chop saws, check out this hard drive build. Video after the break.

Continue reading “How To Turn A Chainsaw Into A Chopsaw”

Arduino And Encoder Form Precision Jig For Cutting And Drilling

“Measure twice, cut once” is great advice in every aspect of fabrication, but perhaps nowhere is it more important than when building a CNC machine. When precision is the name of the game, you need measuring tools that will give you repeatable results and preferably won’t cost a fortune. That’s the idea behind this Arduino-based measuring jig for fabricating parts for a CNC build.

When it comes to building on the cheap, nobody holds a candle to [HomoFaciens]. We’ve seen his garbage can CNC build and encoders from e-waste and tin cans, all of which gave surprisingly good results despite incorporating such compliant materials as particle board and scraps of plumber’s strapping. Looking to build a more robust machine, he finds himself in need of parts of consistent and accurate lengths, so he built this jig. A sled of particle board and a fence of angle aluminum position the square tube stock, and a roller with a paper encoder wheel bears on the tube under spring pressure. By counting pulses from the optical sensors, he’s able to precisely position the tube in the jig for cutting and drilling operations. See it in action in the video after the break.

If you’ve been following [HomoFaciens], you’ll no doubt see where he’s been going — build a low-end tool, use that to build a better one, and so on. We’re excited to see him moving into more robust materials, but we’ll miss the cardboard and paperclip builds.

Continue reading “Arduino And Encoder Form Precision Jig For Cutting And Drilling”

Home Made Miter Saw Is Not Completely Dangerous

Home Made Miter Saw

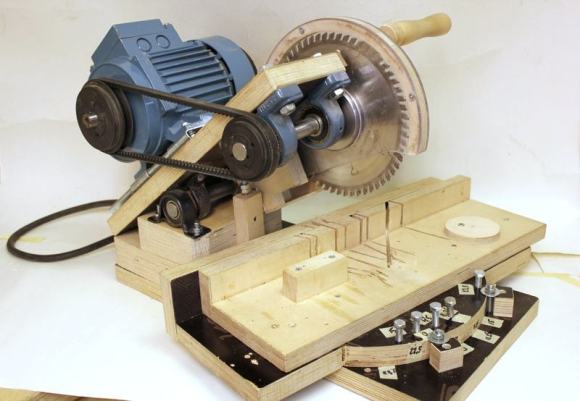
If the term ‘home made miter saw’ instantly instills frightening images of severed limbs into your head, you’re not alone. A quick internet search will yield some pretty hokey tool builds, we’ve even featured a few here on hackaday. This saw is different. [Pekka] made a pretty cool saw for cutting very accurate angles in wood.

This saw was purpose built with one goal in mind: cutting wood that will be glued together for use in segmented turning. Segmented turning is shaping a piece of wood stock that is composed of many different types of wood. This results in a very visually interesting product.

Home Made Miter SawMost of the saw is made from plywood. The hinge and supports for the arbor are beefy off-the-shelf pillow blocks. A 3-phase motor with speed control transmits power to the arbor via a belt. Belt tension is adjusted by sliding the motor further back along the motor mount base. [Pekka] took care so that the entire pivoting assembly was nearly balanced adding to the ease of use.Typical miter saws rotate the blade to achieve different angles of cuts. This design rotates the saw fence.
For safety there are a pair of polycarbonate blade guards and a micro switch on the handle that won’t let the saw start unless it is depressed. The micro switch has a secondary function also, when let go it applies an electronic brake to the motor so that the spinning blade does not touch the work piece when lifting the blade back up.

Your Hard Drive Needs A Diamond Blade

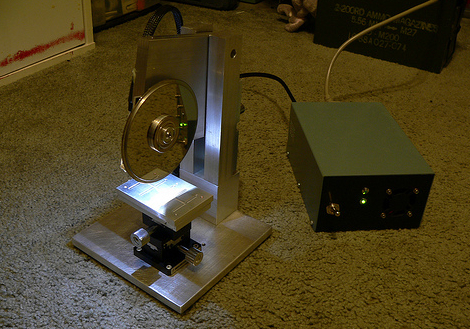
If you find yourself in need of a precision chop saw don’t overlook the value of adding a diamond blade to a spinning HDD platter. [Tony’s] four-part writeup of this build springs out of some very special design considerations for a ham radio that operates in the 47 GHz band. That frequency pretty much rules out using normal components in the circuit and in his case it even makes connecting the components together difficult. He’s using this chop saw to cut small pieces of a ceramic substrate with gold traces on them that will be used to route the signals on the circuit.

We’ve seen hard drives used in a couple of different clocks, and even as a set of speakers. This one makes for a nice addition as a way to reuse those defunct devices that litter your junk box.

[Thanks Thomas]