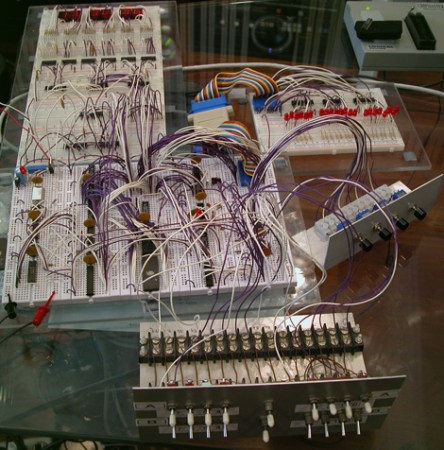
LED POV Hard Drive Clock

[Ian Smith] sent us this POV display made from an old hard drive. It works by flashing some LEDs under the platter, which has a line cut in it. Since the platter spins at roughly 90 rotations per second, we perceive a solid image. He was inspired by [Alan Parekh]’s project, but did several things differently. Mounting the LEDs was much simpler in this project as he had a strip of RGB LEDs that came with adhesive tape on the back. He also used a small magnet and a hall effect sensor to measure full rotations instead of an IR beam sensor. Check the video after the break.

Continue reading “LED POV Hard Drive Clock”

How-to: Make An E-paper Clock From Esquire Magazine

If you’ve never heard about electronic paper, crawl out from under that rock and read up on the Sony Reader and the Amazon Kindle. E-paper is a flexible display made of color-changing beads that mimic ink-on-paper for easy daylight reading. The revolutionary thing about e-paper is that after it’s set, it stays that way without additional power.

This sounds great in theory, but Esquire’s cover is the first time everybody can afford to hack an e-paper display. We took the cover into the Hack a Day lab to document, test, and hack. In the end, we recycled it into something useful that anyone can build. We’ve got all the details on how the display works and what it takes to use it in your own projects. Read about our e-paper clock hack below. Continue reading “How-to: Make An E-paper Clock From Esquire Magazine”

Pong Clock

[funnypolynomial] saw this Pong clock years ago and had been planning on building his own version. With a move looming he decided it was finally time to finish up his Pong clock since completed projects take far less room than incomplete ones. The core of the system is a ThinkPad. He separated the hinge and bolted the keyboard to the back of the screen. The display ribbon was long enough, but he had to extend the wires for the backlight. The power button was also extended and the battery removed. The software is a Windows screen saver that uses the two mouse buttons for navigation similar to how you set a two button watch. Every minute the the left player misses the ball and the right player’s score increases. You can see a video of the clock below. In the past, he also turned a digital multimeter into a clock. Continue reading “Pong Clock”

RGB Desktop Clock

[youtube=http://www.youtube.com/watch?v=-hxZRCponks&hl=en&fs=1&rel=0][Mark Roy] designed this fine RGB LED desktop clock. It uses a PIC16F877A microcontroller and a DS1307N Real Time Clock. There is a ring of 12 RGB LEDs around the perimeter. Hours are indicated in red, minutes green, and seconds blue. If the hands overlap, the colors are mixed. Three buttons are used to set the time and it can run on as little as 0.7volts. You can find out more about the project on Stellar Core. He has plans to kit it in the future.

Victorian Nixie Tube Clock


[John Clarke Mills] has pieced together this tastefully done Victorian style Nixie tube clock. He picked up a kit from nixietube.com and an old clock off of eBay. A little bit of elbow grease and solder later, he has this very nice mantle piece. Well done.

For those unfamiliar, a Nixie tube is used for displaying numbers or letters. They are a glass tube, filled with a gas (usually neon). There are metal structures inside that glow when electricity is applied. First widely used in the early sixties, Nixies were pretty much replaced when LED technology got cheap.

We noticed that nixietube.com was down, so you might also check TubeClock.com and neonixie.com for kits.

If you’re looking for more inspiration, read about the Nixie counter clock, Russian vfd, and the 6502 driven Nixie clock all previously on Hack a Day.

[via Retro Thing]

How-To: Binary Clock Using A Freeduino SB 2.1


Solarbotics recently released its own version of the Arduino microcontroller development board. They based their board on the Freeduino design. We thought this would be a good opportunity to review the new board as well as present a How-To about building a simple binary clock. Along the way we’ll cover some basics on attaching LEDs and switches to a microcontroller.

Continue reading “How-To: Binary Clock Using A Freeduino SB 2.1”

Stroboscope LED Fan Clock


[sprite_tm] sent in one of his latest little adventures – and I love it. To create his stroboscope fan clock, he put a couple of red and green clock hands onto a standard PC fan(I love Panaflo fans), then he built a circuit to strobe a RGB LED to create a set of virtual clock hands on the spinning fan. An ATTiny2313 does all the work, with the help of some transistors to drive the LEDs.