Automatic Tool Changing On A 3D Printer

tool

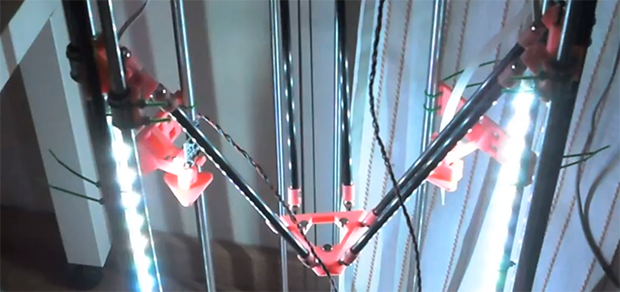
[Luis] has a pretty interesting project on his hands. He’s using a delta 3D printer to plate a few edibles – yogurt, chocolate, and other thick liquids. Because he intends to use actual plates as the build surface, calibration is key. One solution to this problem would be to use identical, pre-measured plates for everything this printer makes. [Luis]’ solution is much more ingenious than that, however. He’s programmed his printer to automatically swap out two tools – one for probing the build surface, and another to extrude liquids.

The two tools are suspended from the body of the printer, and with a little bit of software it’s possible for them to be picked up by the head of the printer and held in place with a few magnets. After auto leveling the build surface in software, a G Code command switches the tools over to a paste extruder for all those delicious edibles.

If an automated tool changer isn’t enough, [Luis] has also completed a very nice 3D printed peristaltic pump to squirt out foodstuffs. You can check out a video of this printer in action below.

Continue reading “Automatic Tool Changing On A 3D Printer”

Fail Of The Week: Laser Cutter That Makes Jagged Edges

This Fail of the Week is really only a failure because of the standards to which [eLabz] holds himself. The rig pictured above is a laser cutter built out of DVD drive parts. It goes above and beyond most of the optical drive CNC projects we see around here — it actually makes cuts! But [eLabz] looks on it as a failure because the steps of the driver motors are visible as jagged edges in those cuts. We see this more as a pausing point in the development process before the next refinement is made.

Continue reading “Fail Of The Week: Laser Cutter That Makes Jagged Edges”

Repairing A Mill That Cost As Much As A Car

miters

Years ago, someone at the bio-instrumentation lab at MIT needed to change a CMOS battery in the controller for a three axis mill. This reset the machine’s BIOS and was widely regarded as a bad move. The mill sat in the lab for a few years before  Prof. [Ian Hunter] donated it to MITERS – the student shop at MIT. And so the task of repairing a machine that cost as much as a car fell upon a plucky group of students.

The machine – a  Dyna-Myte 1007 has a 10″x7″x10″ work area, pneumatic tool changers and carousel, and the working for a fourth axis. It is. however, driven by an ancient Pentium computer running DOS with all the fun of ISA slots and IRQs that entails.

The MITERS began their repair by digging around in the software configuration, finding the axis drive is controlled via IRQ 3, which was currently occupied by COM 2. Changing that in the BIOS let the computer control the axes and, with a few solenoids and an air compressor, the tool carousel also worked.

With a bit of digging around, the MITERS also got the spindle working, giving them a very awesome and very expensive CNC milling machine for free. Even though the computer could be replaced with a $35 Raspberry Pi, we really have to admire the MITERS for fixing what they already had; it’s a cheaper and much, much faster way to get their new toy up and running.

Continue reading “Repairing A Mill That Cost As Much As A Car”

Drilling PCBs With Cameras And Math

PCB

After making your first PCB, you’re immediately faced with your next challenge – drilling the holes. It’s a doable task with a small drill press, but a lot of makers already have a small CNC mill or router, but how to make that work the first time? [Alessio] has you covered with a technique that uses a CNC-mounted webcam and some linear algebra for perfect through-holes the first time and every time.

A few months ago we saw [Alessio]’s work with transform matrices and PCB drills. The reasoning behind this technique is if a PCB isn’t exactly aligned to a CNC mill’s axes, or if the scaling for a toner transfer board is a bit off, automating the drilling process will only end in pain, with holes going through traces and a whole host of other nasty things. The application of linear algebra gets around this problem – taking a measurement off of two or three known locations, it’s easy to program a CNC machine to drill exactly where it’s supposed to.

[Alessio]’s new project takes the same mathematical techniques and applies them to a very sleek application that uses a drill-mounted webcam. After taping his homebrew PCB down to the mill, [Alessio] simply marks off a few known points, imports the drill file, and lets a computer calculate where to drill the holes. The results are remarkable – with a soldermask and silkscreen equipment, these handmade boards can be just as good as professionally manufactured boards,

There are Windows and OS X binaries for [Alessio]’s tool available on his page, with a video demo available below.

Continue reading “Drilling PCBs With Cameras And Math”

Hackaday Links: Sunday, July 7th, 2013

hackaday-links-chain

IR control for your home theater doesn’t have to look ugly. [Rhys Goodwin] put his IR blasters inside his audio equipment.

Steam powered windshield wiper. Need we say more?

An assembled version of the FaceDancer is now available for purchase. This is a man-in-the-middle USB tool developed by [Travis Goodspeed]. When [S.A.] sent us the tip he mentioned that the board is a pain to hand solder if you’re making your own; this is an moderately affordable alternative.

[Aaron] makes it easy for audiophiles to listen to Soundcloud on their Sonos hardware.

We’ve heard of fuzzy clocks — they only give you a general sense of time. Here’s a fuzzy thermometer that uses the vocal stylings of [Freddie Mercury] to get a general feel for how hot it is.

While you’re still laughing, this most useless machine taunts you in more ways than one. It uses audio clips and theatrics to vary the way in which it shuts itself off. [Thanks Itay and David]

Modern CNC techniques make short work of prototyping for the Ford Motor Company. [Thank Wybren via SlashGear]

Briefcase Mill

briefcase-mill

Take the machine shop with you; that’s the mantra which drove [Ryan] to build this CNC mill in a briefcase. That album will give you a taste of the final product. But you’ll want to dig through two pages of his forum thread starting with this post in order to behold the build process.

The image above is only part way through the fabrication, but we thought it gave the best overall view of his work. It’s missing the cables which connect to the control circuitry in the lid. The bed has also not been installed and this was before he fabricated the protective case for the PCBs.

Getting everything to fit inside of a folding case was quite a trick. Of course he used CAD to make sure it was possible. There are several places where the clearance when closed is about 2mm. We’re shocked by the build quality of the mill itself. It’s a novel idea to make it portable, but the accuracy and reliability of the machine didn’t suffer for the concept.

If you need a desktop mill that’s not quite as portable here’s a project which will dish out some inspiration.

One Game Controller Connects To Many Consoles

multi-controller-for-several-gaming-consoles2

[Dave Nunez] wanted arcade quality controls when gaming at home. The problem was he couldn’t decide on just one console to target with his build, so he targeted them all. What you see above is a single controller that connects to many different gaming rigs.

He took a simple-is-best approach, keeping the main goal of high-quality inputs at the forefront. To start, he built the face plate out of thick MDF to ensure it wouldn’t flex or bounce as he mashed the buttons. To keep the electronics as simple as possible he soldered connections to actual controller PCBs (well, reproductions of controllers), breaking each out to a separate DB9 connector on the back of the case. These connectors interface with one of the three adapter cables seen to the right. This lets the controller work with NES, SNES, and an Atari 2600 system.

To pull the enclosure together [Dave] designed the rounded corner pieces and cut them out with a CNC mill. These connect with flat MDF to make up the sides. To give it that professional look he filled the joints with Bondo and sanded them smooth before painting.