CNC Scrapbooking With A Raspberry Pi

It is perhaps a surprise that the widespread adoption of CNC machinery in the home has not come from 3D printing or desktop mills, but as a quiet revolution in the crafting industry. CNC cutters for plastic or card have been around for quite a while now, and while the prospect of cutwork greetings cards might not set all maker pulses racing these cutters do have significant untapped potential in other directions. Perhaps you have to own a carburetor whose gaskets have been unavailable since the 1960s to truly appreciate that.

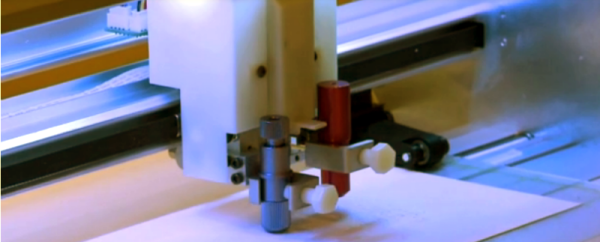
[James Muraca] has a KNK Force, something of an object of desire in the world of desktop CNC cutters. The computer inside the Force is a Raspberry Pi, so of course [James] set about investigating its potential for running his own software. His progress so far is on GitHub, a web interface through which you can upload and cut an SVG file, but his plans are more ambitious. He hopes to turn his machine into a complete PCB manufacturing station, able to both cut the PCB, and with the addition of a vacuum attachment to pick and place components.

The KNK Force is an interesting machine not just because it is powered by a Raspberry Pi. Its cutter head is a rotary tool with a Z axis, so it can perform more heavy-duty and complex cutting tasks than its competition. In addition it has a camera built-in, and it is this feature that [James] hopes to use in his PCB project.

We’ve covered plenty of cutter projects before, from projects turning CNC machines and pen plotters into vinyl cutters to using a cutter as a laser engraver and even cutting solder paste stencils with one. We look forward to further progress on [James’s] project.

Retrotechtacular: Cut All The Cables In This Speedy Teleco Switch Upgrade

In this short but intense classic of corporate cinematography, we get to watch as the Pacific Bell central office in Glendale, California is converted to electronic switching in a 47-second frenzy of cable cutting in 1984.

In the 1970s and 1980s, conversion of telephone central office (CO) switch gear from older technologies such as crossbar (XBar) switches or step-by-step (SxS) gear to electronic switching systems (ESS) was proceeding apace. Early versions of ESS were rolling out as early as the 1950s, but telcos were conservative entities that were slow to adopt change and even slower to make changes that might result in service outages. So when the time finally came for the 35,000 line Glendale CO to cutover from their aging SxS gear to ESS, Pacific Bell retained Western Electric for their “Speedy Cutover Service.”

Designed to reduce the network outage time to a minimum, cuts like these were intricately planned and rehearsed. Prep teams of technicians marked the cables to be cut and positioned them for easy access by the cutters. For this cut, scaffolding was assembled to support two tiers of cutters. It looks like the tall guys got the upper deck, and the shorter techs – with hard hats – worked under them.

At 11PM on this cut night, an emergency coordinator verified that no emergency calls were in progress, and the cut began. In an intense burst of activity, each of the 54 technicians cut about 20 cables. Smiles widened as the cut accelerated, and sparks actually flew at the 35.7 second mark. When done, each tech turned around and knelt down so the supervisors knew when everyone was done. At least one tech couldn’t help but whoop it up when the cut was done. Who could blame him? It must have been a blast.

Continue reading “Retrotechtacular: Cut All The Cables In This Speedy Teleco Switch Upgrade”

Cheap, Dirty And Perfect V-Groove Foam Cutter

If the only tool you have is a hammer, everything looks like a nail. Conversely, if you have the right tool for every job, it makes the difference between pro and amateur. [ftregan] needs to cut perfect V-grooves in foam for many of his projects, especially building RC planes. He wasn’t too satisfied with the results using his Xacto knife. And a proper tool was going to set him back by almost $25, but following that example he built his own version of the tool for much less.

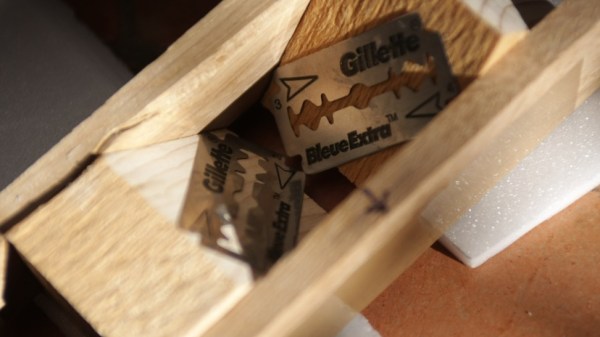
Two pieces of wood cut at a 45 degree angle are held between two flat support pieces. A pair of regular shaving blades form the cutting elements. While it looks simple, it’s important to get the angles and blade directions correct. A central wooden wedge holds the two blades in place. He also added a small guide marker that let’s you cut precise straight grooves. [ftregan] built the tool to allow cutting 6mm thick foam but given that it’s so quick and cheap to build, we guess it’s easy to make a few of these to allow cutting different thicknesses of foam. We’re sure that many of you will find different or better ways of doing this, but considering [ftregan] spent just 15 minutes cooking this up, it’s not too bad, especially since the results are mighty good.

Another method of cutting foam is with hot wire. Check out this DIY Foam Cutter that we featured earlier.

DVD Laser Diode Used To Build A Laser Engraver

[Johannes] has been reading Hackaday for years but this is the first project he’s tipped us off about. It’s a laser engraver built from a DVD burner diode (translated). It turned out so well we wonder what other projects he’s forgotten to tip us off about?

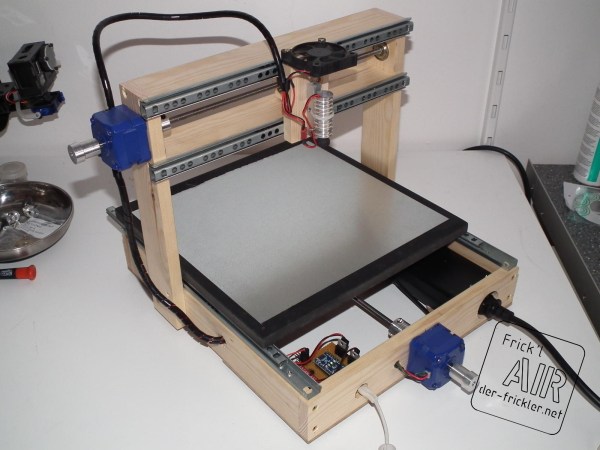
This is the second CNC machine he’s seen through from start to finish. It improves upon the knowledge he acquired when building his CNC mill. The frame is built from pine but also uses bits of plywood and MDF. It can move on the X and Y axes, using drawer sliders as bearings. The pair of blue stepper motors drive the threaded rods which move the platform and the laser mount. Just above the laser he included a small DC fan to keep it from burning up. The control circuitry is made up of an Arduino Nano and a stepper motor driver board. Catch a glimpse of the engraver cutting out some stencil material after the break.

There must be something about Spring that brings out the urge to work with laser diodes. We just saw a similar 1W cutter last week.

Continue reading “DVD Laser Diode Used To Build A Laser Engraver”

Glowing Super Bowl Helmets

glowing-football-helmets-adafruit

These geeky Superbowl decorations glow thanks to the EL panel hack which [Becky Stern] created. It’s almost impossible to make out in this image, but the EL panels have been applied to the surface of the helmet. On the San Francisco helmet you can just make out the black connector and cord at the bottom of the F.

El panels are a lot like EL wire (but they’re flat) in that the phosphors are excited when connected to a high voltage AC supply. You can cut the panels into shapes without a problem. The technique used here is to create a black vinyl mask to go over the top of the panel. This makes cutting the panel a lot easier.

The mask sticker is made on a vinyl cutter. [Becky] is a master at using the vector tool as you can see in the video after the break. She outlined each team logo with paths to create a file which the cutter can use. From there it took several tries to get the sticker just right as the curve of the helmet distorts the logos just a bit. Once it was dialed in she stuck the vinyl on the El panel and cut around the perimeter.

The Adafruit team sure loves to use electroluminescent accents.

Continue reading “Glowing Super Bowl Helmets”

Blu-ray CNC Looks Great For Branding And Engraving

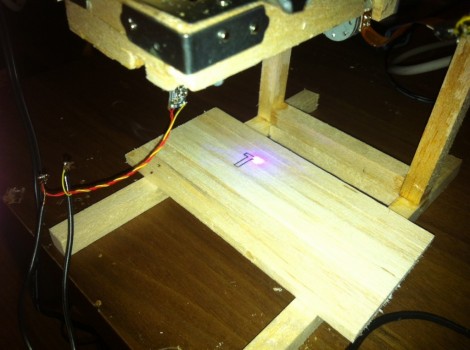
[Nav] got the bug for a tiny little laser cutter. He pulled off the build, and has just finished the second rendition which makes some nice improvements. He’s was hoping for a laser cutter, but we think this really shines when it comes to branding objects like the scrap wood seen above.

This joins a long line of optical drive parts builds. For instance, we saw this plotter that used the lens sleds from some CD-ROM drives. You may think that [Nav] doesn’t need to worry about the Z axis since this is a laser but you’d be wrong. The focal point of the light needs to hit at the right place to cut efficiently, and this is often the trouble with laser cutters. As material is burned away the laser becomes less efficient if you don’t adjust the lens for vertical position. That’s why we think it’s best as an engraver, but the original build writeup for his cutter does show some success cutting letters in dark paper.

Check out a clip of this design being burnt into the wood after the break.

Continue reading “Blu-ray CNC Looks Great For Branding And Engraving”

A Capacitive Discharge Welder/cutter For All Your Lightweight Needs

microspot-welder

[Radu Motisan] wrote in to share a cool project he has been working on lately, a pulsed microspot welder/cutter.

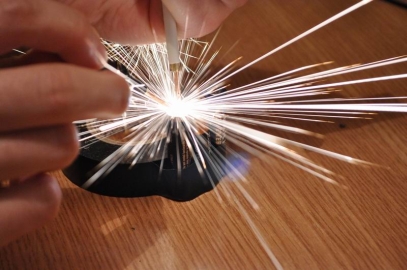
The device is capable of spot welding thin metals such as foils and battery tabs by sending a pair of high current pulses between the two electrodes whenever [Radu] presses the trigger button. The cutting portion of his device uses the same general mechanism, though it requires a far greater number of pulses to get the work done.

The welding/cutting process is controlled by an ATMega16, which is also tasked with taking input from the user and displaying information on the LCD panel. The microcontroller creates quick (in the ten to several hundred microsecond range) pulses for both welding and cutting, with the latter obviously requiring a long series of pulses.

[Radu] started out using a relatively small capacitor array to power the device, but has recently upgraded to a 1.6 Farad car audio capacitor, which works (and looks) much better than before. His blog seems to update every few days with more pictures and details about his welding station, so be sure to check back often for updates.

Be sure to stick around to see a short video of [Radu] adding metal tabs to batteries and tearing down an aluminum can with his cutter.

Continue reading “A Capacitive Discharge Welder/cutter For All Your Lightweight Needs”