Building A Simple Python API For Internet Of Things Gadgets

It’s no secret that I rather enjoy connecting things to the Internet for fun and profit. One of the tricks I’ve learned along the way is to spin up simple APIs that can be used when prototyping a project. It’s easy to do, and simple to understand so I’m happy to share what has worked for me, using Web2Py as the example (with guest appearances from ESP8266 and NodeMCU).

Barring the times I’m just being silly, there are two reasons I might do this. Most commonly I’ll need to collect data from a device, typically to be stored for later analysis but occasionally to trigger some action on a server in the cloud. Less commonly, I’ll need a device to change its behavior based on instructions received via the Internet.
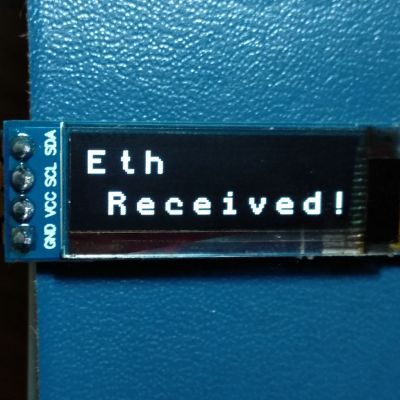
Etherscan is an example of an API that saves me a lot of work, letting me pull data from Ethereum using a variety of devices.

In the former case, my first option has always been to use IoT frameworks like Thingsboard or Ubidots to receive and display data. They have the advantage of being easy to use, and have rich features. They can even react to data and send instruction back to devices. In the latter case, I usually find myself using an application programming interface (API) – some service open on the Internet that my device can easily request data from, for example the weather, blockchain transactions, or new email notifications.

Occasionally, I end up with a type of data that requires processing or is not well structured for storage on these services, or else I need a device to request data that is private or that no one is presently offering. Most commonly, I need to change some parameter in a few connected devices without the trouble of finding them, opening all the cases, and reprogramming them all.

At these times it’s useful to be able to build simple, short-lived services that fill in these gaps during prototyping. Far from being a secure or consumer-ready product, we just need something we can try out to see if an idea is worth developing further. There are many valid ways to do this, but my first choice is Web2Py, a relatively easy to use open-source framework for developing web applications in Python. It supports both Python 2.7 and 3.0, although we’ll be using Python 3 today.

Continue reading “Building A Simple Python API For Internet Of Things Gadgets”

Datalogger Uses ESP32 And ESP8266 Low Power Modes

[G6EJD] wanted to design a low power datalogger and decided to look at the power consumption of an ESP32 versus an ESP8266. You can see the video results below.

Of course, anytime someone does a power test, you have to wonder if there were any tricks or changes that would have made a big difference. However, the relative data is interesting (even though you could posit situations where even those results would be misleading). You should watch the videos, but the bottom line was a 3000 mAh battery provided 315 days of run time for the ESP8266 and 213 days with the ESP32.

Continue reading “Datalogger Uses ESP32 And ESP8266 Low Power Modes”

USB Datalogging With Arduino Using V-USB

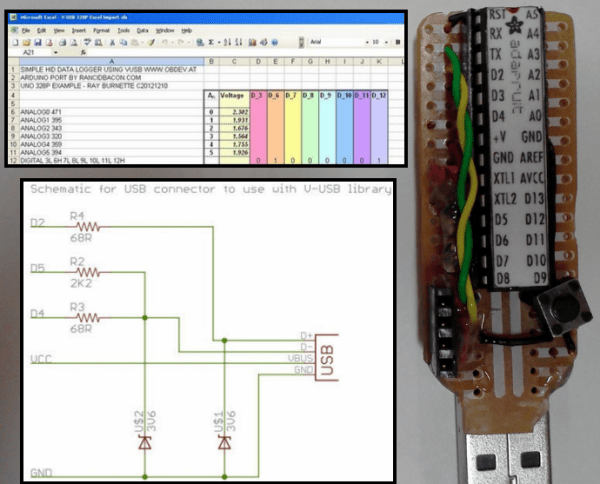
Adding USB functionality to your Arduino projects used to be a pain, but thankfully, the V-USB project came along and gave your ATMEGA328 the ability to control the USB lines directly and mimic simple (low-speed) USB peripherals. [Ray] shows an implementation of the V-USB project by logging the status of the Arduino’s I/O pins to an open Excel spreadsheet

V-USB (Virtual USB) is especially useful for those of us who build standalone Arduino projects with the ATMEGA328. Unlike the Arduino Leonardo and its ATMEGA32U4, the ATMEGA328 does not have a built-in USB controller. The circuit required to tie into the USB lines is made up of just a few basic components, and [Ray] provides a reference schematic and BOM to get you started. The Arduino is programmed to mimic a keyboard, so the datalogging is achieved by allowing the Arduino to ‘type’ the data into an open Excel spreadsheet. In this example, the status of 8 digital pins and all 6 Analog Input pins are logged.

For those of you who prefer the PIC microcontroller and are in a similar position of not having a built-in USB controller, there is the 16FUSB project to help you out.

Rocket Acceleration Logger

rocketdatalogger

Have you ever wondered how high or how fast a model rocket goes when you launch it? [sprite_tm] did, so he decided to build a low cost, lightweight data logger that he could fit into the nose cone of his rocket. To keep the circuit small, he built it around the popular ATtiny13 microcontroller. The microcontroller collects data from a Freescale MMA7260, a 3-axis accelerometer that he extracted from a third-party Wii nunchuck controller. After the microcontroller collects the data, it’s stored in 32K of EEPROM on a 24C256. All of this is powered by a small 3.6v Li-ion battery, which is the largest part of the circuit. If this sounds like something you’d like to make, he has detailed instructions along with the software used available on his site. While we don’t launch a lot of model rockets here, we may soon start just so that we have an excuse to build this.

Progressive MyRate Hackable?

Progressive Insurance announced that it will be rolling out its MyRate plan nationally. You participate by plugging a monitoring device into the ODB-II port on your vehicle. Once every six months you upload the collected data from every trip you’ve made. You’ll receive at least a 5% discount and maybe more based on your driving habits. In some states though, you could actually have your rates raised. Progressive will show you the direct impact your driving behavior has on your rate.

Continue reading “Progressive MyRate Hackable?”