Portable Router Build: Picking Your CPU

I want to introduce you to a project of mine – a portable router build, and with its help, show you how you can build a purpose-built device. You might have seen portable routers for sale, but if you’ve been in the hacking spheres long enough, you might notice there are “coverage gaps”, so to speak. The Pi-hole project is a household staple that keeps being product-ized by shady Kickstarter campaigns, a “mobile hotspot” button is a staple in every self-respecting mobile and desktop OS, and “a reset device for the ISP router” is a whole genre of a hacker project. Sort the projects by “All Time” popularity on Hackaday.io, and near the very top, you will see an OpenVPN &Tor router project – it’s there for a reason, and it got into 2014 Hackaday Prize semifinals for a reason, too.

I own a bunch of devices benefitting from both an Internet connection and also point-to-point connections between them. My internet connection comes sometimes from an LTE uplink, sometimes from an Ethernet cable, and sometimes from an open WiFi network with a portal you need to click through before you can even ping anything. If I want to link my pocket devices into my home network for backups and home automation, I can put a VPN client on my laptop, but a VPN client on my phone kills its battery, and the reasonable way would be to VPN the Internet uplink – somehow, that is a feature I’m not supposed to have, and let’s not even talk about DNSSEC! Whenever I tried to use one of those portable LTE+WiFi[+Ethernet] routers and actively use it for a month or two, I’d encounter serious hardware or firmware bugs – which makes sense, they are a niche product that won’t get as much testing as phones.

Continue reading “Portable Router Build: Picking Your CPU”

Better Living Through Hackery

Hackaday’s own [Arya Voronova] has been on a multi-year kick to make technology more personal by making it herself, and has just now started writing about it. Her main point rings especially true in this day and age, where a lot of the tech devices we could use to help us are instead used to spy on us or are designed to literally make us addicted to their services.

The project is at the same time impossible and simple. Of course, you are not going to be able to build a gadget that will bolster all of your (perceived or otherwise) personal weaknesses in one fell swoop. But what if you start looking at them one at a time? What if you start building up the good habits with the help of a fun DIY project?

That’s where [Arya]’s plan might just be brilliant. Because each project is supposed to be small, it forces you to focus on one specific problem, rather than getting demoralized at the impossibility of becoming “better” in some vague overall sense. Any psychologist would tell you that introspection and dividing up complex problems are the first steps. And what motivates a hacker to take the next steps? You got it, the fun of brainstorming, planning, and building a nice concrete DIY project. It’s like the ultimate motivation, Hackaday style.

And DIY solutions are a perfect match to personal problems. Nothing is so customizable as what you design and build yourself from the ground up. DIY means making exactly what you need, or at least what you think you need. Iteration, improvement, and the usual prototyping cycle applied to personal growth sounds like the ideal combo, because that’s how the tech works, and that’s also how humans work. Of course, even the coolest DIY gadget can’t instantly make you more mindful, for instance, but if it’s a tool that helps you get there, I don’t think you could ask for more.

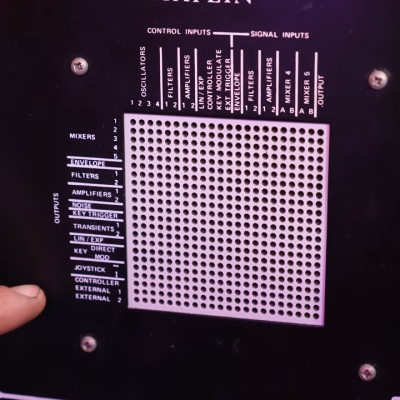
Tulip Is A Micropython Synth Workstation, In An ESP32

We’re not sure exactly what Tulip is, because it’s so many things all at once. It’s a music-making environment that’s programmable in Python, runs on your big computer or on an ESP32-S3, and comes complete with some nice sounding synth engines, a sequencer, and a drum machine all built in. It’s like your dream late-1980s synthesizer workstation, but running on a dev board that you can get for a song.

And because Tulip is made of open-source software and hardware, you can extend the heck out of it. For instance, as demonstrated in this video by [Floyd Steinberg], you can turn it into a fully contained portable device by adding a touchscreen. That incarnation is available from Makerfabs, and it’s a bargain, especially considering that the developer [Brian Whitman] gets some of the proceeds. Or, because it’s written in portable Python, you can run it on your desktop computer for free.

The most interesting part of Tulip for us, as programmer-musicians, is that it boots up into a Micrypython REPL. This is a synth workstation with a command-line prompt as its primary interface. It has an always-running main loop, and you make music by writing functions that register as callbacks with the main loop. If you were fast, you could probably live-code up something pretty interesting. Or maybe it wants to be extended into a physical musical instrument by taking in triggers from the ESP32’s GPIOs? Oh, and did we mention it sends MIDI out just as happily as it takes it in? What can’t Tulip do?

We’ve seen some pretty neat minimalist music-making devices lately, but in a sense Tulip takes the cake: it’s essentially almost entirely software. The various hardware incarnations are just possibilities, and because it’s all open and extremely portable, you can freely choose among them. We really like the design and sound of the AMY software synthesizer engine that powers the Tulip, and we’re sure that more synthesizer models will be written for it. This is a music project that you want to keep your eyes on in the future.

Marimbatron: A Digital Marimba Prototyping Project

The Marimbatron is [Leo Kuipers] ‘s final project as part of the Fab Academy program supervised by [Prof. Neil Gershenfeld] of MIT’s Center for Bits and Atoms. The course aims to teach students how to leverage all the fab lab skills to create unique prototypes using the materials at hand.

The final polyurethane/PET/Flex PCB stack-up for the sensor pad

Fortunately, one of the main topics covered in the course is documentation, and [Leo] has provided ample material for review. The marimba consists of a horizontal series of wooden bars, each mounted over a metal resonator tube. It is played similarly to the xylophone, with a piano-type note arrangement, covering about five octaves but with a lower range than the xylophone. [Leo] converted this piano-type layout into a more logical grid arrangement. The individual pads are 3D printed in PETG and attached to a DIY piezoresistive pressure sensor made from a graphite-sprayed PET sheet laid upon a DIY flexible PCB. A central addressable LED was also included for indication purposes. The base layer is made of cast polyurethane, formed inside a 3D-printed rigid mould. This absorbs impact and prevents crosstalk to nearby sensors. The sensor PCB was initially prototyped by adhering a layer of copper tape to a layer of Kapton tape and cutting it out using a desktop vinyl cutter. While this method worked for the proof of concept, [Leo] ultimately outsourced the final version to a PCB manufacturer. The description of prototyping the sensor and dealing with over-moulding was particularly fascinating.

Continue reading “Marimbatron: A Digital Marimba Prototyping Project”

Long-Awaited SLS4All 3D Printer Now Shipping

We touched on the open source SLS4All DIY SLS 3D printer a year or two ago when the project was in the early stages. Finally, version one is complete, with a parts kit ready to ship and all design data ready for download if a DIY build or derivative is your style. As some already mentioned, this is not going to be cheap: with the full parts kit running at an eye-watering $7K before tax. But it’s possible to build or source almost all of it a bit at a time for those on a budget.

Try printing THIS benchy on an FDM machine!

It’s important to note that to access the detailed information, you’ll need to create an account, which is a bit inconvenient for an open source design. However, all the essential components seem to be available, so it’s forgivable. In terms of electronics, there are two custom PCBs: the GATE1 (GAlvo and Temperature Control) and the ZERO1 (Zero-crossing dimming) controller. Other than that, all the electronics seem to be standard off-the-shelf components. Both of these PCBs are designed using EasyEDA.

Unfortunately we couldn’t find access to the PCB Gerbers, nor does there appear to be a link to their respective EasyEDA projects, just the reference schematics. This is a bit of a drawback, but it’s something that could easily be reproduced with enough motivation. Control is courtesy of a Radxa Rock Pi, as there were ‘problems’ with a Raspberry Pi. This is paired with a 7-inch touchscreen to complete the UI. This is running a highly modified version of the Klipper together with their own control software, which is still undergoing testing before release.

The laser head is built around a 10 W 450 nm laser module from China and a high-end galvanometer set. Two 200 W halogen tube heaters heat the print bed, and 200 W silicone heating pads heat both the powder bed and the print bed.

Continue reading “Long-Awaited SLS4All 3D Printer Now Shipping”

The Dyke Delta: A DIY Flying Wing Fits Four

The world of experimental self-built aircraft is full of oddities, but perhaps the most eye-catching of all is the JD-2 “Dyke Delta” designed and built by [John Dyke] in the 1960s. Built to copy some of the 1950’s era innovations in delta-style jet aircraft, the plane is essentially a flying wing that seats four.

And it’s not just all good looks: people who have flown them say they’re very gentle, they get exceptional gas mileage, and the light wing-loading means that they can land at a mellow 55 miles per hour (88 kph). And did we mention the wings fold up so you can store it in your garage?

Want to build your own? [John] still sells the plans. But don’t jump into this without testing the water first — the frame is entirely hand-welded and he estimates it takes between 4,000 and 5,000 hours to build. It’s a labor of love. Still, the design is time-tested, and over 50 of the planes have been built from the blueprints. Just be sure to adhere to the specs carefully!

It’s really fun to see how far people can push aerodynamics, and how innovative the experimental airplane scene really is. The JD-2 was (and probably still is!) certainly ahead of its time, and if we all end up in flying wings in the future, maybe this plane won’t look so oddball after all.

Continue reading “The Dyke Delta: A DIY Flying Wing Fits Four”

Homebrew Computer From The Ground Up

Building a retro computer of some sort is a rite of passage for many of us, with some building replicas or restorations of old Commodores, Ataris, and other machines from decades past. Others go even further back, to the time of the Intel 8008 or earlier, and a dedicated few will build something completely novel. This project from [3DSage] falls squarely in the latter category, with his completely DIY computer built component by component from scratch, including the machine code needed to run it.

[3DSage] starts with the backbone of every computer: the clock. He first demonstrates how a pair of NOT gates with a set of capacitors can be used as a rudimentary clock pulse, then builds a more refined version with a 555 timer and potentiometer for adjustable rates. Then, it’s on to creating a binary counter, which is a fundamental part of the memory system for this small computer, and finally, allows this circuitry to behave like a normal computer. Using a set of switches to store values in memory and stepping through them with the clock, the computer can be programmed to do plenty of tasks just like a modern microcontroller.

[3DSage] built this project a few years ago and has used it for real-world applications such as controlling servos, LED arrays, playing music, and other tasks. Although he has to program it using his own machine code by hand, it’s a usable computer in many ways. If you want to eschew modernity and build a retro computer in the style of the 1960s, though, this piece goes through what it would have been like to build a similar system in the era when these computers were more common. If you have a switch fetish, you might like to see how real computers worked back then, too.

Continue reading “Homebrew Computer From The Ground Up”