THP Hacker Bio: David Cook

thp-contestant-bio-david-cook

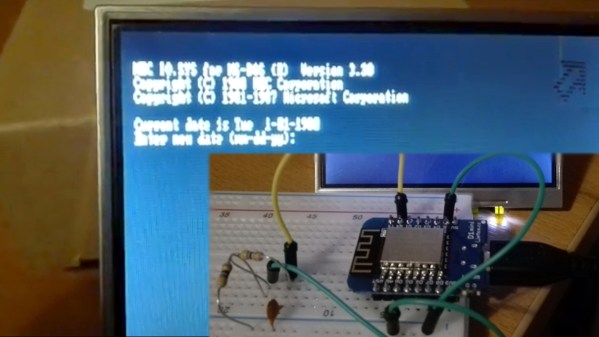
[David Cook] has been on the front page with gnarly hacks many times. We’re happy to present his Hackaday Projects profile as this week’s Hacker Bio.

His entry for The Hackaday Prize is something of a one-wireless-pair-to-rule-them approach to connected devices which he calls LoFi. We were delighted by his first demo video which is exactly what we envisioned for preliminary entries; [David] explains the concept and how he plans to implement it using a few visual aids to drive the point home.

Join us after the break to find out more about [David]. Oh, if you’re wondering about the times he’s been featured on Hackaday, check out his capacitor/coin cell swap which is one of our favorites.

Continue reading “THP Hacker Bio: David Cook”

Hackaday Links: January 26, 2014

hackaday-links-chain

The automotive industry is rolling more and more tech into their offerings. This is great for us because replacement or salvaged parts are great for projects. Here’s one component to look for. [MikesElectricStuff] tears apart the thermal imaging camera form an Audi. [via Hacked Gadgets]

Give your valentine an analog love note on the big day. [Tom’s] LED heart chaser design does it without any coding. It’s a 555 timer with CD4017 decade counter. The nice thing about the setup is a trimpot adjusts the chaser speed.

[Jan] is overclocking his Arduino to 32 MHz. For us that’s kind of an “eh” sort of thing. But his statement that you need to use a clock generator because the chip won’t work with an oscillator at that frequency raised an eyebrow. We saw an AVR chip running from a 32MHz crystal oscillator in the RetroWiz project from yesterday. So do we have it wrong or does [Jan]? Share your opinion in the comments.

Download a copy of the Apple II DOS source code… legally. Yay for releasing old code into the wild! The Computer History Museum has the DOS source code and a bunch of interesting history about it. [via Dangerous Prototypes]

While we were prowling around DP for the last link we came across [Ian’s] post on a new version of Bus Pirate cables. We’ve got the old rainbow cables which are pretty convenient. But if you’ve used them you’ll agree, hunting for the correct color for each connection isn’t anywhere near a fool-proof method. The new cable uses shrink tube printed with probe labels. They sound like a huge pain to manufacture. But this makes connections a lot easier. In our experience, when it doesn’t work its always a hardware problem! Hopefully this will mean fewer botched connections.

Make your tiny LiPo cells last longer. Not capacity wise, but physically. The delicate connections to the monitor PCB break easily, and the plug is really hard to connect and disconnect. [Sean] shows how he uses electrical tape for strain relief, and a bit of filing to loosen up the connector.

KerbalEdu: Kerbal Space Program for education. That’s right, you can play Kerbal as part of school now. Some may shake their heads at this, but school should be fun. And done right, we think gaming is a perfect way to educate. These initiatives must be the precursor to A Young Lady’s Illustrated Primer method of education. Right?

Repairing A Mill That Cost As Much As A Car

miters

Years ago, someone at the bio-instrumentation lab at MIT needed to change a CMOS battery in the controller for a three axis mill. This reset the machine’s BIOS and was widely regarded as a bad move. The mill sat in the lab for a few years before  Prof. [Ian Hunter] donated it to MITERS – the student shop at MIT. And so the task of repairing a machine that cost as much as a car fell upon a plucky group of students.

The machine – a  Dyna-Myte 1007 has a 10″x7″x10″ work area, pneumatic tool changers and carousel, and the working for a fourth axis. It is. however, driven by an ancient Pentium computer running DOS with all the fun of ISA slots and IRQs that entails.

The MITERS began their repair by digging around in the software configuration, finding the axis drive is controlled via IRQ 3, which was currently occupied by COM 2. Changing that in the BIOS let the computer control the axes and, with a few solenoids and an air compressor, the tool carousel also worked.

With a bit of digging around, the MITERS also got the spindle working, giving them a very awesome and very expensive CNC milling machine for free. Even though the computer could be replaced with a $35 Raspberry Pi, we really have to admire the MITERS for fixing what they already had; it’s a cheaper and much, much faster way to get their new toy up and running.

Continue reading “Repairing A Mill That Cost As Much As A Car”

Raspberry Pi: The Perfect Machine For Old DOS Games

DOS

There’s a treasure trove of excellent yet ancient games made for DOS that are nearly unplayable on modern computers. Awesome games like the Lucasarts SCUMM adventures, the original Civilization and SimCity, Starflight, the King’s Quest series and even Leisure Suit Larry aren’t played much today because of the near impossibilities of getting them to run on modern hardware or setting up an emulator with proper sound.

[Patrick] has been doing his best to help out classic gamers with an x86 emulator for the Raspberry Pi. It’s designed to be a very capable DOS box with 20 MB of extended memory, a 640×480 display with 256 colors, an ~20MHz 486 emulated CPU, and a Soundblaster 2.0 sound card.

There’s still a lot of work to be done, but outside of finding a 20-year-old computer, emulation on a Raspberry Pi it probably the most authentic DOS gaming experience you’ll get.

BASH Games

Get serious about your shell scripting skills and maybe you can pull this one off. It’s a game of snake played in a BASH shell. It seems like a coding nightmare, but the final product turns out to be organized well enough for us to understand and took less than 250 lines of code.

[Martin Bruchanov] started on the project after pining for an old DOS game called Housenka. It’s another version of the classic Snake game which we’ve coded ourselves and seen in several projects including this head-to-head version using musical recorders as controllers. When using a terminal emulator capable of ANSI sequences the game is displayed in color using extended characters.

We give [Martin] bonus points for the way he wrote about his project. It describes the mechanics most would be interested in, like how the user input is captured and what drives the update function and food generation. The rest of the details can be gleaned by reading through the code itself.

Hacking A Parallel Port Flash Memory Programmer

[Pulko Mandy] doesn’t use his flash ROM programmer very often, but he does use it. When he tried to get support for a new chip and the manufacturer suggested he just buy a newer version he decided to hack the programmer and it’s software instead.

This device connects to the parallel port and was intended for use with MS-DOS systems (no wonder there’s no longer support from the company). The board uses logic chips to add read and write function. So the first step was to analyze how they connect together and come up with a set of commands. While at it he also made some changes to the board to bring the voltage more in spec and ensure the logic levels on the parallel port met the correct voltages.

His plan was to use the board with a Linux system so the parallel port interface can stay. He used what he learned from the hardware inspection to write his own interface in C++. It works with a chip he was able to use under the MS-DOS software, but he hasn’t gotten it to work with the chip that sparked this adventure. If you’re familiar with how the AT29C040A works please consider lending a hand.

XT IDE Controller

[Geordy] wanted to use some IDE devices but he didn’t have an interface card for his XT system, which can’t handle 16-bit  IDE. He looked around for 8-bit ISA controllers but they were hard to find and quite expensive. Lucky for him there’s an open source project that makes a solution to this problem. The XTIDE project brought together a group of vintage computing enthusiasts to design this ISA card. [Geordy] was even able to order a professional PCB from one of the forum members. He ordered the parts an soldered it together, costing about $30 total. He had a friend help him burn the code to the EEPROM but that’s easy enough to do with an Arduino, Bus Pirate, or one of several other methods. Now his grand plans at installing DOS 6.22 have been realized.