New Microscope Directly Images Protein Atoms

There’s an old joke that you can’t trust atoms — they make up everything. But until fairly recently, there was no real way to see individual atoms. You could infer things about them using X-ray crystallography or measure their pull on tiny probes using atomic force microscopes, but not take a direct image. Until now. Two laboratories recently used cryo-electron microscopy to directly image atoms in a protein molecule with a resolution of about 1.2 x 10⁻⁷ millimeters or 1.2 ångströms. The previous record was 1.54 ångströms.

Recent improvements in electron beam technology helped, as did a device that ensures electrons that strike the sample travel at nearly the same speeds. The latter technique resulted in images so clear, researchers could identify individual hydrogen atoms in the apoferritin molecule and the water surrounding it.

Continue reading “New Microscope Directly Images Protein Atoms”

Electron Microscopes Are Awesome: Everything You Didn’t Know You Wanted To Know

Electron microscopes were once the turf of research laboratories that could foot the hefty bill of procuring and maintaining such equipment. But old models have been finding their way into the hands of eager individuals who are giving us an inside look at the rare equipment. Before you start scouring Craigslist, go on a crash course of what you need to know with Adam McComb’s Hacker’s Guide to Electron Microscopy. He presented the talk at the 2018 Hackaday Superconference and the recording was just published, you’ll find it below.

Continue reading “Electron Microscopes Are Awesome: Everything You Didn’t Know You Wanted To Know”

Reviving An Electron Microscope With Arduino

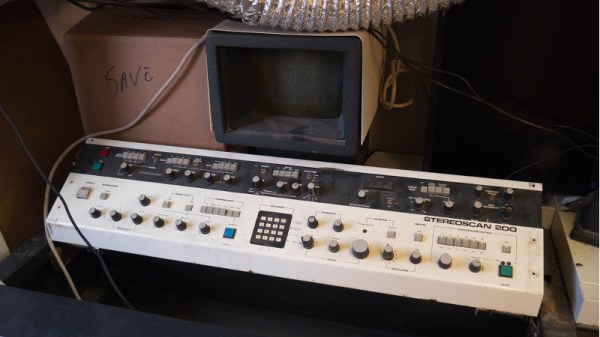
We don’t know about you, but when our friends ask us if we want to help them fix something, they’re usually talking about their computer, phone, or car. So far it’s never been about helping them rebuild an old electron microscope. But that’s exactly the request [Benjamin Blundell] got when a friend from a local hackerspace asked if he could take a look at a vintage Cambridge Stereoscan 200 they had found abandoned in a shed. Clearly we’re hanging out with the wrong group of people.
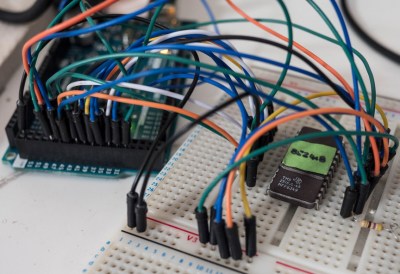
As you might imagine, the microscope was in desperate need of some love after spending time in considerably less than ideal conditions. While some of the hackerspace members started tackling the hardware side of the machine, [Benjamin] was tasked with finding a way to recover the contents of the scope’s ROM. While he’s still working on verification, the dumps he’s made so far of the various ROMs living inside the Stereoscan 200 have been promising and he believes he’s on the right track.

The microscope uses a mix of Texas Instruments 25L32 and 2516 chips, which [Benjamin] had to carefully pry out after making sure to document everything so he knew what went where. A few of the chips weren’t keen on being pulled from their home of 30-odd years, so there were a few broken pins, but on the whole the operation was a success.

Each chip was placed in a breadboard and wired up to an Arduino Mega, as it has enough digital pins to connect without needing a shift register. With the wiring fairly straightforward, [Benjamin] just needed to write up some code to read the contents of the chip, which he has graciously provided anyone else who might be working on a similar project. At this point he hasn’t found anything identifiable in his ROM dumps to prove that they’ve been made successfully, all he really knows right now is that he has something. At least it’s a start.

More and more of these older electron microscopes are getting a second lease on life thanks to dedicated hackers in their home labs. Makes you wonder if there’s ever going to be a piece of hardware the hacker community won’t bend to their will.

A DIY Atomic Force Microscope

AFM

For looking at really small stuff, an optical microscope will only go so far. Looking at things at the nanometer level, though, usually requires some sort of electron microscope, with all the hassle of vacuum chambers and high voltages. There is another way to investigate the domain of the very small: an atomic force microscope. Unlike their electron spewing brothers, they don’t require high voltages or hard vacuums. They can also be built for about $1000, as [whoand] over on the Instructables shows us.

Instead of shooting light or electrons at an object and picking up the reflections, an atomic force microscope drags a very, very tiny stylus across an object. This stylus is attached to a probe that will reflect laser light off of it into a photosensor, eventually rendering an image on a display. [whoand] is using a laser diode and pickup unit from a DVD-ROM drive for the optical pickup unit, a frame made from soldered together PCBs, and a few piezos to vibrate the probe.

The probes themselves are incredible pieces of engineering with a tip size of a few nanometers. They’re consumable, and expensive, ranging from $20 to $500 per probe. Still, with these probes, [whoand] can look at the pits in a CD or DVD, measure the surface of an eraser, or check out the particulate matter floating around in the atmosphere in Beijing.

Thanks [Rob] for the tip.

Electron Beam Control In A Scanning Electron Microscope

Electron

A few years ago [Ben Krasnow] built a scanning electron microscope from a few parts he had sitting around. He’s done a few overviews of how he built his SEM, but now he’s put up a great video on how to control electrons, focus them into a point, and scan a sample.

The basic idea behind a scanning electron microscope is to shoot electrons down a tube, focus them into a point, and scan a conductive sample and detect the secondary electrons shot off the sample and display them on an oscilloscope. [Ben] is generating electrons with a small tungsten filament at the top of his electron ‘stack’. Being like charged, these electrons naturally fan out, so a good bit of electron optics are required to get a small point.

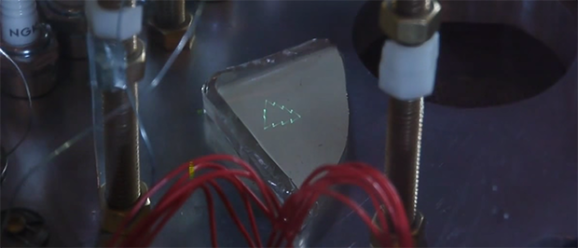
Focusing is done through a series of pinholes and electrostatic deflectors, much like you’d see in an old oscilloscope CRT. In the video, you can see [Ben] shooting electrons and displaying a Christmas tree graphic  onto a piece of phosphor-coated glass. He has a pretty big scanning area in his SEM, more than enough to look at a few chips, wafers, and whatever other crazy stuff is coming out of [Ben]’s lab.

Video below, along with the three-year-old overview of the entire microscope.

Continue reading “Electron Beam Control In A Scanning Electron Microscope”

DIY Scanning Electron Microscope

[Ben Krasnow]  has recently completed a home-built scanning electron microscope and has posted a video of it in action on his blog.

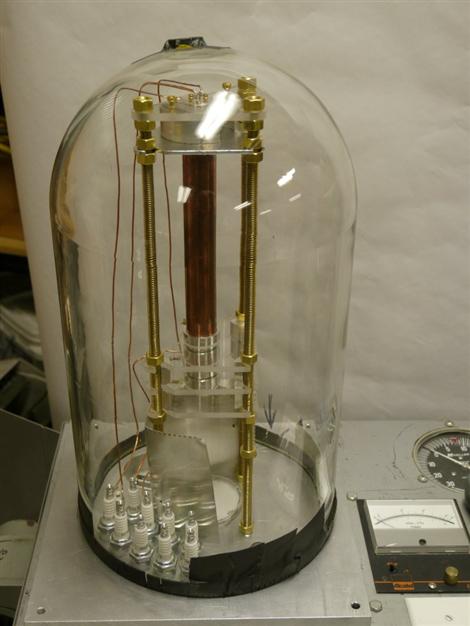
The build itself was done quite creatively using many off-the shelf components. We particularly like how long threaded brass rods were used not only for the supports, but also to maintain column alignment and fine-tune the spacing between the various beam focusing components.  A large glass “bell jar” covers the entire apparatus and is sealed to the bottom plate when the air is removed from within by a mechanical vacuum pump.

In order to produce an image, an electron gun similar to one found in a conventional CRT television tube accelerates the electrons with a 5kV potential from the top of the microscope downwards through a long copper column. Along the way the beam is focused and manipulated by electronic lenses in much the same way that light would be handled by conventional optical lenses. Near the base of the main column there are electrostatic deflection plates placed orthogonally in the X and Y directions that allow for precise scanning of the beam across the sample’s surface. When this high-energy electron beam is scanned across the sample, scattering surface electrons are then picked up by a nearby detector consisting of a phosphor screen and photomultiplier – a system that supposedly allows for higher sensitivity than trying to measure the small numbers of electrons directly.

Although the resolution of the first few scans is only around 50uM, this early success clearly shows that the device functions as intended and will provide a great starting point for future refinement with the final goal being resolutions down to the 1uM range.

Despite Ben’s reassurance that the x-rays produced at this energy level  won’t even penetrate the glass chamber, you can be sure that if we ever visit his garage we will definitely be donning some tin foil protection like these guys.

[Thanks kyle]

Continue reading “DIY Scanning Electron Microscope”