DOOM On A Bootloader Is The Ultimate Cheat Code

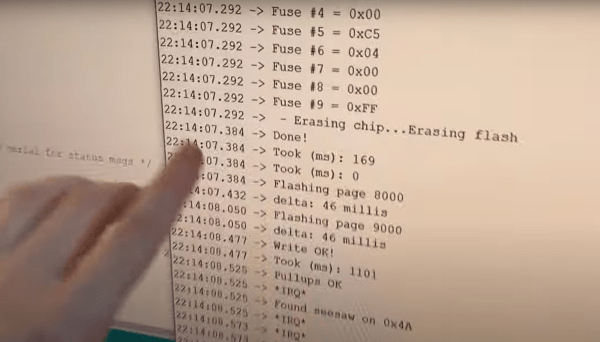
Porting DOOM to run on hardware never meant to run it is a tradition as old as time. Getting it to run on embedded devices, ancient computers, virtual computers, and antique video game consoles are all classic hacks, but what DOOM ports have been waiting for is something with universal applicability that don’t need a bespoke solution for each piece of hardware. Something like DOOM running within a bootloader.

The bootloader that [Ahmad] works with is called Barebox and is focused on embedded systems, often those running Linux. This is the perfect environment for direct hardware access, since the bootloader doubles as a bare metal hardware bring-up toolkit. Now that DOOM runs on this bootloader, it effectively can run anywhere from embedded devices to laptops with minimal work, and although running it in a bootloader takes away a lot of the hard work that would normally need to be done during a port, it may still need some tweaking for specific hardware not otherwise supported.

For those already running Barebox, the bareDOOM code can be found on [Ahmad]’s GitHub page. For those not running Barebox, it does have a number of benefits compared to other bootloaders, even apart from its new ability to play classic FPS games. For those who prefer a more custom DOOM setup, though, we are always fans of DOOM running within an NES cartridge.

Photo: AntonioMDA, CC BY-SA 4.0 via Wikimedia Commons

Free RTOS

Real-Time OS Basics: Picking The Right RTOS When You Need One

When do you need to use a real-time operating system (RTOS) for an embedded project? What does it bring to the table, and what are the costs? Fortunately there are strict technical definitions, which can also help one figure out whether an RTOS is the right choice for a project.

The “real-time” part of the name namely covers the basic premise of an RTOS: the guarantee that certain types of operations will complete within a predefined, deterministic time span. Within “real time” we find distinct categories: hard, firm, and soft real-time, with increasingly less severe penalties for missing the deadline. As an example of a hard real-time scenario, imagine a system where the embedded controller has to respond to incoming sensor data within a specific timespan. If the consequence of missing such a deadline will break downstream components of the system, figuratively or literally, the deadline is hard.

In comparison soft real-time would be the kind of operation where it would be great if the controller responded within this timespan, but if it takes a bit longer, it would be totally fine, too. Some operating systems are capable of hard real-time, whereas others are not. This is mostly a factor of their fundamental design, especially the scheduler.

In this article we’ll take a look at a variety of operating systems, to see where they fit into these definitions, and when you’d want to use them in a project. Continue reading “Real-Time OS Basics: Picking The Right RTOS When You Need One”

Pi Compute Module Is Love-child Of Raspberry And Arduino

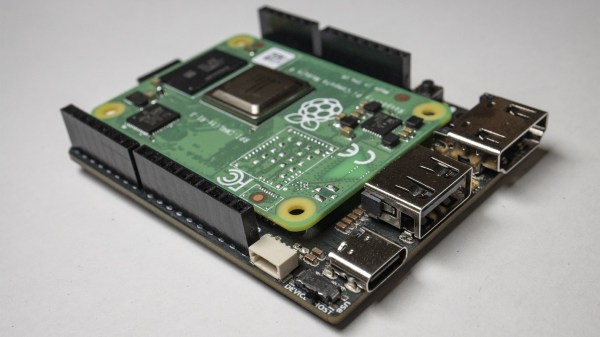
The Raspberry Pi compute module is a powerful piece of hardware, especially for the price. With it, you get more IO than a normal Pi, plus the ability to design hardware around it that’s specifically tailored to your needs rather than simply to general-purpose consumers. However, this comes at the cost of needing a way to interface with it since the compute module doesn’t have the normal IO pins or ports, but [Timon] has come up with a handy development board for this module called the Piunora which solves a lot of these prototyping issues.

The development board expands the compute module to the familiar Arduino-like form factor, complete with IO headers, USB ports, and HDMI output. It doesn’t stop there, though. It has an M.2 connector, some built-in LEDs, a camera connector, and a few other features. It also opens up some other possibilities that would be difficult or impossible with a standard Pi 4, such as the ability to run the Pi as a USB gadget rather than as a host device which simplifies certain types of development, which is [Timon]’s intended function.

As a development board, this project has a lot of potential for the niche uses of the compute module when compared to the standard Raspberry Pi. For embedded applications it’s much easier to deploy, with the increased development costs as a tradeoff. If you’re still unsure what to do with the compute module 4, we have some reading for you. And Timon’s previous project is a great springboard.

Vizy The AI Camera Aims To Ease Machine Vision

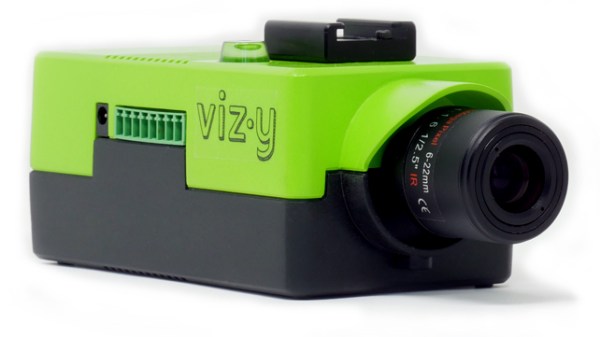
Cameras are getting smarter and more capable than ever, able to run embedded machine vision algorithms and pull off tricks far beyond what something like a serial camera and microcontroller board would be capable of, and the upcoming Vizy aims to be even smarter and easier to use yet. Vizy is the work of Charmed Labs, and this isn’t their first foray into accessible machine vision. Charmed Labs are the same folks behind the Pixy and Pixy 2 cameras. Vizy’s main goal is to make object detection and classification easy, with thoughtful hardware features and a browser-based interface.

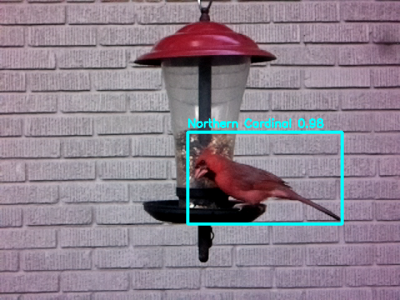
Vizy can identify common birds with “Birdfeeder”, one of the several built-in applications that uses local processing only.

The usual way to do machine vision is to get a USB camera and run something like OpenCV on a desktop machine to handle the processing. But Vizy leverages a Raspberry Pi 4 to provide a tightly-integrated unit in a small package with a variety of ready-to-run applications. For example, the “Birdfeeder” application comes ready to take snapshots of and identify common species of bird, while also identifying party-crashers like squirrels.

The demonstration video on their page shows off using the built-in high-current I/O header to control a sprinkler, repelling non-bird intruders with a splash of water while uploading pictures and video clips. The hardware design also looks well thought out; not only is there a safe shutdown and low-power mode for the Raspberry Pi-based hardware, but the lens can be swapped and the camera unit itself even contains an electrically-switched IR filter.

Vizy has a Kickstarter campaign planned, but like many others, Charmed Labs is still adjusting to the changes the COVID-19 pandemic has brought. You can sign up to be notified when Vizy launches; we know we’ll be keen for a closer look once it does. Easier machine vision is always a good thing, because it helps free people to focus on clever ideas like machine vision-based tool alignment.

Google’s Pigweed For ARM Development Is A Nice Surprise

Setting up an environment for Embedded Development was traditionally a pain and so vendors provide integrated development environments to help bridge the gap. Google has open-sourced their version of an embedded targeted environment designated as embedded-targeted libraries which they trademarked Pigweed.

Google trademarked Pigweed with the U.S. Patent and Trademark Office in February and it popped up on the Google Open Source Blog along with some details.

The repository contains what Google is calling modules but taking a better look reveals that it a little more than that. Packaged in a Python Virtual Environment is a number of tools including an ARM compiler, the clang-format tool and Python 3.8 interpreter which runs more than a few things. The modules that come with Pigweed assist developers by running micro-automations such as the pw_watch module that monitors files for change and triggers a build, test and even flash and debug on hardware. There is also a module that allows pre-submit checks such as linting and formatting.

Google still does not consider this offering production ready though from what we have seen so far, it is a great place for many to start experimenting with for their embedded development automation needs. Anyone tried it out yet?

If you have been inspired with the amazing powers of automation and want to dive in yourself, have a look at Software Development in BASH and Continuous Integration with Python.


File Systems For Tiny Devices

Sometimes you build a computer and use it every day. Sometimes you build a different type of computer and it sits alone on a mountaintop for years. The design considerations for these two setups are remarkably different, right down to the type of file system used. For small computers like [Jo] is using, and for the amount of time they sit alone in remote locations, he decided to build his own file system for them.

Known as JesFs ([Jo]’s embedded serial File system), the file system is for SPI Flash and intended for use in scientific data logging. It can be used on the chip-scale processors found in many development boards, and is robust enough to use in applications where remoteness is a concern. It has a small RAM footprint, is completely open source, includes wear leveling, and has a number of security features built-in as well.

Some of the benefits of using a file system on such a tiny chip aren’t immediately obvious unless you’re doing a lot of data logging, but it does allow you to change virtually any aspect of the firmware much more easily if everything is accessible as a file, and not something you would have to change by reflashing the whole chip, for example. There are also a number of traps that you can easily fall into when working with file systems for tiny devices.

Review: OSEPP STEM Kit 1, A Beginner’s All-in-One Board Found In The Discount Aisle

As the name implies, the OSEP STEM board is an embedded project board primarily aimed at education. You use jumper wires to connect components and a visual block coding language to make it go.

I have fond memories of kits from companies like Radio Shack that had dozens of parts on a board, with spring terminals to connect them with jumper wires. Advertised with clickbait titles like “200 in 1”, you’d get a book showing how to wire the parts to make a radio, or an alarm, or a light blinker, or whatever.

The STEM Kit 1 is sort of a modern arduino-powered version of these kits. The board hosts a stand-alone Arduino UNO clone (included with the kit) and also has a host of things you might want to hook to it. Things like the speakers and stepper motors have drivers on board so you can easily drive them from the arduino. You get a bunch of jumper wires to make the connections, too. Most things that need to be connected to something permanently (like ground) are prewired on the PCB. The other connections use a single pin. You can see this arrangement with the three rotary pots which have a single pin next to the label (“POT1”, etc.).

I’m a sucker for a sale, so when I saw a local store had OSEPP’s STEM board for about $30, I had to pick one up. The suggested price for these boards is $150, but most of the time I see them listed for about $100. At the deeply discounted price I couldn’t resist checking it out.

So does an embedded many-in-one project kit like this one live up to that legacy? I spent some time with the board. Bottom line, if you can find a deal on the price I think it’s worth it. At full price, perhaps not. Join me after the break as I walk through what the OSEPP has to offer.

Continue reading “Review: OSEPP STEM Kit 1, A Beginner’s All-in-One Board Found In The Discount Aisle”