An Easy DIY Pedal Set For Racing Sims

The racing sim scene has always had a strong DIY subculture, as enthusiasts seeking the most realistic-feeling peripherals set out to modify off-the-shelf offerings for greater authenticity. Others go further and craft their own builds from the ground up. [ilge] has done just that, putting together his own set of pedals for sim racing.

The build relies primarily on 3D printed components, with a few springs and some nuts and bolts to hold everything together. Gear teeth on the pedal arms interface with matching gears mounted on potentiometers. These are then wired into an Arduino Pro Micro, which reads the individual pots via analog inputs and then acts as a USB Human Interface Device to the computer.

[ilge] tests the setup with a variety of games, including the popular Euro Truck Simulator and iRacing. It’s a great cheap way to get started with a pedal set for a sim rig. From here, the sky really is the limit; we’d love to see an upgraded version with a load-cell on the brake for better pedal feel. We’d be surprised if an H-shifter isn’t in the works, too. Video after the break.

Continue reading “An Easy DIY Pedal Set For Racing Sims”

Tunes You Can Eat

This week retro-gadget collector and video blogger [Techmoan] featured perhaps the most delicious audio recording format that we know of — a chocolate gramophone record. (Video, embedded below.) Compared to his typical media format explorations, the chocolate record is of quite recent vintage. He first heard of them back in 2015 when Tasmanian artist [Julia Drouhin] offered chocolate recordings as part of her art project. The one that [Techmoan] finally obtained was from a UK chocolatier who offers them with custom labelling and your choice of two songs. There are some pointers in the video about how to playback your chocolate disk without ruining it (use the lightest stylus tracking force as possible). These disks are recorded at 45 RPM on one side only, and are about the same size as a standard single. But being about five times thicker, they pack a lot more calories than your typical phonograph disk.

No reflection on the Tewkesbury Town Band, but this is probably the lowest fidelity recording media ever, but at least you can eat it when you’re done listening — label and all. We hope the Mission Impossible movie producers are paying attention so we can see the secret audio briefing being eaten instead of going up in smoke next film.

Continue reading “Tunes You Can Eat”

Dead Simple Time-Domain Reflectometry With Just A Battery And An Oscilloscope

“Time-domain reflectometry” sure sounds like something that needs racks of expensive equipment to accomplish. In reality, TDR is just measuring the time between injecting a pulse into a cable and receiving its echo, either from the other end of the cable or from some fault or defect along the way. It’s a useful technique, and as [Allen Wolke (W2AEW)] shows us, it can be accomplished with little more than a battery, a resistor, and an oscilloscope. And a little math, of course.

There are, of course, dedicated time-domain reflectometers, but all of them are really just elaborations of the basic principles [W2AEW] demonstrates with his simple setup. The oscilloscope is set up with a tee connector on one channel; one side of the tee is connected to the cable under test, while the shield conductor of the other side is connected to the negative terminal of a 9V battery. A resistor connected to the center conductor is used to complete the circuit, which sends a brief pulse down the test cable. The scope is set up to capture the outgoing pulse as well as the return pulse, allowing the time between the two to be measured. Some simple math gives the length of the cable, the distance to a fault, or with a little rearrangement, the velocity factor of the cable.

The video below shows the simple method at work on coax and Cat 5e Ethernet cable. It even worked on a roll of zip cable, which was a little surprising. If this technique is too simple, you can always elaborate a bit and roll your own TDR tester. Googly eyes optional, of course, but recommended.

Continue reading “Dead Simple Time-Domain Reflectometry With Just A Battery And An Oscilloscope”

Railroad Rail Transformed Into Blacksmith’s Anvil With The Simplest Of Tools

One of the biggest challenges facing the aspiring blacksmith is procuring the tools of the trade. And that means tackling the unenviable task of finding a decent anvil. Sure, one can buy an ASO — anvil-shaped object — at Harbor Freight, but a real anvil is much harder to come by. So perhaps the beginner smith’s first build should be this railroad rail to anvil conversion.

Repurposing sections of rail into anvils is hardly a new game, but [The Other Finnish Guy]’s build shows us just how little is needed in terms of specialized tooling to pull this off. Other than a file, the bulk of the work is done by angle grinders, which are used to cut off the curved crown of the rail section, cut the shape of the heel, and rough out the horn. Removing that much metal will not be a walk in the park, so patience — and a steady supply of cutting wheels and sanding discs — is surely required. But with time and skill, the anvil hidden inside the rail can be revealed and put to use.

We have questions about the final result, like its lack of a hardy hole and the fact that the face isn’t hardened. We wonder if some kind of induction heating could be used to solve the latter problem, or if perhaps a hardened plate could be welded into the top to make a composite anvil. Still, any anvil is better than no anvil. More on the anatomy and physiology of these tools can be had in [Jenny List]’s article on anvils, and her whole excellent series on blacksmithing is highly recommended. [Jenny]’s not the only smith we have on staff, though — [Bil Herd] has been known to smite a bit too.

Continue reading “Railroad Rail Transformed Into Blacksmith’s Anvil With The Simplest Of Tools”

Pi Compute Module Is Love-child Of Raspberry And Arduino

The Raspberry Pi compute module is a powerful piece of hardware, especially for the price. With it, you get more IO than a normal Pi, plus the ability to design hardware around it that’s specifically tailored to your needs rather than simply to general-purpose consumers. However, this comes at the cost of needing a way to interface with it since the compute module doesn’t have the normal IO pins or ports, but [Timon] has come up with a handy development board for this module called the Piunora which solves a lot of these prototyping issues.

The development board expands the compute module to the familiar Arduino-like form factor, complete with IO headers, USB ports, and HDMI output. It doesn’t stop there, though. It has an M.2 connector, some built-in LEDs, a camera connector, and a few other features. It also opens up some other possibilities that would be difficult or impossible with a standard Pi 4, such as the ability to run the Pi as a USB gadget rather than as a host device which simplifies certain types of development, which is [Timon]’s intended function.

As a development board, this project has a lot of potential for the niche uses of the compute module when compared to the standard Raspberry Pi. For embedded applications it’s much easier to deploy, with the increased development costs as a tradeoff. If you’re still unsure what to do with the compute module 4, we have some reading for you. And Timon’s previous project is a great springboard.

China’s Moon Mission Was About More Than Rocks

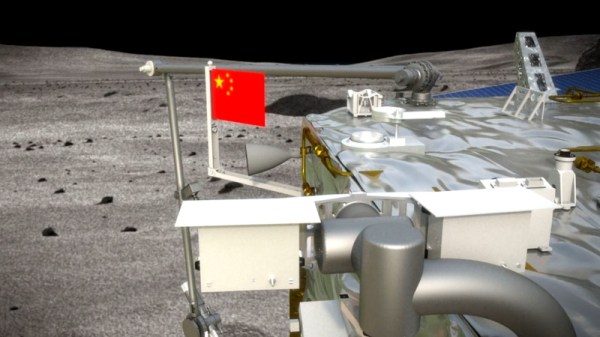
If everything goes according to plan, China will soon become the third country behind the United States and the Soviet Union to successfully return a sample of lunar material. Their Chang’e 5 mission, which was designed to collect 2 kilograms (4.4 pounds) of soil and rock from the Moon’s surface, has so far gone off without a hitch. Assuming the returning spacecraft successfully renters the Earth’s atmosphere and lands safely on December 16th, China will officially be inducted into a very exclusive club of Moon explorers.

Of course, spaceflight is exceedingly difficult and atmospheric reentry is particularly challenging. Anything could happen in the next few days, so it would be premature to celebrate the Chang’e 5 mission as a complete success. But even if ground controllers lose contact with the vehicle on its return to Earth, or it burns up in the atmosphere, China will come away from this mission with a wealth of valuable experience that will guide its lunar program for years to come.

In fact, one could argue that was always the real goal of the mission. While there’s plenty of scientific knowledge and not an inconsequential amount of national pride to be gained from bringing a few pounds of Moon rocks back to Earth, it’s no secret that China has greater aspirations when it comes to our nearest celestial neighbor. Starting with the launch of the Chang’e 1 in 2007, the Chinese Lunar Exploration Program has progressed through several operational phases, each more technically challenging than the last. Chang’e 5 represents the third phase of the plan, with only the establishment of robotic research station to go before the country says they’ll proceed with a crewed landing in the 2030s.

Which helps explain why, even for a sample return from the Moon, Chang’e 5 is such an extremely complex mission. A close look at the hardware and techniques involved shows a mission profile considerably more difficult than was strictly necessary. The logical conclusion is that China intentionally took the long way around so they could use it as a dry run for the more challenging missions that still lay ahead.

Continue reading “China’s Moon Mission Was About More Than Rocks”

Join Us For The “Holiday With Hackaday And Tindie” Meet-Up

It’s a ritual in workplaces around the world this time of any other year but 2020: the office holiday party. Too much food, perhaps too much alcohol, and garish sweaters that you wouldn’t be caught dead in on any other occasion. Things are, of course, a tad different this year, which is why we’re putting our community’s party online with the Holiday with Hackaday and Tindie meet-up on Tuesday, December 15 at noon Pacific time!

Why should you come to this hangout? Because why not! This is going to be a loose, informal meet-up that will give us all a chance to get to know one another. We’ve got an amazing community here, and just putting faces to names can be really valuable. You’ll be able to connect with old friends and perhaps make new ones. It’s your chance to reach out and find someone to collaborate with, or perhaps just find an answer to a thorny problem you’ve been stuck on. Be sure to bring your latest projects to show off, and maybe even consider giving everyone a virtual tour of your shop. Ugly sweaters are optional, of course, and we don’t judge.

The Holiday with Hackaday and Tindie meet-up is being held on Remo. Those of you who joined the Friday night Bring-a-Hack session at Remoticon this year will no doubt remember the platform, which we got a lot of good feedback on. You’ll want to check browser compatibility ahead of time and reserve your spot, so head over to Remo and make it so. If you need help with timezone conversions, we’ve got you covered on that too.

We’re looking forward to seeing everyone at the Holiday with Hackaday and Tindie meet-up!