3D Print An Enigma Machine That’s Close To The Real Thing

The Enigma machine as used by the German military during World War Two exerts a curious fascination among our community of hardware hackers and makers. Perhaps it is the mechanical complexity of the machine itself, or maybe the tale of how its encoded messages were decrypted by Allied codebreakers that contributes to this interest, but whatever it is we’ve seen a succession of Enigma-related projects over the years that shows no sign of abating.

The latest Enigma project to come our way is a particularly nice one from a group of first year students at CentraleSupélec Rennes, in Northwestern France. Their Réplique Enigma is a fully mechanical Enigma replica using 3D printing techniques, and unlike so many replicas which use modern electronics it has a set of rotors just like those you would have found in the original. The rotors themselves have a 3D-printed plastic shell which houses brass contacts and the associated writing, while the keyboard and lamp board are both made from plywood. Rather than trying to replicate the original switches from the keyboard they are using modern microswitches, however the keys themselves are upright posts that resemble the original. An AZERTY layout may not have been present on the real Enigma machines, but lends a pleasing twist to the build.

It’s worth browsing all the pages for this build, as the front page does not necessarily capture the whole build. The rotors set this Enigma apart from many of the replicas we’ve featured in the past, so you may find it interesting to take a look and make a few comparisons.

A Modern But Classic Enigma Machine

Hacking has always brought more good to the world than not hacking. The successful efforts of the Allies during World War II in deciphering the Enigma machine output still reminds us of that. Today, the machine is a classic example of cryptography and bare-metal computing.

We have covered quite a few DIY Enigma machines in the past, yet 14 years old [Andy] really impressed us with his high school science fair project, a scratch built, retro-modern Enigma machine.

Continue reading “A Modern But Classic Enigma Machine”

Mein Enigma

The World War II German Enigma encoding machine is something of an icon in engineering circles not just for its mechanical ingenuity but for the work of the wartime staff at Bletchley Park in decoding its messages. Without it we would not have had Colossus, the first programmable digital electronic computer, and subsequent technological developments might have taken a slower pace towards what we take for granted today.

Sadly for the Enigma enthusiast though, real machines are now few and far between. Our grandparents’ generation saw to that through the chaos and bombing of the fight across Europe. If you want to handle one you will have to either have an outrageous amount of money, work for a museum, or maybe for the GCHQ archivist.

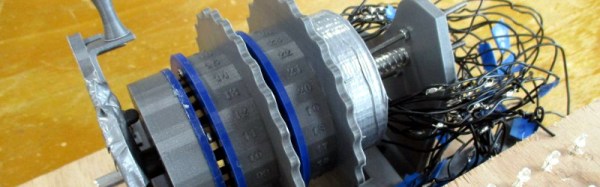
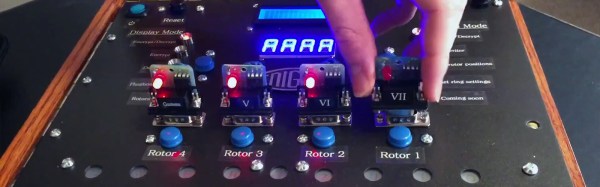
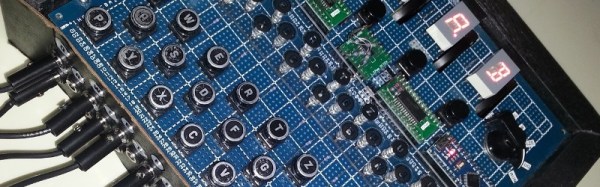
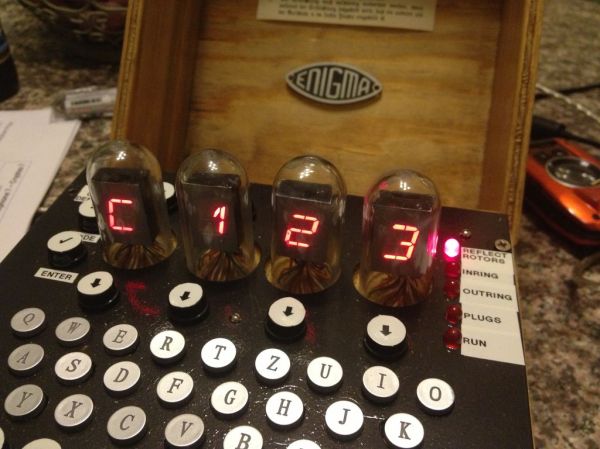
This has not stopped our community building Enigma replicas, and the latest one to come to our attention here at Hackaday shows some promise. [lpaseen]’s meinEnigma is an electronic Enigma driven by an Arduino Nano, with rotary encoders to represent the Enigma rotors and multi-segment alphanumeric displays standing in for the lighted letters in the original. It supports all the different variations of rotors from the original in software, has a physical plugboard, and a serial port over USB through which all machine functions can be controlled. The machine as it stands is a fully working prototype, the plan is that a final machine will resemble the original as closely as possible.

All the code used in the project can be found on GitHub, along with [lpaseen]’s Arduino library for the Holtek HT16K33 keyboard/display chip used to handle those tasks.

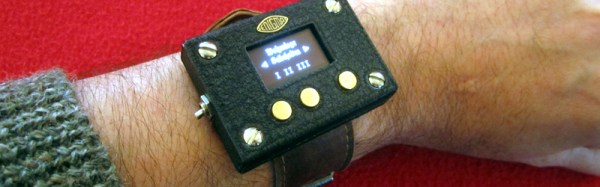
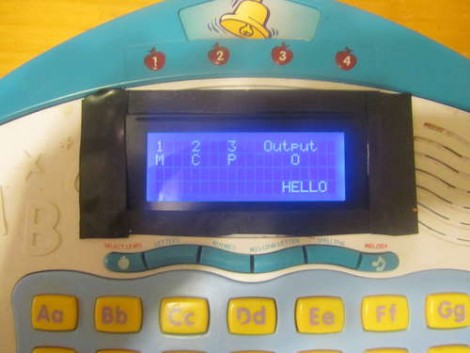
We’ve featured a few Enigma machines on Hackaday over the years. One was built into a wristwatch, another into a hacked child’s toy, but the closest in aim to [lpaseen]’s offering is this rather attractive replica also driven by an Arduino. It is also worth mentioning that should your travels ever take you to Buckinghamshire you can visit the Bletchley Park Museum and neighboring  National Museum of Computing, to get the Enigma and Colossus story from the source.

Enigma Machine Wristwatch

We don’t find smartwatches to be supremely usable yet. This one sets a definition for usefulness. The Enigma machine is of course the cipher process used by the Germans during World War II. This Enigma Machine wristwatch is not only functional, but the appearance is modelled after that of the original machine. With the speckled gray/black case and the Enigma badge branding [Asciimation] has done a fine job of mimicking the original feel.

Driving the machine is an Arduino Pro Mini. We’ve seen Arduino Enigma Machines in the past so it’s not surprising to see it again here. The user interface consists of an OLED display at 128×64 resolution, three buttons, with a charging port to the right and on/off switch on the left.

The device is demonstrated after the break. Quite a bit of button presses are used to set up each of the three encoder wheels. But that’s hardly avoidable when you’re not committing to a full keyboard. We’re pretty impressed by the functionality of [Asciimation’s] interface considering it’s hardware simplicity.

This seems perfect for kids that are proving to have an interest in engineering. They learn about ciphers, embedded programming, and mechanical design and crafting (this is a hand-sewn leather wristband). Of course if you build one and start wearing it into the office we won’t judge.

Continue reading “Enigma Machine Wristwatch”

Arduino-based Enigma Replica Is Fully Functional

This open-source Enigma replica by the folks at [ST-Geotronics] is simply stunning. They drew their inspiration from a hilarious build we saw a few years ago that hacked a children’s toy into an Enigma machine. Their project is instead modeled on the original Enigma M4 cipher machine, and aside from a bit of artistic license, we think they nailed the visual style. As for functionality, the guide claims everything works, right down to the plugboard.

Rather than try to immediately cram everything into the final enclosure, the [ST-Geotronics] gang painstakingly worked out a prototype to be sure the four 16-segment LED displays had been wired correctly and functioned properly. The next step was laying out a swarm of buttons and resistors on a 6″x8″ perfboard. They used charlieplexing to handle the 16-segment displays (which actually have 17 LEDs each), and deceptively disguised each display as a nixie tube by mounting them vertically and encasing them in a transparent dome. The case follows the M4’s original dimensions and consists of a plywood box with scrap steel for the top plate.

Swing by their Instructables page for more details. There you can find several Arduino sketches to test functionality and the code for five different M4 operation modes.

WWII’s Top Cryptography Comes To A Child’s Toy

This toy has some upgraded internals that turn it into an Enigma machine. We absolutely love the idea, as it takes a toy that your child may have grown out of, and uses it to provide teachable moments dealing with both history and mathematics. But who are we kidding? We want to make one just because it’s a fun project.

[Sketch] grabbed this toy from a thrift store because it has a full keyboard that he can use to make his own machine. It’s powered by an Arduino, with a four-line character LCD display taking the place of the original. His post covers the methods he used to figure out the keyboard wiring, and also contains a cursory overview of how the Enigma Machine functions. See a video of the finished project after the break.

If this wet your appetite, also check out the paper Enigma Machine we covered during Hackaday’s first year.

Continue reading “WWII’s Top Cryptography Comes To A Child’s Toy”