An Internet Speedometer With A Dekatron

[Sprite_tm], like most of us, is fascinated with the earlier ways of counting and controlling electrons. At a hacker convention, he found an old Dekatron tube hooked up to a simple spinner circuit. The prescription for this neon infatuation was to build something with a Dekatron, but making another spinner circuit would be a shame. Instead, he decided to do something useful and ended up building an Internet Speedometer with this vintage display tube.

Like all antique tubes, the Dekatron requires about 400V to glow. After a bit of Googling, [Sprite] found a project that drives a Dekatron with an AVR with the help of a boost converter. Borrowing the idea of controlling a boost converter with a microcontroller, [Sprite] built a circuit with the Internet’s favorite Internet of Things thing – the ESP8266 – that requires only a 12 volt wall wart and a handful of parts.

Controlling the rotating glow of a Dekatron is only half of the build; this device is an Internet speedometer, too. To read out his Internet speed, [Sprite] is using a managed switch that allows SNMP to read the number of incoming and outgoing octets on a network interface. By writing a simple SNMP client for the ESP8266, the device can read how clogged the Intertubes are, both incoming and outgoing.

With an acrylic case fresh out of the laser cutter and a remarkably good job at bending acrylic with a heat gun, [Sprite] has a tiny device that tells him how much Internet he’s currently using. He has a video of it running a speedtest, you can check that video out below.

Continue reading “An Internet Speedometer With A Dekatron”

ESP8266 As A Networked MP3 Decoder

Support libraries, good application notes, and worked examples from a manufacturer can really help speed us on our way in making cool stuff with new parts. Espressif Systems has been doing a good job with their ESP8266 product (of course, it doesn’t hurt that the thing makes a sub-$5 IOT device a reality). Only recently, though, have they started publishing completed, complex application examples. This demo, a networked MP3 webradio player, just popped up in Github, written by the man better known to us as Sprite_tm. We can’t wait to see more.

The MP3 decoder itself is a port of the MAD MP3 library, adapted for smaller amounts of SRAM and ported to the ESP8266. With a couple external parts, you can make an internet-connected device that you can point to any Icecast MP3 stream, for instance, and it’ll decode and play the resulting audio.

What external parts, you ask? First is something to do the digital-to-analog conversion. The application, as written, is build for an ES9023 DAC, but basically anything that speaks I2S should be workable with only a little bit of datasheet-poking and head-scratching. Of course, you could get rid of the nice-sounding DAC chip and output 5-bit PWM directly from the ESP8266, but aside from being a nice quick demo, it’s going to sound like crap.

The other suggested external IC is an SPI RAM chip to allow for buffering of the incoming MP3 file. WiFi — and TCP networks in general — being what they are, you’re going to want to buffer the MP3 files to prevent glitching. As with the dedicated DAC, you could get away without it (and there are defines in the “playerconfig.h” file to do so) but you’ll probably regret it.

In sum, an ESP8266 chip, a cheap I2S DAC, and some external RAM and you’ve got a webradio player. OK, maybe we’d also add an amplifier chip, power supply, and a speaker. Hmmm…. and a display? Or leave it all configurable over WiFi? Point is, it’s a great worked code example, and a neat DIY device to show your friends.

The downsides? So far, only the mono version of the libMAD decoder / synth has been ported over to ESP8266. The github link is begging for a pull request, the unported code is just sitting there, and we think that someone should take up the task.

Other Resources

In our search for other code examples for the ESP8266, we stumbled on three repositories that appear to be official Espressif repositories on Github: espressif, EspressifSystems, and EspressifApp (for mobile apps that connect to the ESP8266). The official “Low Power Voltage Measurement” example looks like a great place to start, and it uses the current version of the SDK and toolchain.

There’s also an active forum, with their own community Github repository, with a few “Hello World” examples and a nice walkthrough of the toolchain.

And of course, we’ve reported on a few in the past. This application keeps track of battery levels, for instance. If you’ve got the time, have a look at all the posts tagged ESP8266 here on Hackaday.

You couldn’t possibly want more resources for getting started with your ESP8266 project. Oh wait, you want Arduino IDE support?

Thanks [Sprite_tm] for the tip.

More GPIOs For The ESP8266

The ESP8266 is an incredible piece of hardware; it’s a WiFi module controllable over a serial port, it’s five freaking dollars, and if that’s not enough, there’s a microcontroller on board. Until there’s a new radio standard, this is the Internet Of Things module.

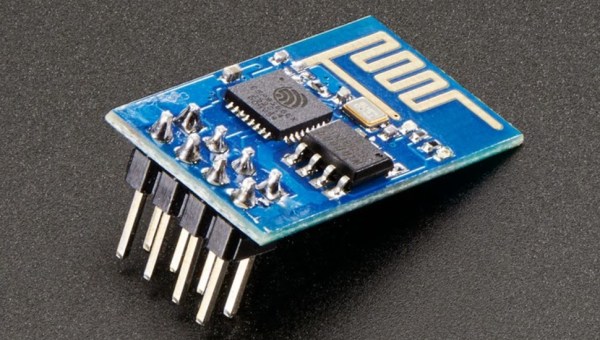
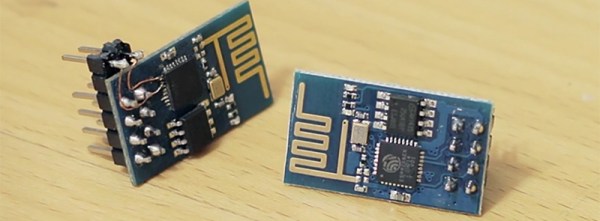
The most common version of the ESP, the -01 version, only has a 2×4 row of pins for serial, power, configuration, and two lines of GPIO. It’s a shame that module only has two GPIOs, but if you’re good enough with a soldering iron you can get a few more. It took a lot of careful soldering, but [Hugatry] managed to break out two more GPIOs on this tiny module.

According to [Hugatry] a lot of patience to solder those wires onto those tiny pads, but after finishing this little proof of concept he discovered a Russian hacker managed to tap into four extra GPIOs on the ESP8266-01 module (Google Translatrix).

As a proof of concept, it’s great, but there’s more than one ESP module out there. If you’re looking for a cheap WiFi module, check out the ESP-03, -04, or -07; they have nice castellated pins that are exceptionally easy to solder to.

Video below.
Continue reading “More GPIOs For The ESP8266”

An Amazon Dash-Like Button For The ESP8266

The Amazon Dash Button is a tiny piece of hardware that contains a single pushbutton, a WiFi module, and a nice, shiny corporate logo. Press the button, and products with that logo will be delivered to your house. An impressive bit of marketing, at least. With small, cheap WiFi modules like the ESP8266, it was only a matter of time until something an Amazon Dash clone was developed.

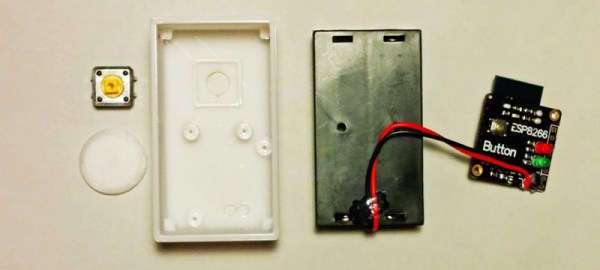
[deqing] created an ESP8266 Dash Button using the ESP-12 module, a button, a 3D printed case, and a pair of AA batteries. Electronically, it’s extremely simple; press the button, the ESP will wake up, request a URL, and put itself back to sleep. That’s all you need to do when you’re replicating the functionality of the Amazon Dash Button – the server will take care of the rest.

To configure the ESP8266, [dequng] is using the ESP-TOUCH app for Android, and setting up new functionality in this ESP button is as simple as putting a URL in the button’s Flash.

Not only is this a great build that has literally hundreds of different uses, it’s also not a breakout board for the ESP8266. It’s great that we’re finally seeing some builds using this cheap WiFi chip in the real world.

Obviously the actual Dash buttons include authentication that this one does not. We recently saw a teardown of the original hardware. We’re still waiting for in-depth analysis of the data squirted to the internet when an order is placed with it, though.

ESP8266 WiFi Throwies

A few years ago, someone figured out you can take an LED, a coin cell battery, and a magnet, tape them together, and throw them on every conceivable metallic surface. This was the creation of LED throwies, and the world was much worse off for its invention.

With the ESP-8266 WiFi module, we have a tiny, tiny device with a WiFi radio, and just enough processing power to do something interesting. What does that mean? WiFi throwies.

[Andreas Reischle] stuffed an ESP-8266 WiFi module and a lithium cell inside a weatherproof controller loaded up with magnets. On its own, these wouldn’t do much, but with the right combination of software, this little magnetic box can serve as an access point, serving up small JavaScript games to anyone who connects.

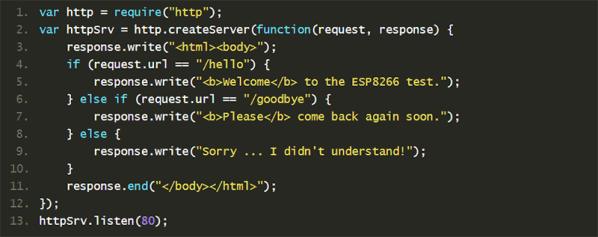
The software is based on the NodeMCU firmware and features a web server and a DNS server. The utility of a web server is obvious, and the DNS server redirects all traffic to the device’s index.html file, where a menu of small JavaScript games are presented.

It’s much better than polluting the world with LEDs and lithium; this one has Hunt the Wumpus on it.

Thanks [Oliver] for the tip.

Continue reading “ESP8266 WiFi Throwies”

The Digistump Oak; An ESP8266 On Kickstarter

When it was first released, the ESP8266 was a marvel; a complete WiFi solution for any project that cost about $5. A few weeks later, and people were hard at work putting code on the tiny little microcontroller in the ESP8266 and it was clear that this module would be the future of WiFi-enabled Things for the Internet.

Now it’s a Kickstarter Project. It’s called the Digistump Oak, and it’s exactly what anyone following the ESP8266 development scene would expect: WiFi, a few GPIOs, and cheap – just $13 for a shipped, fully functional dev board.

The guy behind the Oak, [Erik Kettenburg], has seen a lot of success with his crowdfunded dev boards. He created the Digispark, a tiny, USB-enabled development board that’s hardly larger than a USB plug itself. The Digispark Pro followed, getting even more extremely small AVR dev boards out in the wild.

The Digistump Oak moves away from the AVR platform and puts everything on an ESP8266. Actually, this isn’t exactly the ESP8266 you can buy from hundreds of unnamed Chinese retailers; while it still uses the ESP8266 chip, there’s a larger SPI Flash, and the Oak is FCC certified.

Yes, if you’re thinking about building a product with the ESP8266, you’ll want to watch [Erik]’s campaign closely. He’s doing the legwork to repackage the ESP into something the FCC can certify. Until someone else does it, it’s a license to print money.

The FCC-certified ESP8266 derived module, cleverly called the Acorn, will be available in large quantities, packaged in JEDEC trays sometime after the campaign is finished. It’s an interesting board, and we’re sure more than one teardown of the Acorn will hit YouTube when these things start shipping.

Arduino IDE Support For The ESP8266

Despite a wealth of tutorials for setting up and writing code for the ESP8266 WiFi module, there has not been much of anything on programming this cheap wireless module with the Arduino IDE. Finally, this has changed. After many months of coding, the Arduino IDE supports the ESP8266 module.

The Arduino IDE support was announced on the ESP8266 community forum. Setup is fairly simple with downloads for Linux, OS X, and Windows. This isn’t an ESP8266 shield, either: you can write code for the ESP module, connect the serial pins, and hit the program button.

The basic functions of the Arduino IDE – pinMode, digitalRead, digitalWrite, and analogRead – are available. Most of the WiFi functions work just like the WiFi shield library.

There are a few things that aren’t written yet; PWM doesn’t work, as the ESP8266 only has one hardware PWM source. SPI and I2C slave mode aren’t done yet, and uploading sketches via WiFi needs a little bit of thought. That said, this is a great introduction to programming the ESP module. If the Arduino IDE isn’t your thing, you could always do it the cool way with [CNLohr]’s programming tutorial we featured last week.