FaBrickation: Combining Lego And 3D Printing

faBrickation

While 3D printing gives you the ability to fabricate completely custom parts, it does have some drawbacks. One issue is the time and cost of printing large volumes. Often these structures are simple, and do not require completely custom design.

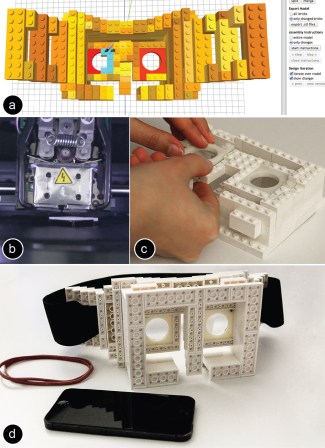
This is where the faBrickation system comes in. It allows you to combine 3D printed parts with off the shelf LEGO bricks. The CAD tool that lets you ‘Legofy’ a design. It creates directions on how to assemble the LEGO parts, and exports STL files for the parts to be 3D printed. These custom bricks snap into the LEGO structure.

In their demo, a head mounted display is built in 67 minutes. The same design would have taken over 14 hours to 3D print. As the design is changed, LEGO blocks are added and removed seamlessly.

Unfortunately, the tool doesn’t appear to be open source. It will appear for the ACM CHI Conference on Human Factors in Computing Systems, so hopefully we will see more in the future. Until then, you can watch the demo after the break.

Continue reading “FaBrickation: Combining Lego And 3D Printing”

Heavy Metal Computer Case Desk

heavy-metal-computer-case-desk

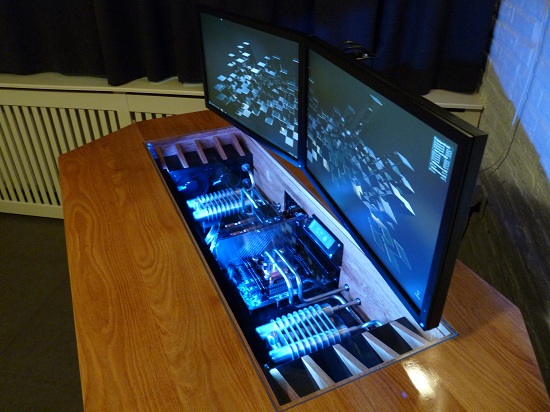
This desk is also a computer case. From this view it may not seem like much, but the build log has hundreds of images which could be called metal fabrication porn. The desk surface is made of wood, but all of the other parts were crafted from stainless steel.

The three components that weren’t fabricated by [Paslis] are the pair of legs and the column supporting the screens. These pieces are actually lifting columns that allow you to adjust desk and screen height at the touch of a button. The build starts off with a sub-surface to house the computer guts. After careful cutting, bending, welding, and polishing this comes out looking like the work surface in a commercial kitchen. After attaching the lifting legs to that assembly a foot for the desk takes shape from square pipe which is then skinned with stainless steel to match the finished look of the sub-surface. After spending countless hours on brackets, trim pieces, grills, and wood accents he sent everything off for painting before the final assembly.

Certainly this is in a different realm than the case desk from yesterday. But a mere mortal can pull that off while this is surely the work of an experienced tradesman.

[Thanks Andreas]

Semi-professional Board Assembly For Your Workshop

[Zach Hoeken] has the answer to assembling multiple surface mount PCBs in the home workshop. It’s certainly not for everyone. But if you’ve ever thought of marketing your own small runs he has the equipment and methodology you need.

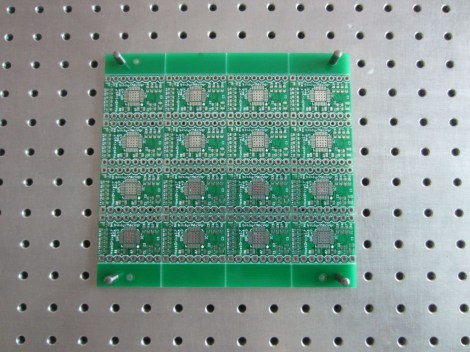
He had tried using hacked together equipment, but after encountering a range of issues he finds the investment in a few key items saves time and money in the long run. The first is a precision tooling fixture block; that metal plate with a grid of holes that makes up the background of the image above. It comes with machined pegs which fit the holes perfectly, and as you can see, his panel of 16 boards include tooling holes that line up with the fixture. Once in place, a steel solder stencil is aligned with the board using its own tooling holes. The alignment of the stencil and its uniformed thickness ensure that the perfect amount of solder paste is easy to apply with a squeegee. [Zach] hand places his components but he did invest in a proper reflow oven to make the soldering a set and forget process.

Aluminum Bending Tutorial And A DIY Brake

What makes a project really exceptional? Part of it is a, ‘gee, that’s clever’ angle with a little bit of, ‘that’s actually possible.’ One thing the Hack a Day crew really appreciates is awesome enclosures. Altoids tins will get you far, but to step up to the big leagues you’ve got to bend some aluminum. Luckily, [Rupert] sent in a great tutorial on bending aluminum sheets for enclosures.

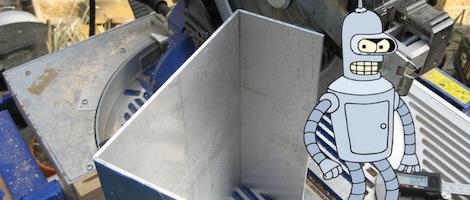
To make his press brake, [Rupert] scavenged a few pieces of 38mm bamboo worktop scraps. After assembling a few of these pieces with some hinges, he was ready to bend some aluminum.

One trick [Rupert] picked up is scoring the sheet metal on the inside of a future bend. For [Rupert]’s project, he sent his 3mm aluminum sheet through a table saw set to cut 1mm deep. Of course this should only be done with a blade designed for non-ferrous metals with as many carbide teeth as possible. Judging from [Rupert]’s homebuilt Hi-Fi that used this construction technique, the results are phenomenal.

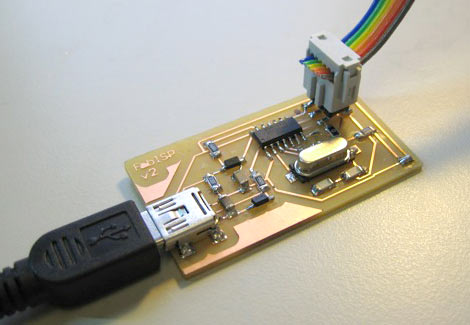
Minimalist AVR Programmer Is Just Fab!

Whether you’re burning a new bootloader to an Arduino board, or doing away with a bootloader to flash Atmel chips directly, an in-system programmer (ISP) is an indispensable tool for working with AVR microcontrollers. If cost has held you back, it’s no longer an excuse: FabISP is a barebones USB-based AVR programmer that can be pieced together for about ten bucks.

FabISP was created by [David Mellis] as a product of MIT’s Fab Lab program, which provides schools with access to design and manufacturing tools based around a core set of fabrication capabilities, so labs around the world can share results. But the FabISP design is simple enough that you don’t need a whole fab lab. It’s a small, single-sided board with no drilling required; the parts are all surface-mounted, but not so fine-pitched as to require reflow soldering. Easy!

There’s still the bootstrap problem, of course: you need an AVR programmer to get the firmware onto the FabISP. This would be an excellent group project for a hackerspace, club or school: if one person can provide the initial programmer to flash several boards, each member could etch and assemble their own, have it programmed, then take these out into the world to help create more. We must repeat!

[Thanks Juan]

DIYLILCNC: Do-it-yourself CNC Mill

DIYLILCNC

The DIY LIL CNC project is the newest member of the homebrew fabrication scene. This is a three-axis CNC mill that can be built by anyone with basic shop skills and about $700 in their pocket. Many of the materials can be acquired from the likes of Home Depot: the basic framework is assembled from Masonite, while other cost-cutting measures include the use of skate bearings and a common Dremel tool for powering the cutting bit. About half of the cost is for the HobbyCNC driver and stepper motor package that runs the show.

The instructions for the DIY LIL CNC are distributed under a Creative Commons license, allowing for modification and distribution with few restrictions. They’re well-written and quite thorough, including all patterns and a complete bill of materials with suppliers, part numbers and costs. As documented, the ’bot can produce parts up to 12 x 14 x 2 inches, but the project’s creators offer some suggestions on adapting the design for larger work. It’s not self-replicating like the RepRap aims for; you’ll need access to a laser cutter for some of the parts. If you can clear that hurdle, this looks like a great introduction to CNC production.

A New Contender In Home Fabbing

purple_crayon

Purple Crayon is a new entry into the home fabricating arena.  Shown above, with it’s makers [Konrad] and [Aaron], it’s set to compete with RepRap and Cupcake. It looks to be bigger than Cupcake, but smaller than the reprap. There aren’t many details available on their site, but we’re sure there will be soon. They do state that it should retail for less than $1,000.