Using The ESP8266 For Low-Cost Fault Injection

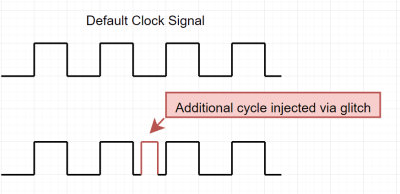
As a general concept, fault injection is a technique that studies how a system reacts to unusual or unexpected external forces. The idea is that, if you can trigger a glitch at the precise moment, you might be able to use that to your advantage in disabling security features or otherwise gaining further access to the device in question. In the hardware world, this could be achieved by fiddling with the power going into the device, or subjecting it to extreme temperatures.

We’ve covered voltage glitching attacks on these pages in the past, but most of the tools used are fairly expensive if you’re not doing this kind of thing professionally. Luckily for us, [Aditya Patil] has developed a fault injection tool that can run on a standard ESP8266 development board. Obviously it’s not as capable as a bespoke device costing hundreds of dollars, but if you just want to experiment with the concept, it’s a fantastic way to wrap your head around it all.

Continue reading “Using The ESP8266 For Low-Cost Fault Injection”

Use PicoGlitcher For Voltage Glitching Attacks

We see a fair few glitcher projects, especially the simpler voltage glitchers. Still, quite often due to their relative simplicity, they’re little more than a microcontroller board and a few components hanging off some wires. PicoGlitcher by Hackaday.IO user [Matthias Kesenheimer] is a simple voltage glitcher which aims to make the hardware setup a little more robust without getting caught up in the complexities of other techniques. Based on the Raspberry Pico (obviously!), the board has sufficient niceties to simplify glitching attacks in various situations, providing controllable host power if required.

A pair of 74LVC8T245 (according to the provided BoM) level shifters allow connecting to targets at voltages from 1.8 V to 5 V if powered by PicoGlitcher or anything in spec for the ‘245 if target power is being used. In addition to the expected RESET and TRIGGER signals, spare GPIOs are brought out to a header for whatever purpose is needed to control a particular attack. If a programmed reset doesn’t get the job done, the target power is provided via a TPS2041 load switch to enable cold starts. The final part of the interface is an analog input provided by an SMA connector.

The glitching signal is also brought out to an SMA connector via a pair of transistors; an IRLML2502 NMOS performs ‘low power’ glitching by momentarily connecting the glitch output to ground. This ‘crowbarring’ causes a rapid dip in supply voltage and upsets the target, hopefully in a helpful way. An IRF7807 ‘NMOS device provides a higher power option, which can handle pulse loads of up to 66A. Which transistor you select in the Findus glitching toolchain depends on the type of load connected, particularly the amount of decoupling capacitance that needs to be discharged. For boards with heavier decoupling, use the beefy IRF7807 and accept the glitch won’t be as sharp as you’d like. For other hardware, the faster, smaller device is sufficient.

The software to drive PicoGlitcher and the hardware design files for KiCAD are provided on the project GitHub page. There also appears to be an Eagle project in there. You can’t have too much hardware documentation! For the software, check out the documentation for a quick overview of how it all works and some nice examples against some targets known to be susceptible to this type of attack.

For a cheap way to glitch an STM8, you can just use a pile of wires. But for something a bit more complicated, such as a Starlink user terminal, you need something a bit more robust. Finally, voltage glitching doesn’t always work, so the next tool you can reach for is a picoEMP.

Continue reading “Use PicoGlitcher For Voltage Glitching Attacks”

Laser Fault Injection, Now With Optional Decapping

Whether the goal is reverse engineering, black hat exploitation, or just simple curiosity, getting inside the packages that protect integrated circuits has long been the Holy Grail of hacking. It isn’t easy, though; those inscrutable black epoxy blobs don’t give up their secrets easily, with most decapping methods being some combination of toxic and dangerous. Isn’t there something better than acid baths and spinning bits of tungsten carbide?

[Janne] over at Fraktal thinks so, and the answer he came up with is laser decapping. Specifically, this is an extension of the laser fault injection setup we recently covered, which uses a galvanometer-scanned IR laser to induce glitches in decapped microcontrollers to get past whatever security may be baked into the silicon. The current article continues that work and begins with a long and thorough review of various IC packaging technologies, including the important anatomical differences. There’s also a great review of the pros and cons of many decapping methods, covering everything from the chemical decomposition of epoxy resins to thermal methods. That’s followed by specific instructions on using the LFI rig to gradually ablate the epoxy and expose the die, which is then ready to reveal its secrets.

The benefit of leveraging the LFI rig for decapping is obvious — it’s an all-in-one tool for gaining access and executing fault injection. The usual caveats apply, of course, especially concerning safety; you’ll obviously want to avoid breathing the vaporized epoxy and remember that lasers and retinas don’t mix. But with due diligence, having a single low-cost tool to explore the innards of chips seems like a big win to us.

Laser Fault Injection On The Cheap

One can only imagine the wonders held within the crypto labs of organizations like the CIA or NSA. Therein must be machines of such sophistication that no electronic device could resist their attempts to defeat whatever security is baked into their silicon. Machines such as these no doubt bear price tags that only a no-questions-asked budget could support, making their techniques firmly out of reach of even the most ambitious home gamer.

That might be changing, though, with this $500 DIY laser fault injection setup. It comes to us from Finnish cybersecurity group [Fraktal], who have started a series of blog posts detailing how they built their open-source reverse-engineering rig. LFI is similar to other “glitching” attacks we’ve covered before, such as EMP fault injection, except that a laser shining directly on a silicon die is used to disrupt its operation rather than a burst of electromagnetic energy.

Since LFI requires shining the laser very precisely on nanometer-scale elements of a bare silicon die, nanopositioning is the biggest challenge. Rather than moving the device under attack, the [Fraktal] rig uses a modified laser galvanometer to scan an IR laser over the device. The galvo and the optical components are all easily available online, and they’ve started a repo to document the modifications needed and the code to tire everything together.

Of course, this technique requires the die in the device under study to be exposed, but [Fraktal] has made that pretty approachable too. They include instructions for milling away the epoxy from the lead-frame side of a chip, which is safer for the delicate structures etched into the top of the die. The laser can then shine directly through the die from the bottom. For “flip-chip” packages like BGAs, the same milling technique would be done from the top of the package. Either way, we can imagine a small CNC mill making the process safer and quicker, even though they seem to have done pretty well with a Dremel.

This looks like a fantastic reverse engineering tool, and we’re really looking forward to the rest of the story.
Continue reading “Laser Fault Injection On The Cheap”

Get Your Glitch On With A PicoEMP And A 3D Printer

We’re not sure what [Aaron Christophel] calls his automated chip glitching setup built from a 3D printer, but we’re going to go ahead and dub it the “Glitch-o-Matic 9000.” Has a nice ring to it.

Of course, this isn’t a commercial product, or even a rig that’s necessarily intended for repeated use. It’s more of a tactical build, which is still pretty cool if you ask us. It started with a proof-of-concept exploration, summarized in the first video below. That’s where [Aaron] assembled and tested the major pieces, which included a PicoEMP, the bit that actually generates the high-voltage pulses intended to scramble a running microcontroller temporarily, along with a ChipWhisperer and an oscilloscope.

The trouble with the POC setup was that glitching the target chip, an LPC2388 microcontroller, involved manually scanning the business end of the PicoEMP over the package. That’s a tedious and error-prone process, which is perfect for automation. In the second video below, [Aaron] has affixed the PicoEMP to his 3D printer, giving him three-axis control of the tip position. That let him build up a heat map of potential spots to glitch, which eventually led to a successful fault injection attack and a clean firmware dump.

It’s worth noting that the whole reason [Aaron] had to resort to such extreme measures in the first place was the resilience of the target chip against power supply-induced glitching attacks. You might not need to build something like the Glitch-o-Matic, but it’s good to keep in mind in case you run up against such a hard target. Continue reading “Get Your Glitch On With A PicoEMP And A 3D Printer”

To the left, a breadboard with the ATMega328P being attacked. To the right, the project's display showing multiple ;) smiley faces, indicating that the attack has completed successfully.

Glitching An ATMega328P Has Never Been Simpler

Did you know just how easily you can glitch microcontrollers? It’s so easy, you really have no excuse for not having tried it out yet. Look, [lord feistel] is doing glitching attacks on an ATMega328P! All you need is an Arduino board with its few SMD capacitors removed or a bare 328P chip, a FET, and some sort of MCU to drive it. All of these are extremely generic components, and you can quickly breadboard them, following [lord feistel]’s guide on GitHub.

In the proof-of-concept, you can connect a HD44780 display to the chip, and have the victim MCU output digits onto the display in an infinite loop. Inside of the loop is a command to output a smiley face – but the command is never reachable, because the counter is reset in an if right before it. By glitching the ATMega’s power input, you can skip the if and witness the ;) on your display; it is that simple.

What are you waiting for? Breadboard it up and see for yourself, this might be the method that you hack your next device and make it do your bidding. If the FET-and-MCU glitching starts to fail you at some point, there’s fancier tools you can use, like the ChipWhisperer. As for practical examples, [scanlime]’s elegant glitching-powered firmware hack is hard to forget.

Everything You Didn’t Know You Need To Know About Glitching Attacks

If you’ve always been intrigued by the idea of performing hardware attacks but never knew where to start, then we’ve got the article for you: an in-depth look at the hows and whys of hardware glitching.

Attentive readers will recall that we’ve featured [Matthew Alt]’s reverse engineering exploits before, like the time he got root on a Linux-based arcade cabinet. For something a bit more challenging, he chose a Trezor One crypto wallet this time. We briefly covered a high-stakes hack (third item) on one of these wallets by [Joe Grand] a while back, but [Matthew] offers much, much more detail.

After introducing the theory of glitching attacks, which seek to force a processor into an undefined state using various methods, [Matthew] discusses the specifics of the Trezor wallet and how the attack was planned.

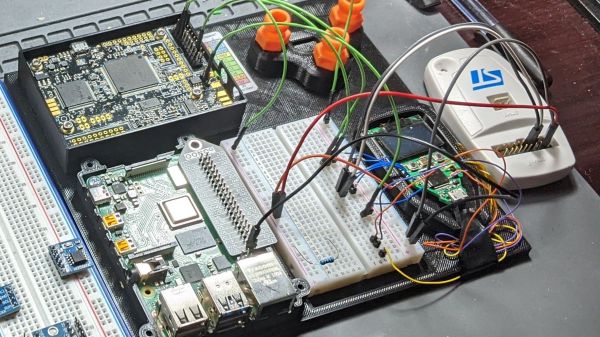
His target — the internal voltage regulator of the wallet’s STM32 microcontroller — required desoldering a few caps before the attack could begin, which was performed with a ChipWhisperer. After resolving a few initial timing issues, he was able to glitch the chip into dropping to the lowest level of readout protection, which gave access to the dongle’s SRAM through an ST-Link debugger.

While this summary may make the whole thing sound trivial, it’s obvious that the attack was anything but, nor was the effort that went into writing it all up. The whole thing reads a little like a techno-thriller, and there’s plenty of detail there if you’re looking for a tutorial on chip glitching. We’re looking forward to part 2, which will concentrate on electromagnetic fault-injection using a PicoEMP and what looks like a modified 3D printer.