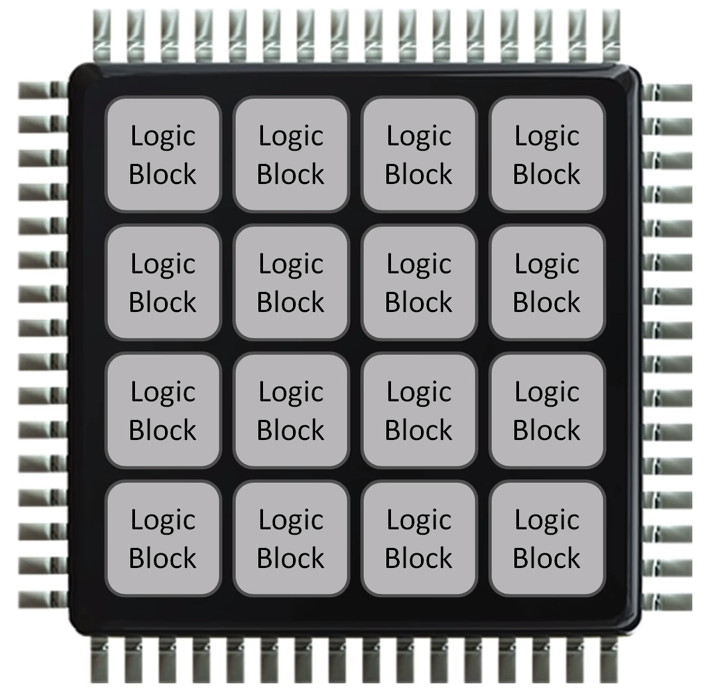
Digi-Key have been producing YouTube videos for a number of years now, and if you weren’t aware, they’re definitely worthy of some viewing time. The playlist we’re highlighting here is a pretty good introduction to FPGAs, specifically those supported by open source tools, with low cost hardware. If you’ve always wanted to get into hacking FPGA platforms, but don’t know where to start, this is going to be a big help. After first covering what an FPGA is and is not, and why you want to use one, [Shawn Hymel] dives in to the toolchain.
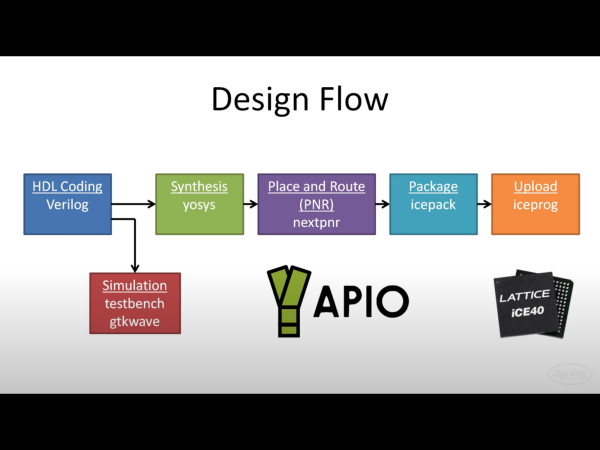
We’re really lucky that the bitstream for the Lattice iCE40 was reverse engineered by the super talented Claire (née Clifford) Wolf (AMP hour interview) which enabled the project ICEstorm toolchain to be created. Leveraging Yosys for synthesis and logic mapping, Icarus verilog coupled with GTKwave for simulation, netpnr for place and route and finally the project ICEstorm bitstream tools for packing into iCE40 format and loading onto the hardware. The whole toolchain flow is managed by APIO for simplicity, that is, provided your FPGA board is supported!
 Of course, [Shawn] is using the low cost (for an FPGA) ICEStick by Lattice for this tutorial series, and they’re currently hard to get (you know why by now!) but, there are many other boards you could use. If you want to play with applications coupling a ARM micro to an FPGA, then the excellent BlackIce Mx is an option, but there are many other boards now with an decent micro nestled next to an FPGA and a few peripherals for convenience.
We should mention here, that project ICEstorm and the iCE40 is not the only show in town. Project Trellis has had our eye for a while, which targets the more complex Lattice ECP5 device. Yosys and friends do support more architectures, but the available flows usually require at least some vendor tool support at this time (looking straight at you, Xilinx) but as more devices get decoded, the open source tools will grow, and we will bring you that news!
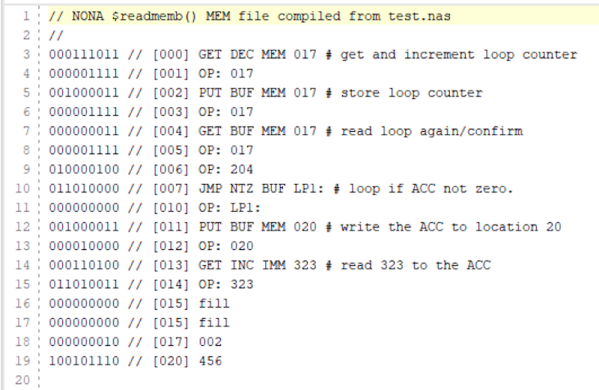
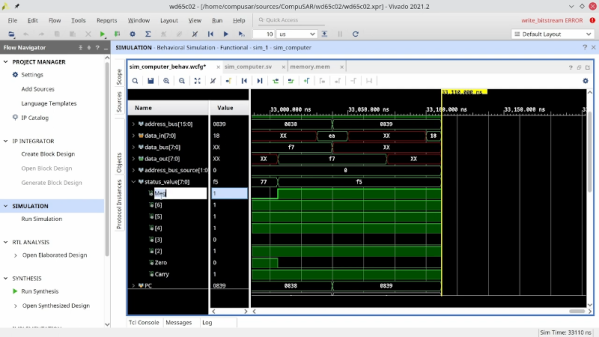
What’s nice about this Digi-Key YT series, is that it doesn’t just cover the basic toolchain flow, then drop you in at the deep end of a big learning curve. There are videos covering subjects such as finite state machines (FSMs), test-benching and simulation, using embedded (block) memories, PLLs, harder subjects like dealing with metastability and clock-domain crossing (OK, he covers one technique – there’s more than one way to skin that particular cat) before finally looking at soft cores like the RISC-V. Lots to learn, and pretty well executed if you ask us! A Github version is available, for those who can’t stand watching the videos!
Continue reading “FPGA Starter Videos To Help Soften That Learning Curve”
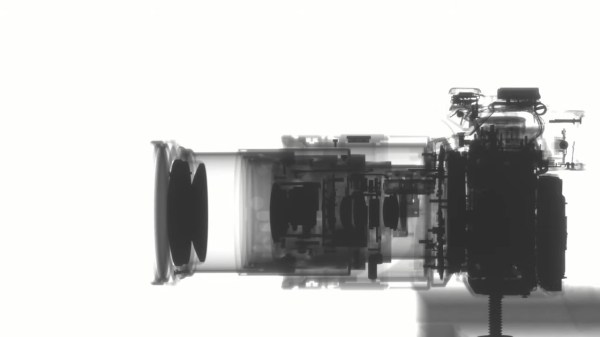
 The trick here is having an X-ray sensing panel that can be reused. It takes around five seconds of exposure to grab each 40×40 cm frame which are then assembled back into video.