Turning A DS Into A Game Boy Advance

The venerable Game Boy is dead – and has been for a long time – after being replaced by the DS, DSi, DSi XL, and the 3DS. That doesn’t mean there’s nothing of value to the old Game Boy catalog; Pokemon Red/Blue is still as much fun as it was 15 years ago, and the game play of Advance Wars is still superb.

[Maarten] over at Bureau voor Gamers decided to put a modern twist on our old friend by taking a first-gen DS and converting it to a proper single screen Game Boy (Dutch, Google translation).

The donor machine was a broken first gen DS with a broken top screen. [Maarten] removed the top screen, did a tiny bit of Bondoing, moved the speaker, and gave his new toy a bright orange paint job.

Now [Maarten] has a modern version of the best portable system ever created, packed full of more powerful hardware and a much more capacious battery. Sure, it’s not a build that requires rewiring everything, but it’s still an awesome build for GBA aficionados.

Adding A Backlight To The ‘ol Game Boy Brick

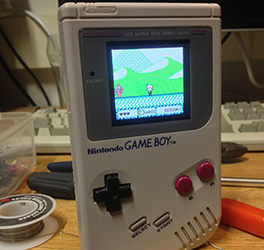
For being more than 20 years old, [Max]’s old brick-sized Game boy still has a lot of life left in it. Even though his Game Boy was still in good condition, there were a few vertical lines in the display, making it a perfect candidate for a restoration. While he had his DMG-01 open on his work bench, [Max] also decided to put in a back light.

After researching the blank vertical lines in his Game Boy’s display, [Max] learned the problem was probably a loose solder connection. [Max] whipped out his tri-wing screwdriver, disassembled his classic plastic friend, took a soldering iron to the LCD’s flex connector, and fixed the problem easily.

Since his Game Boy was already taken apart, he decided to add a 3rd party backlight. The installation was a snap – [Max] only removed the reflective LCD backing and shoved an edge-lit backlight panel into the Game Boy.

If you’re wondering why anyone would still be interested in a 20+ year-old Game Boy, the DMG-01 is highly regarded in the chiptune scene when paired with Little Sound DJ, in part because of the noisy amplifiers and unique sound. Anything that keeps these wonderful machines out of the garbage is alright in our book, so we’ve got to hand it to [Max] for putting together this wonderful tutorial.

Simple Trick For Replacing Game Boy Cart Batteries While Retaining Game Saves

[Adr990] wants to make sure his Game Boy game saves aren’t lost to aging batteries. They’re stored in SRAM with a small coin cell inside the cartridge to keep the memory energized when the game is not being played. But if you pull out the battery in order to replace it the data will be lost in the process. It turns out that you can hot-swap the battery without too much effort. As shown in the video after the break, he disassembled the case of the cartridge, then replaced the battery while the Game Boy is switched on. The edge connector feeds power which will keep the SRAM active while the backup battery is removed. We’re sure this could be done with a bench supply as well, but you’ll need to do your own testing before risking those prized game saves.

The other option is to backup your SRAM before replacing the batteries. We’ve seen an AVR-based cartridge dumper, and also one that uses an Arduino. Both should be able to read and write SRAM data. Continue reading “Simple Trick For Replacing Game Boy Cart Batteries While Retaining Game Saves”

Adding A MIDI Input To A Game Boy

[Sprite_tm] is back again, and his work never fails to impress. His latest project is a Game Boy Advance MIDI synth that takes MIDI data from a keyboard or sequencer and maps that to Game Boy sound channels.

Because he seems to never do anything the normal way, [Sprite_tm] decided to run the Game Boy without a cartridge. We’ve seen this before; the GBA boots into the synth software over the link cable with multibooting.

Continue reading “Adding A MIDI Input To A Game Boy”

Going A Long Way For Game Boy Advanced Video Out

Here’s an intense hack that lets [Matt Evans] play Game Boy Advanced on a larger LCD monitor. He didn’t take the easy way out during any step of the process.

He’s using an FPGA to translate the LCD signals from the GBA hardware into a 1280×960 picture that is then pushed to the large monitor. But did he use an FPGA development board? No, instead he picked up an old PCI card at a surplus store because it had a Xilinx Virtex-E FPGA. So the first thing he had to do there was to remove unneeded components and figure out how to make the connections to reprogram that chip.

So next you’d grab a working monitor and hook it up to the FPGA signal, right? Wrong, [Matt] had a slightly borked monitor, getting rid of the LVDS section and wiring up his own connections to push the RGB signals through in parallel.

Yeah, that’s a lot of work. But as you can see in the clip after the break, it works like a charm. If you’re looking for some other gnarly video-out hacks, check out this one that lets you play Game Boy on an oscilloscope.

Continue reading “Going A Long Way For Game Boy Advanced Video Out”

Hackaday Links: April 10, 2011

Sunlit LCD screen

[A.J.] did some experiments and managed to replace his LCD backlight using fiber optics and the sun.

Game Boy LCD Repair

[Alan] found that he could fix dead columns on his Game Boy LCD screen with a little reflow work on the connector.

3DS Design Flaw?

Anyone having problems with the way their Nintendo 3DS closes? [Jeroen] noticed that his screen touches the other half of the device when closed. He added rubber feet to protect it, but we wonder if anyone else has noticed this issue?

Mac TP dispenser

This one takes iLife to a new level. Never poop without Apple’s consent again thanks to this Macintosh toilet paper dispenser. [Thanks Rob]

Children are the future

Here’s a heart warming way to end; [Bret] is teaching his 5-year-old son to solder. There’s a video that is sure to put a smile on your face. You’ll remember [Bret] (aka [FightCube]) from the adjustable prank box, a few 555 timer contest submissions, and several other hacks. We expect big things from your progeny!

PLCC Replaces Game Boy Cartridge ROM

[Gerry] sent us pictures and a few details on replacing the Game Boy cartridge chip with a flash chip. For the prototype he used a PLCC and a little wire porn to interface a flash chip with the cartridge’s PCB while still having access to it for programming. In retrospect he plans to use a 32-pin ZIF socket on the next version to make things easier. It does work and he’s had some success loading his own code and getting it to run. There are other cartridge hacks that let you load code onto a cartridge but if you have the knowhow and the parts this makes for a fun weekend project. We’ve posted the rest of the photos that [Gerry] sent us after the break.

Update: Gerry is working on a video and a pinout. We’ll post info once we get a hold of it.

Continue reading “PLCC Replaces Game Boy Cartridge ROM”