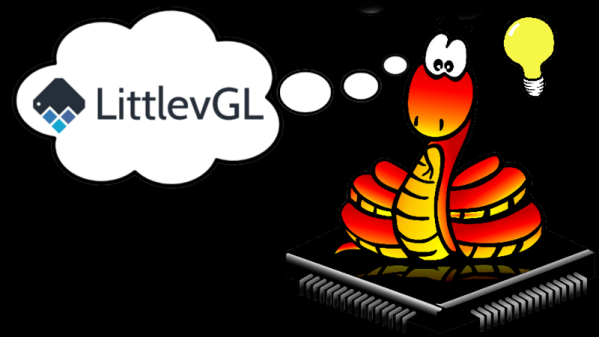
GUI Window Manager On An AVR Chip

avr-window-manager-gui

This project is reminiscent of the old days when window managers were an amazing new idea. The difference is that this window-based GUI is running on an ATmega1284 microcontroller. But the behavior and speed of the interface is pretty much exactly what you’d expect if working on an early 90’s home computer. It even uses a mouse as input.

So how is this even possible? The key to the project is a serial to VGA module which handles the heavy lifting involved with generating a VGA signal. We featured one of [Andrew’s] past projects which used an AVR chip to generate the VGA signal. But that doesn’t leave nearly enough cycles to implement something like a window manager, not to mention the fact that it got nowhere near the resolution shown here.

He uses a serial mouse with an RS-232 converter chip to interact with the windows. This is best shown in his video after the break. He’s able to generate and interact with new windows. He even implemented a set of rudimentary controls which allow him to adjust the theme of the windows and drive the audio playback feature included on that VGA controller he’s using.

Continue reading “GUI Window Manager On An AVR Chip”

Python Frontend Is A GUI For Different Microcontrollers

python-frontend-gui-for-microcontrollers

[Navin] has been hard at work producing a GUI which works with different micocontrollers. The idea is to make it even easier to develop projects by simplifying the feedback and control you can get from the prototyping hardware. The best part about it is that he designed the software to interface with any hardware which can be programmed in C++.

The screenshot above shows the program communicating with an mbed board which has an ARM microcontroller. But the Arduino board (which uses an ATmega chip) is supported as well. Support for additional architectures can be added by writing your own configuration file for the chip. The Python program then asks for the com port it should be using for this session.

The source package, including the code which runs on the microcontrollers, can be found at the project repository. The functions used in the sketches are quite simple and should be a snap to drop into your own code projects.

Giving The MSP430 A GUI

Sometimes you need to toggle or read a few pins on a microcontroller for a project so simple (or so temporary) that coding some firmware is a rather large investment of time. [Jaspreet] had the same problem – wanting to read values and toggle pins without writing any code – so he came up with a rather clever solution to control an MSP430 through a serial connection.

[Jaspreet] calls his project ControlEasy, and it does exactly as advertised: it provides a software interface to control ADC inputs, PWM outputs, and the state of output pins via a desktop computer. ControlEasy does this with a matching piece of code running on any MSP430 with a hardware UART (like the TI Launchpad) sending and receiving data to the computer.

Right now ControlEasy can read analog values, generate PWM output, and set individual pins high and low. [Jaspreet] plans on expanding his software to allow control of LCDs and I2C and SPI devices.

In the video after the break you can see [Jaspreet] fiddling around with some pins on his LaunchPad via the GUI. The software is also available for download if you’d like to try it out, but unfortunately it’s a Windows-only build at this point.

Continue reading “Giving The MSP430 A GUI”

Hackaday Links: October 3, 2012

Cheap ergonomic mouse

If your had keeps cramping while using the computer mouse why not grab a hunk of wood and a couple of buttons to make your own ergonomic input device?

C# GUI for Arduino testing

Here’s a Windows GUI for controlling Arduino. [Rohit] put it together using C#. It should make development very simple as you have control of almost everything before you need to worry about writing your own server-side software.

Networked strip lighting replaces the office overheads

[Jeremy] got tired of replacing the halogen bulbs in his office. He upgraded to ten meters of RGB LED strips. We can’t think they do as well at lighting up the room. But he did add network control so they can flash or change colors depending on what type of alert they’re signalling.

Woven QR codes

Now that [Andrew Kieran] proved you can weave a working QR code into textiles do you think we’ll see garments that have a QR code leading to care instructions? We could never figure out what all those strange icons stood for.

World’s largest QR code in a corn maze

The world’s largest QR code was cut out of this field of corn. It’s at the Kraay Family Farm in Alberta, Canada. Gizomodo called it “Stupidly Pointless”. But we figure if it got them a world record and put their website on the front page of Giz and Hackaday they’re doing okay. Plus, we whipped out our Android and it read the QR code quite easily.

Minibloq Arduino IDE Is In Beta And In Need Of Testers

minibloq_beta

If you have been chomping at the bit to give drag and drop Arduino programming a try, Minibloq is finally in Beta and ready for you to test!

We mentioned the application back in April of this year, when [Julián da Silva] was still in the early stages of developing the software. His graphical programming environment is meant to put the power of the Arduino and its derivatives into the hands of children in an easy fashion, with a gentle learning curve.

A lot has transpired since we first wrote about Minibloq, including a very successful Kickstarter campaign, along with many hours of programming and testing. The current Beta release includes a ton of features and programming “blocks” beyond what we saw earlier this year, so be sure to check out the video below for a quick tour of what’s new.

[Julián] says that the application’s source code will be released after they add a few key features, so keep an eye out for that if you’re interested in taking a peek under the hood.

Continue reading “Minibloq Arduino IDE Is In Beta And In Need Of Testers”

Modifying DD-WRT’s Protected GUI

hacking_the_ddwrt_gui

[Craig] is always keeping busy by deconstructing and poking around in various firmware images. This time around he has taken on the task of modifying the DD-WRT package, a popular replacement firmware for SOHO routers.

While the firmware is released under the GPL, [Craig] cites that it’s pretty difficult to build from source. Instead, he says that the typical course of action is to extract files from the firmware image, alter them, then reconstruct the image. This works for most things, but the DD-WRT GUI files are protected in order to prevent modification.

Since the phrase “you are not allowed to do that” doesn’t exist in his vocabulary, [Craig] set out to see if he could make his way around the protections and change the GUI code. It took quite a bit of digging around using IDA Pro and readelf, but he was eventually able to extract, tweak, then reinsert individual pages back into the firmware image.

The process is pretty time consuming, so he put together a tool called webdecomp that automates the extraction and rebuilding of DD-WRT’s web page file. If you’re interested in rocking a custom Hackaday-branded router interface like the one shown above, be sure to swing by his site and grab a copy of webdecomp.

minibloq

Drag And Drop Programming Gets Kids Started Early

While programming an Arduino is a piece of cake for EEs who have been around the block a few times, there are some groups who would still find it difficult to get started with the IDE. It is touted for its ease of use, but there is a steep learning curve if say, you are 5 or 6 years old. [Julián da Silva] has been hard at work for a while now, to make the Arduino more accessible than ever.

Earlier today, we posted a story about moldable putty which can be used by children to build rudimentary circuits, enabling them to enter the fun world of hobby electronics at a young age. [Julián’s] project “Minibloq” aims to do the same thing with the Arduino. A work in progress, Minibloq uses a graphical interface to “build” Arduino code a block at a time. The code components are dragged and dropped into place on one side of the screen, while the source code is generated on the other half. This helps gently introduce those people new to the Arduino how to write actual code, a little bit at a time.

[Julián] is working hard to ensure that his application works well on OLPC and other classroom-oriented computers to ensure it can reach as wide an audience as possible. We think this would be a great introduction to the world of micro controllers for children as well as those who have never tinkered with electronics at any point in their lives.

Keep reading to see a quick demo of the software in action.

Continue reading “Drag And Drop Programming Gets Kids Started Early”