Gateway To Metal Casting

Casting is an exciting and very useful pastime, but it’s not exactly common these days. That’s a problem whether you’re just getting started or have been doing it for years: everyone can use the advice of another. Fear not! The US Department of Energy is here to help with the Industrial Metal’s Program’s Metal Casting cornucopia.

Although not strictly a hack, this is certainly a facilitator of hacks and any experienced user would do themselves some good by perusing the site. Click on the maps to find complex issues presented remarkably well for papers at this level of rigor. Seriously, check them out.

However, since these papers go into such depth, we can’t really say the material is beginner friendly. That’s not to say it would be bad for a newbie to read through, just that it might be a bit discouraging. But, if you need to figure out where to start in the maze of molds and sand and molten metal, we might have some articles that might help you out.

Do y’all know of any good casting resources on the interwebs? If so, leave ’em in the comments!

Thanks [RunnerPack] for sending this in.

Design A Coil For A Specific Inductance

YouTuber [RimstarOrg], AKA Hackaday’s own [Steven Dufresne], shows how to make a DIY inductor for a specific inductance. This is obviously a great skill to learn as sometimes your design may call for a very accurate inductance that may be otherwise hard to find.

Making your own inductor may seem daunting. You will have to answer a few questions such as: “what type of core will I use?”, “how many turns does my coil need?”, or “how do I calculate these parameters to create the specific inductance I desire?”. [RimstarOrg] goes through all of this, and even has a handy inductance calculator on his website to make it easier for you. He also provides all the formulae needed to calculate the inductance in the video below.

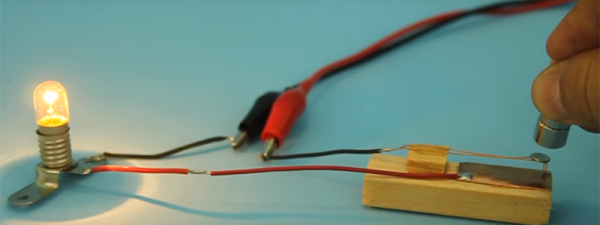
Using a DIY AM Radio receiver, he demonstrates in a visual way how to tune an AM Radio with a wiper on his home-built coil. Changing the inductance with a wiper changes the frequency of the radio: this is a variable inductor,

This video is great for understanding the foundations of inductors. While you may just go to a supplier and buy yours, it’s always great to know how to build your own when you can’t find a supplier, or just can’t wait.

Continue reading “Design A Coil For A Specific Inductance”

Quick And Dirty Shock Gloves

[JLaservideo] has created some cool high-voltage gloves and uploaded a video on YouTube showing you how to get your mitts on a pair of your own. Using some very simple parts, he manages to make some decent sparks.

At the heart of this project is one of those new-fangled arc lighters which normally use some type of voltage multiplier circuit to function. The rest of the build is just wire, glue, aluminum foil, a switch, and paintball gloves.

Using the tip of each finger as an electrode, anything he touches will complete the circuit, creating high-voltage arcs. The demo of burning through paper is pretty neat, although we’ll admit we’re at a loss to think of what other tricks you could pull off with electrified fingertips. Anyone?

Continue reading “Quick And Dirty Shock Gloves”

Can You Build An E-ink Display From Scratch?

Modern displays are fascinating little things. In particular, the E-Ink displays employed in modern E-books achieve mesmerising paper like contrast with excellent standby power consumption.  Many of us at some point have had a go at experimenting with DIY displays, but been discouraged by the miniature scales involved. Driving them is hard enough, but building your own?

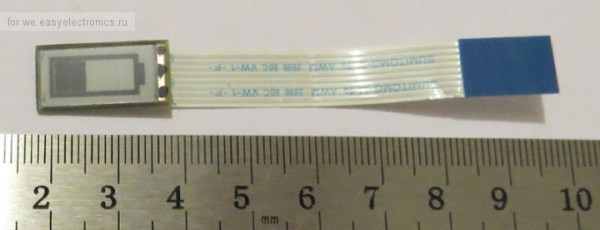
[MChel] has achieved some excellent success in building a simple E-Ink display. The account presented on this Russian electronics forum, graciously translated for us by Google Translate, outlines that the greatest barrier to pursing this in your home lab is creating the conductive layer that serve as electrodes for each pixel and depositing the thin layer of electrostatically charged ink pellets onto another transparent yet conductive film. [MChel] solution was to extract a small a portion of pre-deposited ink from a smashed and notoriously brittle E-ink display. Next, instead of attempting to build an ambitious and dense grid of electrodes, [MChel] etched a simple battery indicator on a PCB. The ink and the electrodes were then fused with some DIY graphite based conductive glue and sealed with some careful yet ingenuitive epoxy laying skills.

The DIY electrodes

The result is a working battery indicator that consumes no power, whilst reporting any remaining power.

There is something increasingly defiant and laudable about home-brewing technologies, otherwise thought to be confined to multi-million dollar factories. We have already covered how you should go about making some conductive glass and using it in your homemade LCD.

Creating A PCB In Everything: Upverter

For the last five months, I’ve been writing a series of posts describing how to build a PCB in every piece of software out there. Every post in this series takes a reference schematic and board, and recreates all the elements in a completely new PCB tool.

There are three reasons why this sort of review is valuable. First, each post in this series is effectively a review of a particular tool. Already we’ve done Fritzing (thumbs down), KiCad (thumbs up), Eagle (thumbs up), and Protel Autotrax (interesting from a historical perspective). Secondly, each post in this series is a quick getting started guide for each PCB tool. Since the reference schematic and board are sufficiently complex for 90% of common PCB design tasks, each of these posts is a quick how-to guide for a specific tool. Thirdly, this series of posts serves as a basis of comparison between different tools. For example, you can do anything you want in KiCad and most of what you want in Eagle. Fritzing is terrible, and Autotrax is the digital version of the rub-on traces you bought at Radio Shack in 1987.

With that introduction out of the way, let’s get cranking on Upverter.

A little bit about Upverter

Upverter was founded in 2010 as an entirely web-based EDA tool aimed at students, hobbyists, and Open Hardware circuit designers. This was one of the first completely web-based circuit design tools and Upverter’s relative success has been a bellwether for other completely web-based EDA tools such as circuits.io and EasyEDA.

I would like to take a second to mention Upverter is a Y Combinator company (W11), which virtually guarantees this post will make it to the top of Hacker News. Go fight for imaginary Internet points amongst yourselves.

Upverter is a business after all, so how are they making money? Most EDA suites offer a free, limited version for personal, hobbyist, and ‘maker’ projects, and Upverter is no exception. The professional tier offers a few more features including CAM export, 3D preview, an API, simulation (coming soon), BOM management, and unlimited private projects for $125 per seat per month, or $1200 per seat per year.

To give you a basis of comparison for that subscription fee, Eagle CAD’s new license scheme gives you everything – 999 schematic sheets, 16 layers, and unlimited board area – for $65 per month, or $500 per year. Altium’s CircuitStudio comes in at $1000 for a one-year license. There are more expensive EDA suites such as Altium Designer and OrCAD, but you have to call a sales guy just to get a price.

Upverter is positioning itself as a professional tool at a professional price. There are better tools out there, of course, but there are thousands of businesses out there designing products with tools that cost $500 to $1000 per seat per year. In any event, this is all academic; the Hackaday crowd gravitates towards the free end of the market, whether that means beer or speech.

A big draw for Upverter is their Parts Concierge service. You’ll never have to create a part from scratch again, so the sales copy says. Apparently, Upverter is using a combination of very slick scripts to pull part layouts off a datasheet and human intervention / sanity check to create these parts. Does it work? We’re going to find out in the review below.

Continue reading “Creating A PCB In Everything: Upverter”

Creating A PCB In Everything: Creating A Custom Part In Fritzing

This is the continuation of a series of posts where I create a schematic and PCB in various EDA tools. Already, we’ve looked at Eagle CAD, KiCad, and took a walk down memory lane with one of the first PCB design tools for the IBM PC with Protel Autotrax. One of the more controversial of these tutorials was my post on Fritzing. Fritzing is a terrible tool that you should not use, but before I get to that, I need to back up and explain what this series of posts is all about.

The introduction to this series of posts laid it out pretty bare. For each post in this series, I will take a reference schematic for a small, USB-enabled ATtiny85 development board. I recreate the schematic, recreate the board, and build a new symbol and footprint in each piece of software. That last part — making a new symbol and footprint — is a point of contention for Fritzing users. You cannot create a completely new part in Fritzing. That’s a quote straight from the devs. For a PCB design tool, it’s a baffling decision, and I don’t know if I can call Fritzing a PCB design tool now.

Continue reading “Creating A PCB In Everything: Creating A Custom Part In Fritzing”

Convert That Cheap Laser Engraver To 100% Open-Source Toolchain

laserweb-on-cheap-laser-squareLaserWeb is open-source laser cutter and engraver software, and [JordsWoodShop] made a video tutorial (embedded below) on how to convert a cheap laser engraver to use it. The laser engraver used in the video is one of those economical acrylic-and-extruded-rail setups with a solid state laser emitter available from a variety of Chinese sellers (protective eyewear and any sort of ventilation or shielding conspicuously not included) but LaserWeb can work with just about any hardware, larger CO2 lasers included.

LaserWeb is important because most laser engravers and cutters have proprietary software. The smaller engravers like the one pictured above use a variety of things, and people experienced with larger CO2 laser cutters may be familiar with a piece of software called LaserCut — a combination CAD program and laser control that is serviceable, but closed (my copy even requires a USB security dongle, eww.)

LaserWeb allows laser engravers and cutters to be more like what most of us expect from our tools: a fully open-source toolchain. For example, to start using LaserWeb on one of those affordable 40 W blue-box Chinese laser cutters the only real hardware change needed is to replace the motion controller with an open source controller like a SmoothieBoard. The rest is just setting up the software and enjoying the added features.

Continue reading “Convert That Cheap Laser Engraver To 100% Open-Source Toolchain”