IKEA sometimes seems like a DIY store disguised as a furniture store. We may go there looking for a new sofa or kitchen table, but, to the DIY enthusiast, it’s a shop full of possibilities. While wandering through the local IKEA, [Erich Styger] noticed they had some Qi wireless chargers and receivers for a very reasonable price, so he bought a few and added wireless charging to his Mikroelektronika Hexiwear.
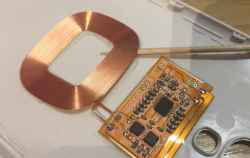
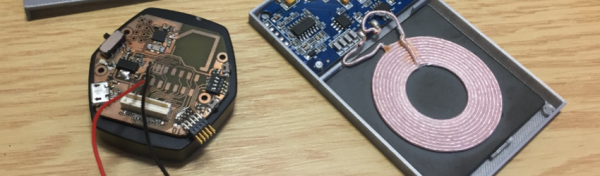
[Erich Styger] didn’t like the clumsiness of the Hexiwear’s USB charging options and, at the price he got the IKEA Vitahult Qi phone case wireless receivers at, he couldn’t resist buying a few for his projects. After carefully separating the circuitry from the phone cases they came in he opening up the Hexiwear. He removed the battery connector and soldered the charger to battery charging circuit. [Erich Styger] then 3D printed a new back to the Hexiwear’s case to fit the new circuitry. A quick test with the IKEA charging pad proved the hack had worked.
IKEA has become something of a DIY enthusiasts go-to shop, with everything from weather stations to a camera slider at a decent price. Walking through the maze inside the store, the DIYer doesn’t see lamps and boxes and shelves, they see light projectors and enclosures and, well, everyone needs shelves.