Infrared Hides Code Combination On Geocache Puzzle

[AJ] and [Brian] are making sure the geocache challenges they set up take some ingenuity to solve. They’ve just rolled out a two-part cache which uses a code hidden in infrared light.  (Editor’s note from the far future: link wend dead.  Have a look in the Wayback Machine.)

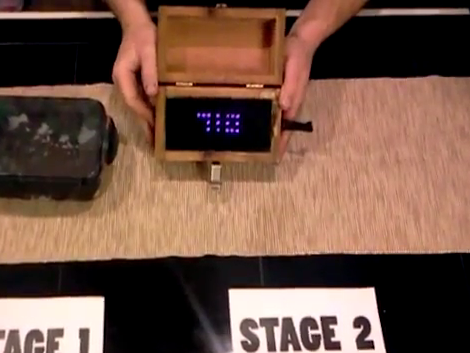
The first part of the cache is a box (the black one on the left) which contains a mysterious hand crank and a smaller box that has a combination lock on it. The second stage is the wooden box on the right. It’s got a hole in the side to receive the hand crank. This connects to the dynamo inside, letting you build up some electricity as it spins. Inside the case you’ll see two red lights blink as the crank is turned, but when you push the button on the outside of the box nothing will happen. That is, unless you’re looking through a camera which can pick up infrared light. The code (710 in this case) is displayed in an array of IR LEDs, and is used to open that combination lock. We wonder if there’s any clues about using a camera or if you have to figure this out on your own.

Don’t miss the video after the break for a full demo of the system.

Continue reading “Infrared Hides Code Combination On Geocache Puzzle”

Decoding, Then Cloning An IR Helicopter Toy’s Control Signals

[Mike Field] got his hands on this Syma S107 helicopter with the intention of hacking it. After playing around with it for a while he set out to build his own infrared controller for the toy. It seems there is some protocol information about it published in various forum posts, but he decided it would be more fun to figure it out for himself.

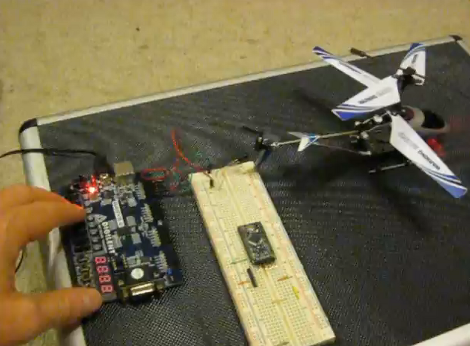
He started off trying to capture the IR signals using Adafruit’s tutorial which has come in handy on a number of other projects. He could get his television remote to register, but not the toy’s controller. This didn’t stop fun, instead he tore open the controller and grabbed a logic sniffer to see what’s being pushed to the IR LEDs. The signals are a bit curious. It seems two different packets are sent with each command which [Mike] thinks is for use with two different models of the toy. In addition to that the frames are not synchronized. But a bit of 10 MHz sampling helped him to figure everything out, and he believes he’s got a more accurate version of the protocol than had previously been discovered. To prove it he developed an FPGA-based controller using VHDL which he shows off in the clip after the break.

Continue reading “Decoding, Then Cloning An IR Helicopter Toy’s Control Signals”

Control Your PC With A Remote

Because his computer is gradually turning into an all-inclusive media display device, [Shawn] figured a remote to control the volume and a video playlist would be a reasonable addition. TV remotes for computers have been around for years, but [Shawn] decided to go the DIY route and build his own computer remote.

For the build, [Shawn] used a Teensy dev board with an IR receiver module and the requisite infrared remote library. To translate infrared signals to keyboard commands,[Shawn] decided to base his project off a previous build that used a small program called AutoHotKey.

Right now the build can cycle through a pre-defined YouTube and Shoutcast playlist and change the volume of the currently playing track. There’s also support for moving the mouse with directional buttons on the remote, but we’re wondering if a better implementation would be using the Windows multimedia keyboard scan codes that should be supported by [Shawn]’s laptop.

Still, [Shawn] managed a very nice build that would fit into our computer battlestations quite nicely. Check out the demo of the remote in action after the break.

Continue reading “Control Your PC With A Remote”

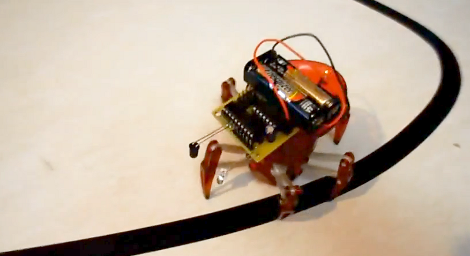
Hexbug Code Rewrite Makes It A Walking Line-follower

You know you’ve got a good hardware platform if you can easily repurpose it with a code rewrite. And that’s what [Eric] continues to do with these little Hexbugs. This time around he’s bent the IR emitter and receiver downward to use as a reflectance sensor. This gives it the ability to follow a dark line on a light surface.

He originally patched an MSP430 into the $25 RC toy. The IR pair was intended for obstacle avoidance, which we saw in a recent links post. This hack does a great job of repurposing the avoidance system. Since the add-on hardware is mounted on a motorized turret, the single sensor pair can sweep back and forth to find the line it will follow. In one way this is better than most line followers which use multiple sensors mounted to the body. But the drawback is that this results in slower travel and won’t be winning any contests. Don’t miss the demo clip after the break.

Continue reading “Hexbug Code Rewrite Makes It A Walking Line-follower”

Controlling Your Christmas Lights Without Ever Getting Off The Couch

remote-xmas-tree-light-switch

14 year-old [Connor Smith] has been busy this holiday season, thinking up ways to improve the lighting situation at home.

A few weeks ago he put together this 3-channel light controller to toggle his parents’ external lights, incorporating an Arduino for control. The Arduino was used to switch the channels on and off at specified intervals in order to create a simple light show on the house’s exterior. Not satisfied with just a few strings of blinky lights, he took his controller back inside for some additional modifications.

He had grown tired of crawling behind the Christmas tree to plug and unplug it every day, and decided to make things easier on himself. He stripped the IR receiver out of an old VCR and interfaced it with the Arduino in his light controller using the IRremote library. After taking a bit of time to decode the values for two infrequently used buttons on his TV remote, he had himself a Christmas tree light switch that he could activate from across the room.

Check out the short video below to see his remote switch in action.

Continue reading “Controlling Your Christmas Lights Without Ever Getting Off The Couch”

Lamp Fading And Remote Control For The Lazy

[Dmitry Grinberg] has to walk all the way across his bedroom to switch the lamp on and off. The drudgery of this finally became too much, so he built a remote control and added dimming for good measure. Above you can see the circuitry for the remote and the receiver, as well as the finished remote housed in what he calls a ‘Chinese Altoids tin’.

After the break you’ll find [Dmitry’s] demo video. The remote control is quite responsive, and the dimming has great resolution. That’s thanks to a power N-channel MOSFET which switches the AC with the help of a full wave rectifier. The PIC 12F617 that controls the MOSFET is powered separately, and [Dmitry] mentions that you must use a transformer and not a switch-mode power supply to avoid a fire. We’d like to know more about this, so leave a comment if you are able to explain further.

The remote and receiver communicate via Infrared. The protocol is operating with 38 kHz signals using an easily sourced receiver tuned to that frequency. [Dmitry] shares all the details about the encoding scheme that he uses. Recreating this communications pairing is a great way to test your understanding of this technique. But if you need a refresher, here’s a tutorial to push you in the right direction. Continue reading “Lamp Fading And Remote Control For The Lazy”

Building Optical Flex Sensors

[Joel] dug up this hack that he pulled off over ten years ago. It’s inspired by the Nintendo PowerGlove, and uses flex sensors to react to movements of your fingers. The interesting thing is, he built these optical flex sensors himself.

He likes to say that this is a ghetto fiber-optic setup. The inlaid diagram above gives you an idea of how the sensors work. An IR LED and infrared diode are positioned at either end of a piece of clear aquarium tubing. When the tube is flexed, the amount of light that makes it to the diode is diminished, a change that can be measured by a microcontroller. [Joel] found that he could increase the resolution of the sensor by adding something to the center of the tube, blocking the light when not straight. In this case he used pieces of scrap wire. The outside of the sensor was also wrapped in shrink tubing to keep ambient light from interfering with measurements.

He uses a trimpot to tune the sensors but we wonder how hard it would be to add a calibration algorithm to the firmware?